Over the coming months I’d like to share with you some before and after images of shots I’ve taken over the years. I’m a firm believer that there needs to be transparency in photography and the days of photographers hiding away secrets is done. Sorry to the old guard and old rules (oh yeah I just quoted Jay-Z in a post). Sure, there’s some aspects of photography that can’t be taught but I for one enjoy a behind the scenes look of how other photographers work. It’s both beneficial to people starting out and people who have been shooting for sometime. I shoot quite a bit with various people and find even though we’re shooting the same thing and processing quite similarly, there’s always subtle differences and it’s that what I hope to capture in my posts.
Through these before and after images, you will sometimes find that there is a dramatic change between the straight out of camera image and the final image you see on my website. While in others there may be minimal difference. For me, this is highlighting that we aren’t always fortunate to get great light while in other cases we are fortunate for the get great light and walk away with great photos in camera.
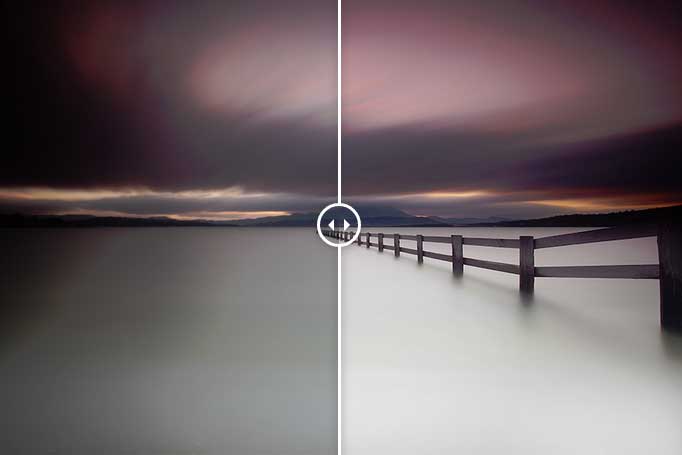
I’d like to use this as an opportunity to demonstrate how the image looked prior to my processing and briefly explain the processing techniques I used to achieve the final image. In some cases, the final image won’t be to everyone’s tastes and I fully accept and welcome that so feel free to chime in if you have any criticism of how you may have gone about things differently.
Capturing and Processing Mortimer Bay
Now that’s out of the way. Let’s kick things off with an image taken in 2009 at Mortimer Bay, Tasmania. It’s slowly becoming quite the overshot destination about Hobart, largely because it leads to a beautiful composition with its leading lines towards Mt. Wellington. One of my favourite locations not far from Hobart.
[twentytwenty]
 [/twentytwenty]
Photograph Details
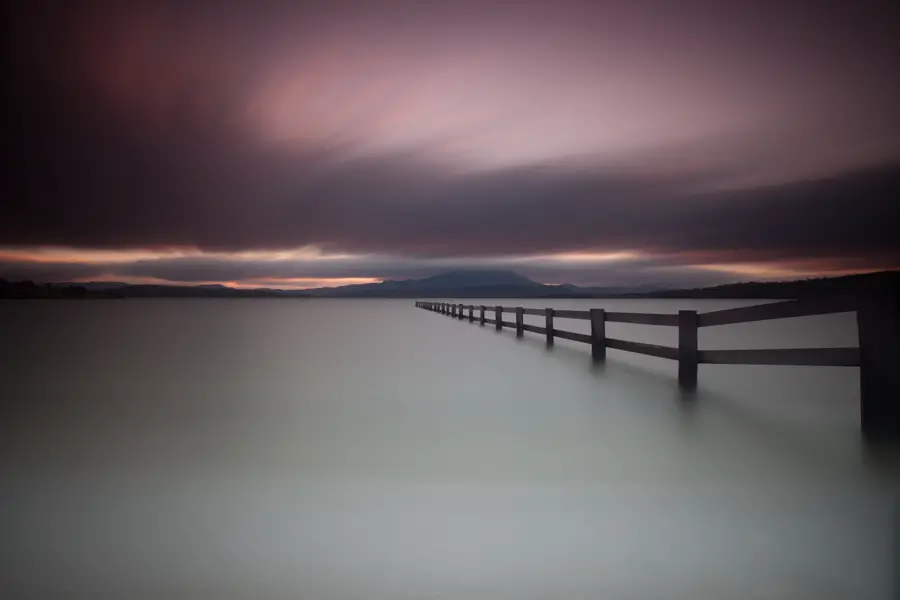
This is a 5 minute long exposure captured just at the start of sunset on a windy afternoon. Normally shooting around this time, your camera will be lucky to get an exposure time longer than a second if shooting at F22 and ISO 50. To get around this I use a [ilink url=”http://www.adorama.com/BW77ND1XC.html?KBID=65353″]B+W 110 10 stop neutral density filter[/ilink] which allows me to get long exposure times regardless of the time of the day.There’s some real fun in capturing day time long exposures like I’ve [ilink url=”http://www.alexwisephotography.net/blog/2010/02/16/guide-to-daytime-long-exposures/” style=”note”]discussed in an article in the past[/ilink] .
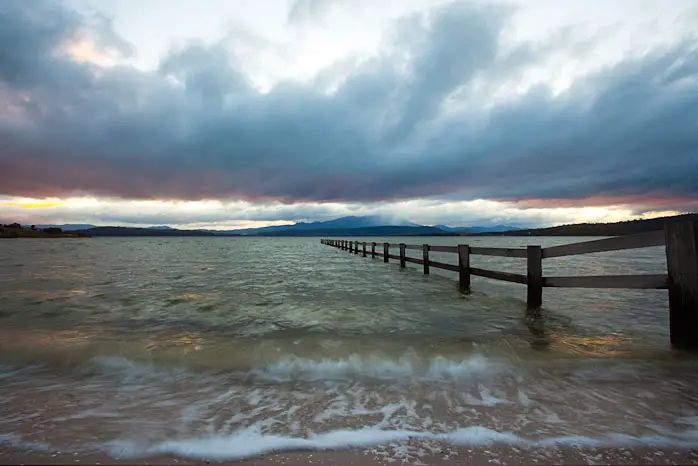
As the scene was windy with clouds coming over fast and the waves crashing against the shoreline, this would great a great effect over the course of a long exposure and I setup my camera using the fence as a composition. The intention was to capture the movement of the clouds passing above and smooth the repetition of the crashing waves.
Post Processing Details
Straight out of camera the image was slightly under exposed but I find that shooting with such a strong neutral density filter like the [ilink url=”http://www.adorama.com/BW77ND1XC.html?KBID=65353″]B+W 110 10 stop neutral density filter[/ilink] on sunset/sunrise you do introduce a level of risk in trying to get a perfect exposure. It’s possible but can be difficult at times. Fortunately modern camera bodies are excellent at pulling back and saving detail where needed.
Before I go any further I’ll mention that this photo was edited exclusively in Adobe Lightroom. I find myself slowly using Photoshop less and less as Lightroom has become increasingly capable over the years. When editing images like this where I’m recovering from an under or over exposed image, I’ll enable the [ilink url=”http://cdn1.alexwisephotography.net/blog/wp-content/uploads/2014/08/shadow-and-highlight-clipping.png” style=”note”]highlight and shadow clipping modes[/ilink] to have a better understanding of when parts of the image are about to clip. This allows you to identify when you start to lose either the highlights or shadows of the image (quite self explanatory).
The editing process for this image was as follows:
Bottom part of the frame (land):
- The image has a heavy vignette especially around the left of the frame. I use an adjustment brush to begin painting over areas where there is a heavy vignette in an attempt to even it out with the rest of the scene
- Once the scene was vignette was removed and exposure even across the scene, I bumped the exposure and curves of the image to bring it to a more neutral exposure
- Adjustment brush was created and was used to paint on the bottom part of the image. The intention here was to boost the brightness of the water to give it more of an oomph. I was careful not to brighten it too much and over expose the highlights
- Small adjustment brush was used to paint over the fence with a small brightness and sharpness increase to give it a little bit of a pop
Editing the sky:
- Using a graduated neutral density filter on the top half of the frame, adding a low opacity pink to the sky while giving the brightness a boost without over exposing the sky
- Using an adjustment brush I completely painted over the top part of the image and gradually increased the saturation and brightness to a level that I was happy with
- Small adjustment brush with a slight brightness bump was used to paint along Mt Wellington and the surrounding hills that you see on the foreground
- Additional adjustment brush was run along the horizon with a boost in saturation. The reason for this was the sun was setting behind the hills and created a nice bit of orange colour which I wanted to bring out a little
As you can see, my editing process for this image was heavily dependent on the use of adjustment brushes. Traditionally I would use layers and layer masks in Adobe Photoshop but the introduction of adjustment brushes in Lightroom has brought the product a long way and allows me to do the bulk of my editing in Photoshop without sometimes needing to open Photoshop and use layer masks.
If you have any questions feel free to comment or drop an email using the [ilink url=”http://www.alexwisephotography.net/blog/contact/”]contact form[/ilink].
Thanks for reading,
– Alex
