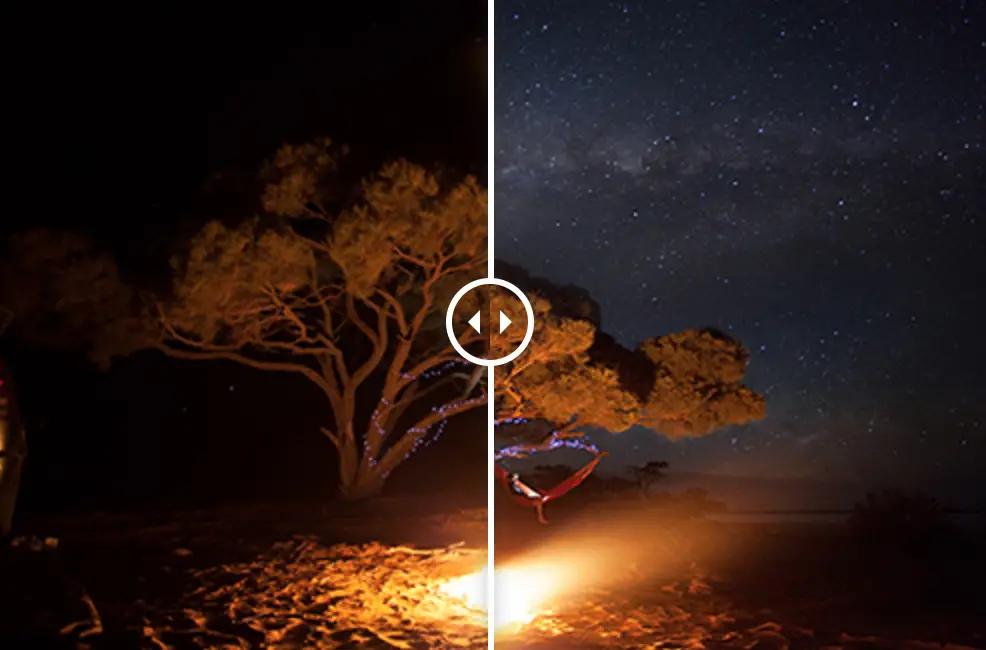

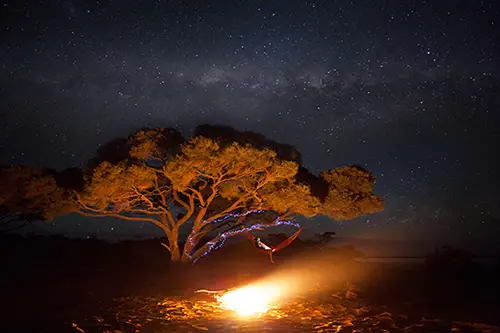
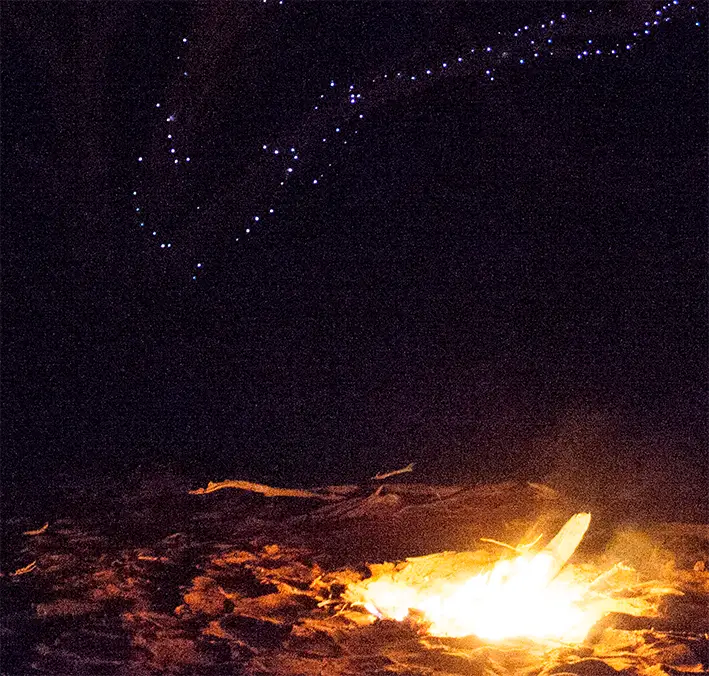
In the last few years I’ve been in awe of the work by Michael Shainblum who is just one of the many people upping the game when it comes to silky clean milky way and star photographs. I have to admit, milky way photography has never been one of my strongest points and I’ll often blame the age of my Canon 5D Mark II being limited in lowlight as an excuse to not get out and shoot milky ways. With a recent trip I was keen to challenge myself with this photograph titled Under the Stars which features me, sitting on a hammock attached to a tree wrapped in fairy lights under the milky way with a fully stoked fire keeping us warm. The end photo required a few shots at varying exposures to bring it all together which I’ll look to walk you through in this post.
Challenging your in camera and post processing techniques
On a drive from Melbourne to Perth (50 hours of driving) I was keen to explore some of the night skies in the middle of nowhere and add a couple of milky way shots to my gallery. Yes, the Canon 5D Mark II struggled at ISO 3200 but unless you’re looking close, it’s not too noticeable (well I think so anyway..!)
[box type=”info” style=”rounded”]My Melbourne to Perth roadtrip post has more photos from this trip where I explored some of the best parts of Australia[/box]
This is one of my favourite photos of the trip and is something that was just a concept I was keen to try. To be honest, I didn’t think I’d be able to pull it off in getting the right exposures and post processing it correctly but I’m pretty happy with the end result.
Coming up with a concept that’s outside your comfort zone and giving it a go is the only way to really push your development in hands on photography and post processing. There were other concepts that I toyed with while we were away and you know what? They didn’t come off. But it was fun taking them and giving them a try. Next time you’re planning a photography outing, why not set yourself a lofty goal and see how you go executing it? If you fail, you’ll learn so much on how to do it different next time. If you succeed, you’ll no doubt pick up on things you can do better next time while learning little techniques that you may not normally use in your normal post processing workflow.
[box type=”info” style=”rounded”]I recently bought a new travel tripod and compared the 5 most popular tripods on the market. Give my travel tripod guide a read if you’re looking for a lightweight tripod for your next trip![/box]
About the photograph
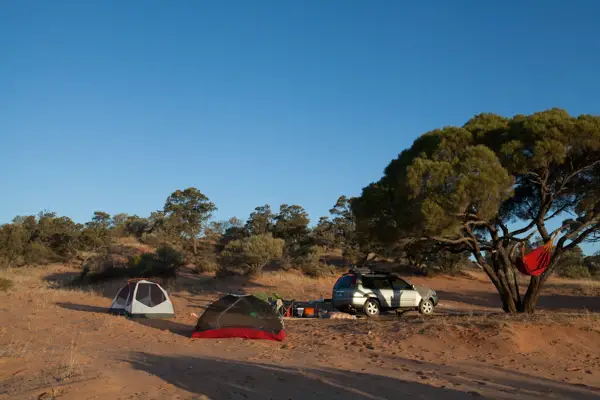
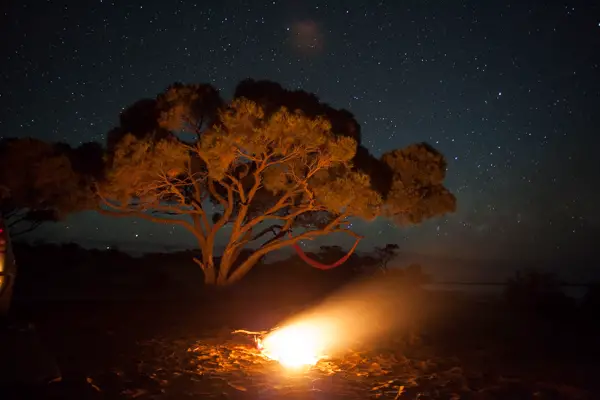
For this photograph, Under the Stars, we were camping in Pimba, South Australia which is basically in the middle of no where. As we were driving around the area looking for somewhere to set up our tents for the night, we found this secluded part located just off the salt lake and surrounded by this tree you see in the photo. Straight away we knew where we were camping for the night. It was perfect, silence that was almost eerie and skies that were darker than some of my brother’s music tastes in high school (really dark! Sorry Rich 😉 )
After shooting the sunset and then shooting the milky way down at the salt lake for a few more hours, we eventually headed back to our tents but were still keen to shoot for a while longer to make the most of the dark skies.
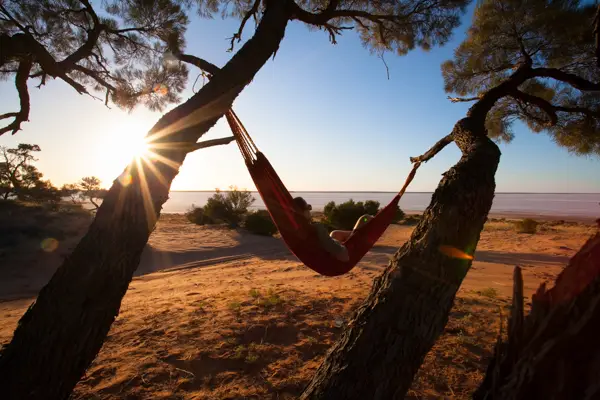
With a hammock already in the tree from some lazy beers in the sun earlier and the fire lit to warm up, we decided to pull the solar powered fairy lights out of the car which we had bought on the first day of our trip and neglected ever since. I knew they would eventually come in handy..!
[box type=”info” style=”rounded”]Interested in landscape photography? My guide to landscape photography shows you how to get started in this fun part of photography[/box]
Taking the photograph

When experimenting with an image concept I have a habit of going overboard with my image brackets. Throw in the poor performance of the Canon 5D Mark II and you have 10 bracketed images. Ok ok. I probably could have got by with less but better safe than sorry right?
There is some reasoning to my madness with the need for having 10 different images coming from:
- Tree and fairy lights –With a light wind around this meant a shorter exposure of the tree and fairy lights was needed to avoid any shake. This had to be a high ISO shot to get a shorter exposure (5 sec)
- Me sitting in the hammock – Trying to sit still in a hammock with no subtle movements should be an Olympic sport. Either that or I have ants in my pants. With this said, I needed a shorter exposure (2.5 sec) of me sitting in the hammock to minimise the risk of any subtle movements
- Exposing for the stars behind the tree – With the plan to make this a two image panoramic (one for the scene you see in most of the frame and another for the milky way sky) it was important to bracket a shot of the stars behind the tree which would allow for a seamless alignment of the two images
- Positioning the camera further up to capture the milky way – I won’t lie the milky way wasn’t directly above the tree like the photo suggests but it was close! Unfortunately it was hovering just to the right of the tree however by angling the camera up I was able to capture a frame which would later be used above three
- Short burst for the fire – The plan was to capture the fire looking more natural rather than a blur of orange light. Even at ISO 25600 I wasn’t able to get an exposure short enough to get the fire how I wanted it. At ISO 25600, the Canon 5D Mark II really comes into its own with its amazing handling of noise (sarcasm intended).
- Couple of extra frames for good measure – I’ve got nothing. Press the button and hope for the best for a few frames?
Bringing it all together
[twentytwenty]
[/twentytwenty]
I’d love to tell you that I processed this with the same level of precision like Marc Adamus in the space of 10 minutes. But in reality of me being sleep deprived after driving 12 hours the day before and not really knowing what I was doing, the edit for this photo took a couple of hours or so of extreme procrastination and trial and error.
The key elements to processing this image (after we get past the trial and error):
- Bringing all the concepts together with layer masks – As mentioned earlier in the post, I shot a series of frames at different ISO levels and shutter speeds to minimise noise where possible and capture specific detail (i.e. me in the hammock or the detail of the fairy lights).
- Cloning out the car – Not sure when composing that I didn’t notice a small part of the car in the frame. Whoops. A quick touch over with the clone stamp tool had it removed.
- Colour grading – Sorry, that sounds wanky but it also sounds like I know what I’m talking about so let’s run with it. Colour grading was selectively applied to the image using layer masks. The intent here is to control the colour to parts of the scene which may have been affected by noise. Parts of the image where these minor tweaks were applied include adjusting the blue hues in the sky and dialling back the orange glow on the sand.
- Overlaying the milky way – Dropping the milky way into the shot was either going to make or break the photo. In an effort to make it look as natural as possible, I used the bracketed image with the stars as the base image of the sky. I then used the image which had the milky way with a very subtle transition through the tree using an inverse selection.
- Noise reduction – Shooting at ISO 3200 and higher does leave you with some ugly noise in parts (i.e. around the dark parts of the sand where I’ve tried to pull back some detail). Fortunately Nik Collection’s free Dfine tool works wonders for the removal of noise. I don’t apply noise reduction across my whole image and prefer to just apply it selectively to parts of the image most affected. When you are applying noise reduction, you are reducing the sharpness of the image so it’s important to ensure you are only applying it where needed to minimise any loss of sharpness.
- Dodging of the scene – As I was using exposures of various dynamic ranges, there wasn’t much needed in the way of dodge and burning of the scene. With only some minor dodging applied to the fairy lights to make them appear brighter and further dodging around the fire to create the flare effect you see in the final image.
To help give you a sense of how the different adjustments were made and effected the image, I’ve put together this short clip which gradually introduces the various layers to reach the final image.
[box type=”info” style=”rounded”]If you enjoyed this post, be sure to give my Before and After series a look for similar posts[/box]
Feel free to use the contact page if you have any comments or questions about this post.
Thanks for reading!
Alex
