
Recently one of my Photoshop tutorials I posted on YouTube was featured on PetaPixel. It’s a neat little tutorial that shows you how to manually find the black and white points of an image and then define them within curves. The effect can be quite interesting and I’ve found can reduce the colour cast effect that is brought on from using and stacking neutral density filters like the Cokin setup. Admittedly it’s not something I use all the time but I find it useful for when I’m lacking motivation and curious to see what effect it will have on an image.
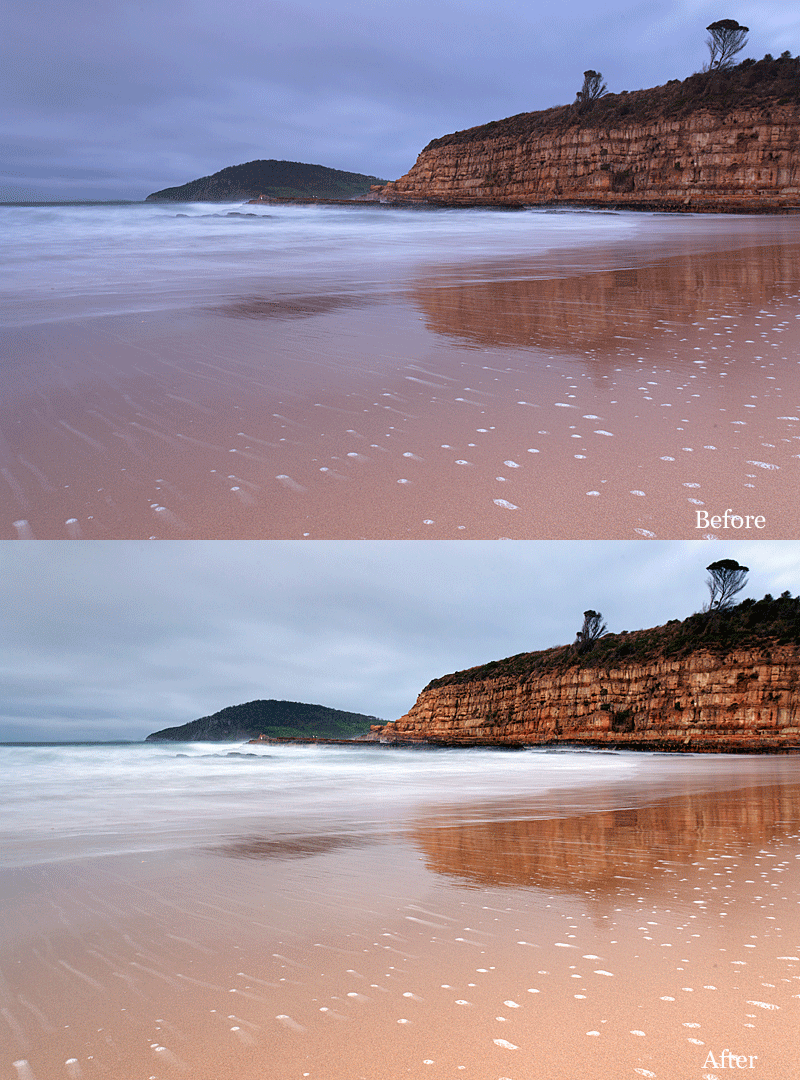
In case you’re feeling lazy and just curious how the effect looks on an image, scroll down to the bottom of the post where I’ve included two before and after gif clips.
Apologies that my blog theme isn’t the prettiest thing when it comes to posting tutorials but bare with me.
Photoshop Tutorial – How to Find the Black and White Points of a Photograph
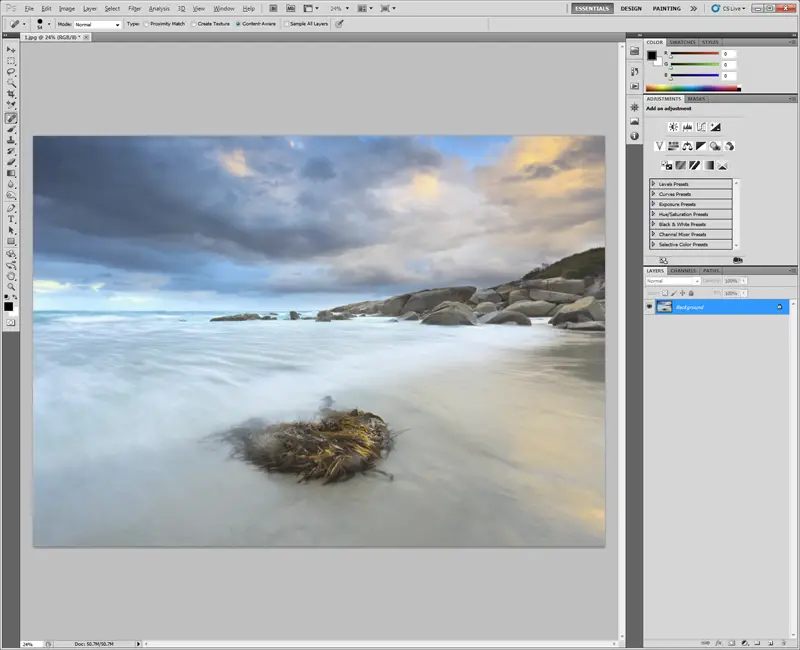
- We first begin with an image which will be used to find the black and white points.
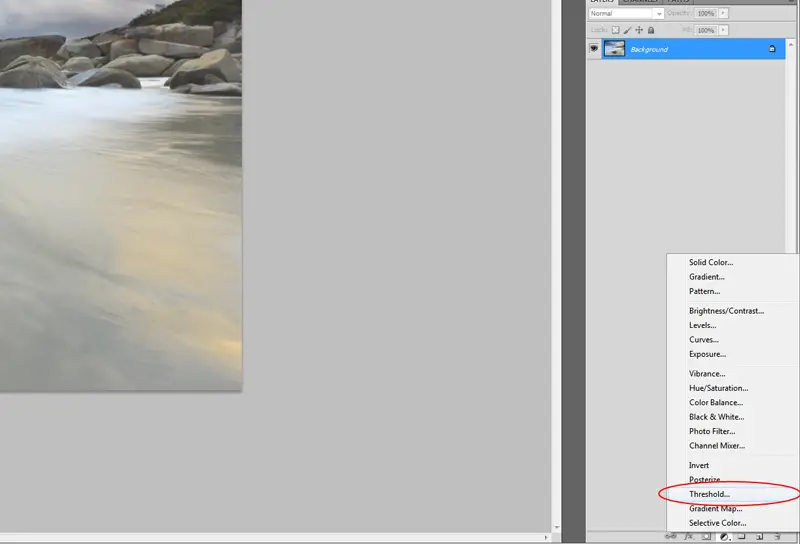
- To find the black and white points we must first create a threshold layer. You can do this by selecting the Create a fill or adjustment layer button and then selecting Threshold…
- Upon selecting the threshold option we’re now presented with an odd looking overlay to our image. Don’t worry about this and continue on.
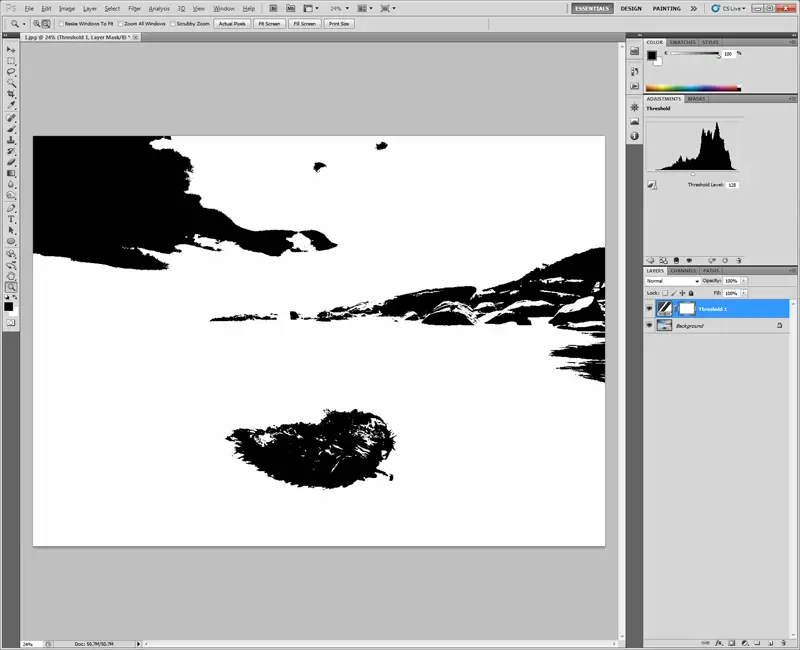
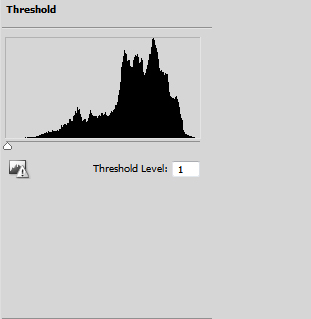
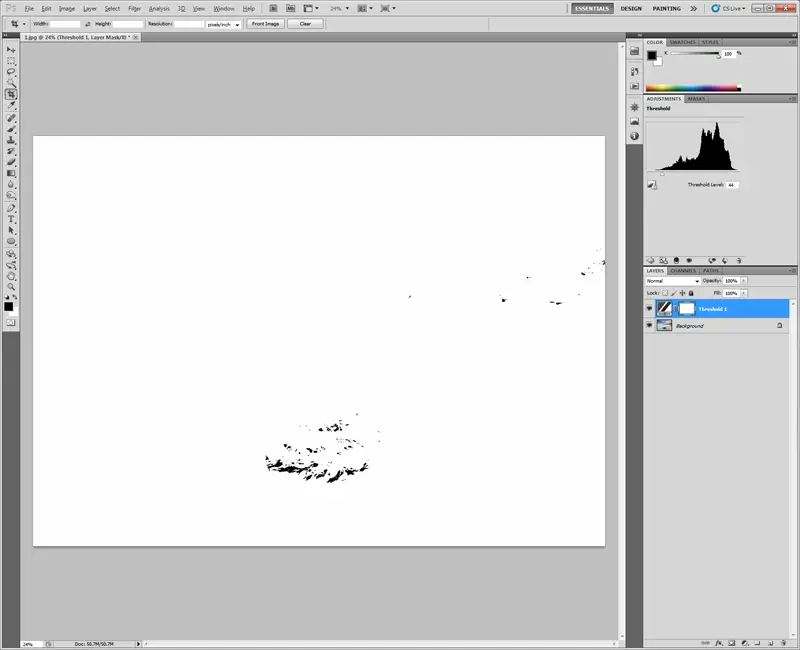
- Pull the slider within the Threshold layer options to the far left so we can identify the white point of the image.
- Gradually bring the slider back towards the right until black parts start appearing within the image. These are your highlights/white points.
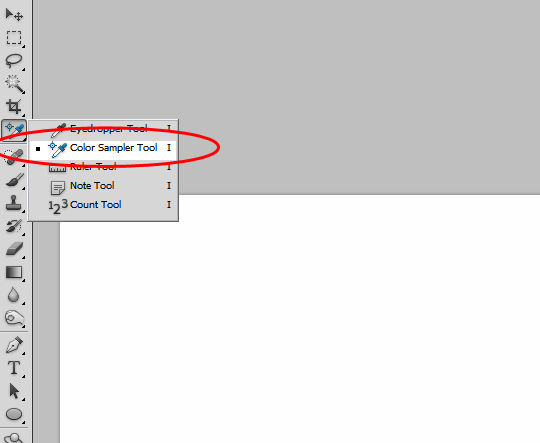
- To save the white point we’ve now identified, you need to use the Colour Sampler Tool. Open this by selecting the following
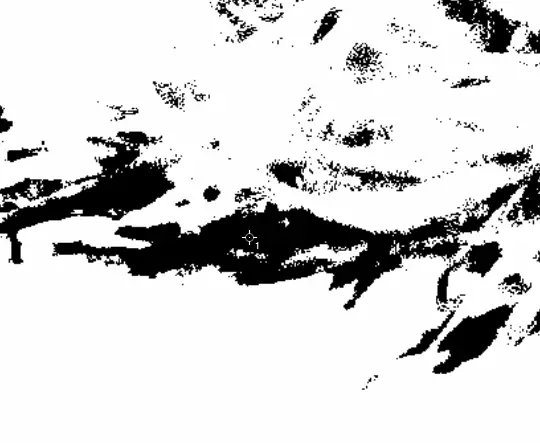
- With the Colour Sampler Tool selected you can now hover over the white point of the image that you have identified and select it. This will save the point for future reference
- Now to find the black point we do the opposite to the above by instead of dragging the slider to the left, we drag it to the right and gradually bring it back to the left like so
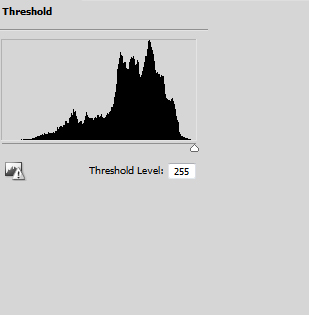
- Gradually bring the slider back to the left until white spots begin to appear. This is your black point. Once again use the Colour Sampler Tool to save your black point
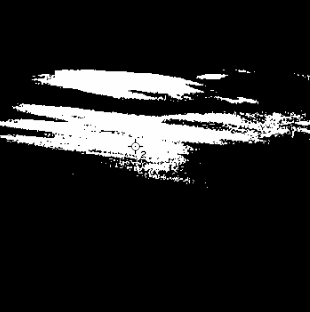
- Now that you have found your black and white points to the image, you can now begin to define them within curves. This is where things start to get fun. Before we move onto this stage though, this is how my image looks with the black and white points selected. As you can see the black point is around the sea weed and the white point is around the waves. Makes sense right?

- To create a curves layer select the Create a fill or adjustment layer button and then select Curves
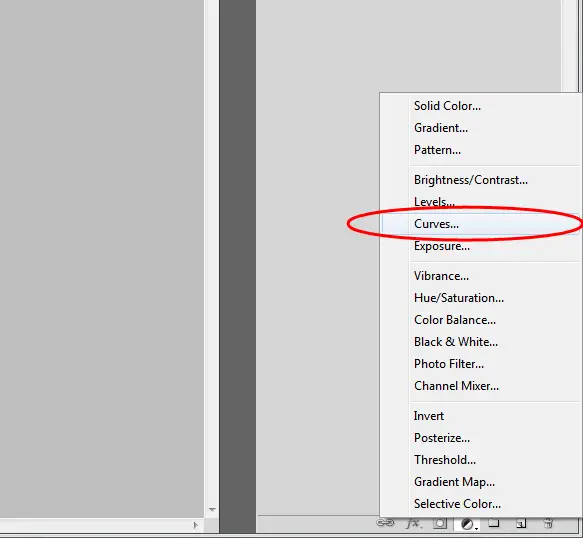
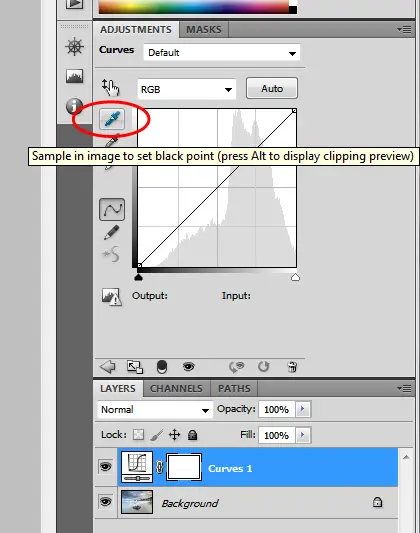
- Now select the black colour sampler tool and select the black point which you defined previously in the tutorial like so

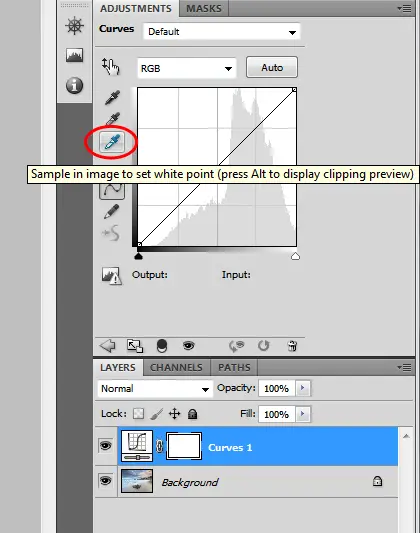
- Similar to the previous step, we now define the white point of an image. Begin by selecting the white colour sample tool and sampling the white point as previously defined
And that’s all there is to it. You’ve now identified the black and white points of the image and defined them within curves. In case you’re curious this is how the image in the tutorial ended up looking after the effect was applied. I’ve also included the image used as part of the YouTube tutorial.
Thanks for reading this tutorial. If you have any questions or feedback I’d love to hear so feel free to drop a comment or use the contact form to drop a line.
Also in case you’re interested I’ve uploaded other Lightroom and Photoshop tutorials on YouTube that touch on split toning in Lightroom, using the colour range tool for selective adjustments and other bits. It’s slowly a work in progress that I hope to upload more in the near future.
PS – Apologies about the .gif animations. After 2 minutes of writing these last few lines I’ve noticed how nauseating they are switching back and forth.
– Alex

Awesome, never seen it done so easy… Thankyou, the video really helped integrate it all, I watched it after I did the reading, and was able to see the little selection points and the exact eye dropper tool you picked early on.
One question, why is this improving the picture actually? Is it increasing contrast, or bringing details to some areas? Which/how?
I’ve moved these sliders around in levels and been going by eye. What you did here just made these images pop.
Is there any down side, like when printing?
Thanks again.
Hi Yucel.
Thanks for the kind words and I’m glad you got something out of it. If anything I think it applies stronger blacks while pushing the highlights subtly. It’s an interesting effect that doesn’t necessarily work with all photos but it’s a neat one to have up your sleeve to experiment with.
Thanks,
– Alex
Hey, Nice picture… I like this.. very good keep it up.
Thanks Mark! 🙂