Transparency in photography is something I’m big on. Some photographers like to keep their techniques and tricks to themselves while others are a little more open and happy to discuss. I fall into the later group and am big on sharing with others. For me, sharing technique makes a good way of starting the conversation about how I personally do something which then allows for others to chime in with their opinion on how they approach it or do it slightly differently. Plus I can’t help but feel that being secretive wins you no friends in a digital world where it’s important to make connections with others.
Recently I was out shooting at Phillip Island with some fellow photographers (Ricardo Da Cunha, Tony Middleton and Michael Bates) playing around with some steel wool. It was only a few weeks back that I first experimented with steel wool photography when I put together this small guide on how to get started with steel wool photography. Eager to experiment I got in touch with Ric with the idea for a shoot and with Tony living in the area, both himself and Michael decided to join us.
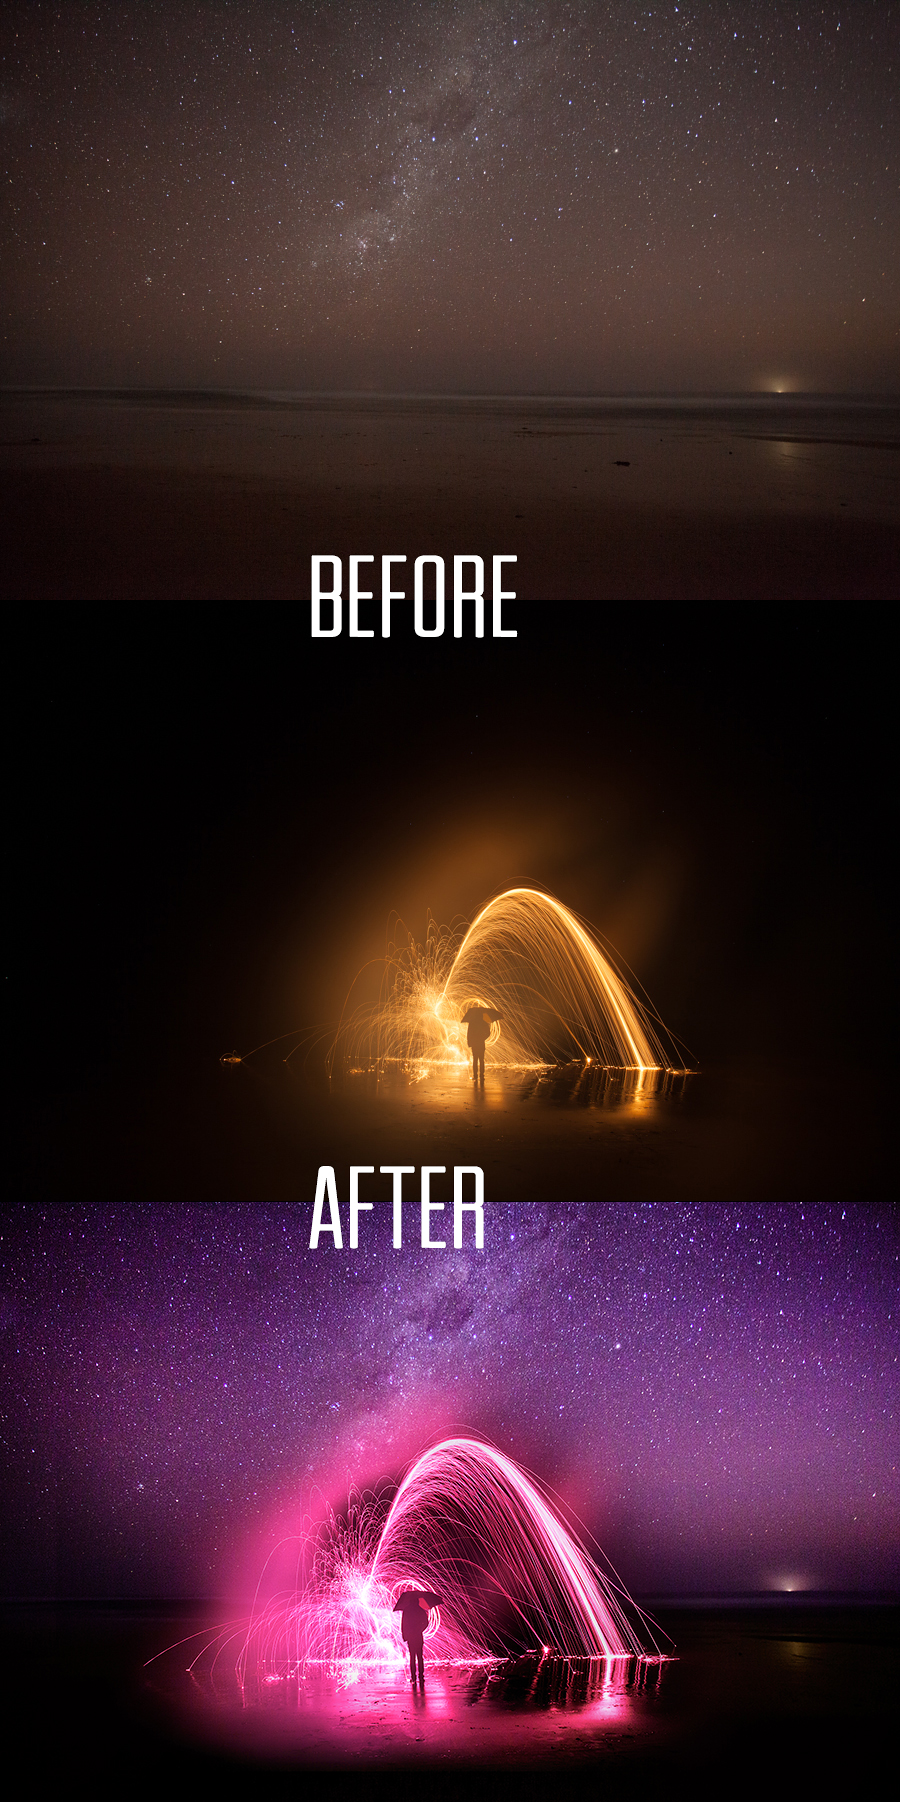
On the particular night it was a beautiful clear evening providing a great view of the stars. I was hoping to combine the two with the stars filling the top half of the frame and a steel wool long exposure at the bottom. Unfortunately after much effort it just wasn’t happening. One would over or under expose the other. It was a nightmare. Instead I opted to bracket two frames. Something I don’t normally do as my Photoshop skills could be best described as awful. So I took a frame of the stars and then another of the steel wool. Ric stood underneath an umbrella while Michael waved steel wool from above. It worked out great even if it did burn a few holes in his jumper… Oops.
So to get started let’s look at the two before images which are captured straight out of camera and then the final image which shows both images combined. It may not be to everyone’s tastes but at the time of shooting was how I envisaged the final image to look.

Editing Process
I’ve re-created the processing used for the image in a video below. Feel free to watch as it shows the edits I made in Lightroom and then the edits made to combine the two images in Photoshop. But for those unable to watch the video I’ll do my best to explain the steps taken to get the final image below.
Lightroom
Where possible I try to make 99% of my edits within Lightroom leaving only minor edits that I’m unable to make in Lightroom for Photoshop. The editing process within Lightroom included the following edits:
- Both images had the tint heavily increased towards the pink end of the spectrum
- Purple split toning was applied to the highlights of the steel wool image
- Tighter crop of the steel wool was used due to there being too much wasted space which wasn’t needed for the blend
- Hue adjustments made to the colours of the stars to bring out some feint blue
- Curves adjustments made to both images (increase in lights & highlights with a decrease in shadows)
- Hue saturation adjustments to the steel wool to tinker with the colour of the pink slightly
- Adjustment brush used to under expose the land area of the star photo. This was mostly due to this part of the image being quite grainy and I thought by making it darker would allow for it to blend easier
- Another adjustment brush was used for the steel wool photo to slightly bring down the highlights on the steel wool
- Both images were exported
Photoshop
Both images were loaded into Photoshop with the steel wool exposure being overlaid to the star photograph. At this stage I positioned the photo in an ideal place and began to use the free transform tool to play around with the size and positioning of the photo. I aimed to have the person situated a little below the horizon.
Once the image was placed at a good level I created a layer mask on the steel wool image to subtly combine the image with the star image. After this there wasn’t much adjustments needed other than dodge/burning around certain areas, pro contrast from Nik Soft applied and USM sharpening used to sharpen the final image.
For more information and to watch the process live see the video below for more information –
I hope this little Photoshop and Lightroom tutorial was of use for you. Apologies that the video is a little rushed but feel free to drop a line if you have any feedback or have any questions about the techniques used in the clip.
Thanks,
– Alex
