Posted on 6 Comments

Landscape Photography Tip – Shutter Stacking

Sunset at Heart Bay, South Australia
Howrah Beach, Tasmania
Using shutter stacking is a great technique to use in changing light conditions

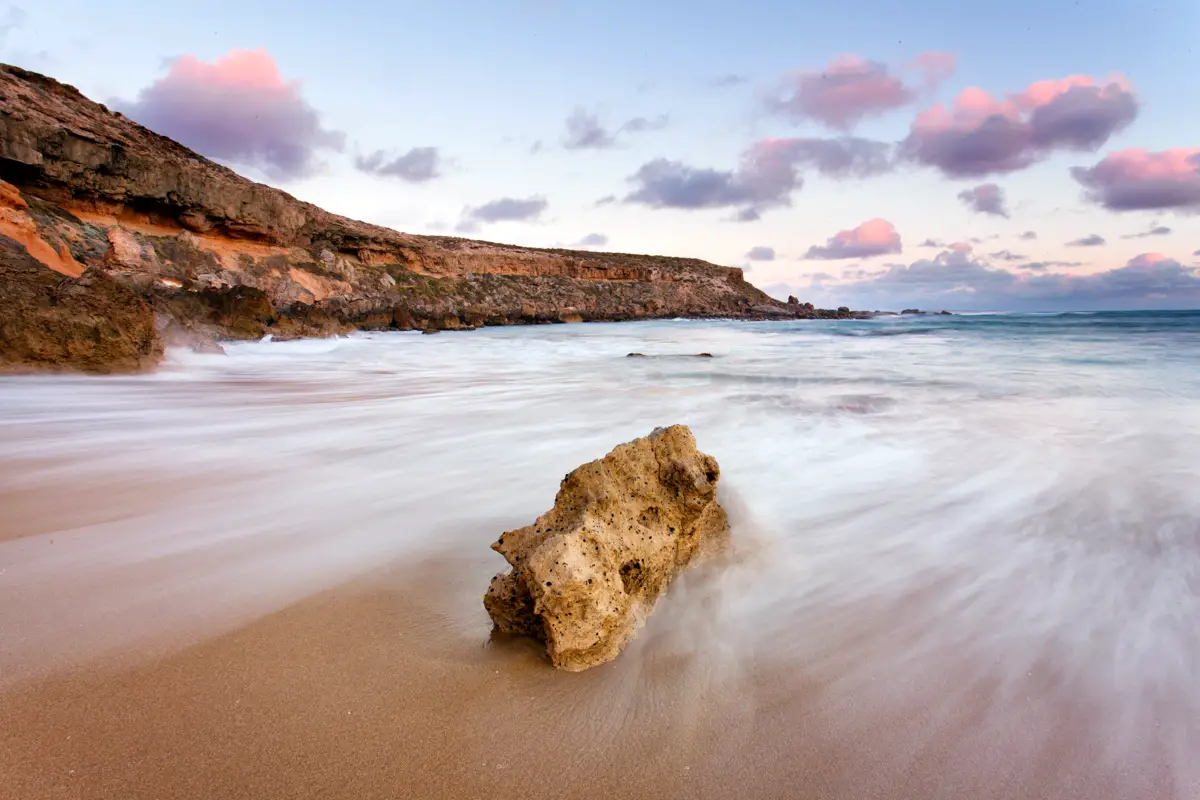
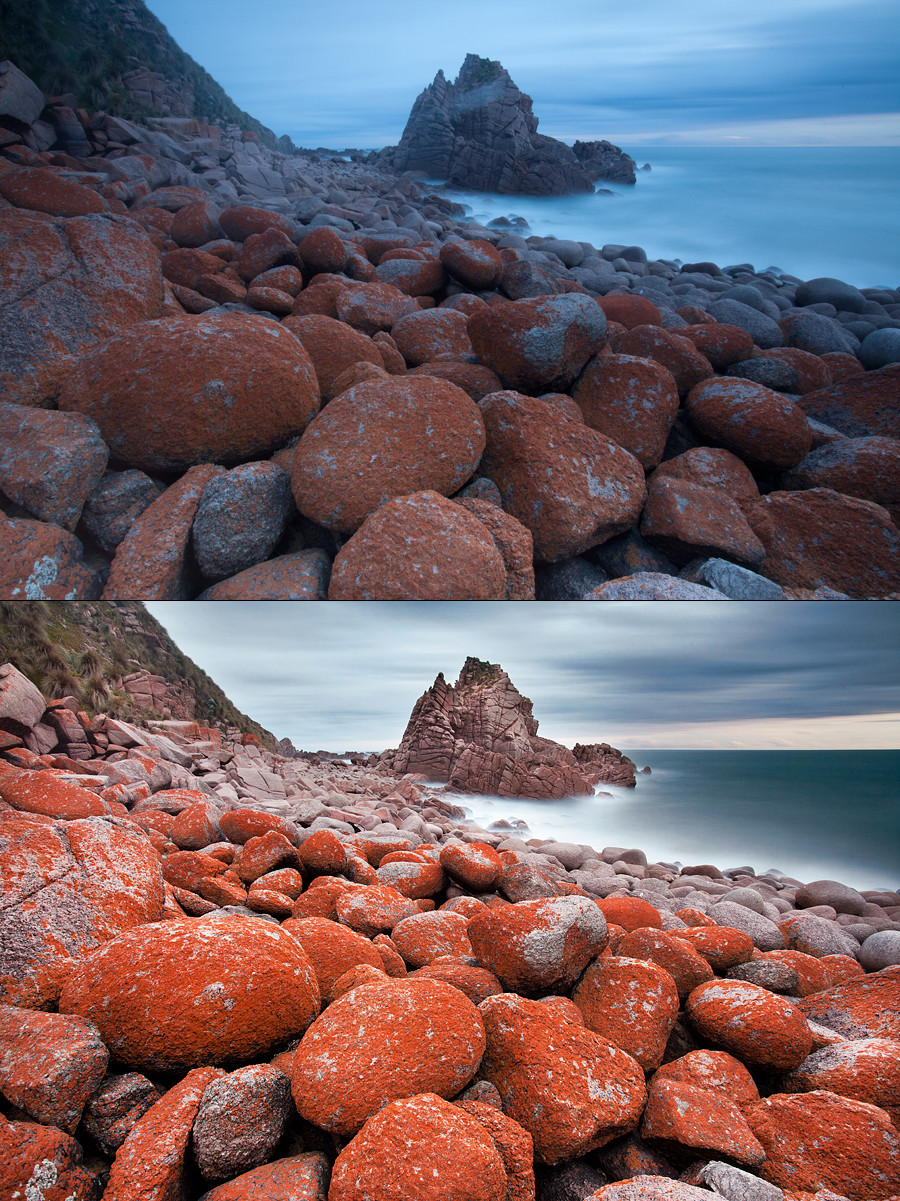
One thing I love about landscape photography is the challenge that comes with trying to capture a particular moment in quickly changing conditions. An example that I’m sure some people reading this post can relate to is when photographing the sea, you see a rock ledge and think to yourself, some water falling over that rock ledge would create a nice waterfall effect over the rocks (similar to the image to the right). But as we’re all too familiar, that wave creating that nice effect seems to never come and if it does, it’s all too late and the nice sunset colour has disappeared. This is where shutter stacking different exposure times comes in as a useful trick to have in your workflow when you’re out shooting in variable conditions and know you’re about to miss the timing on what you’ve envisaged in your head. 

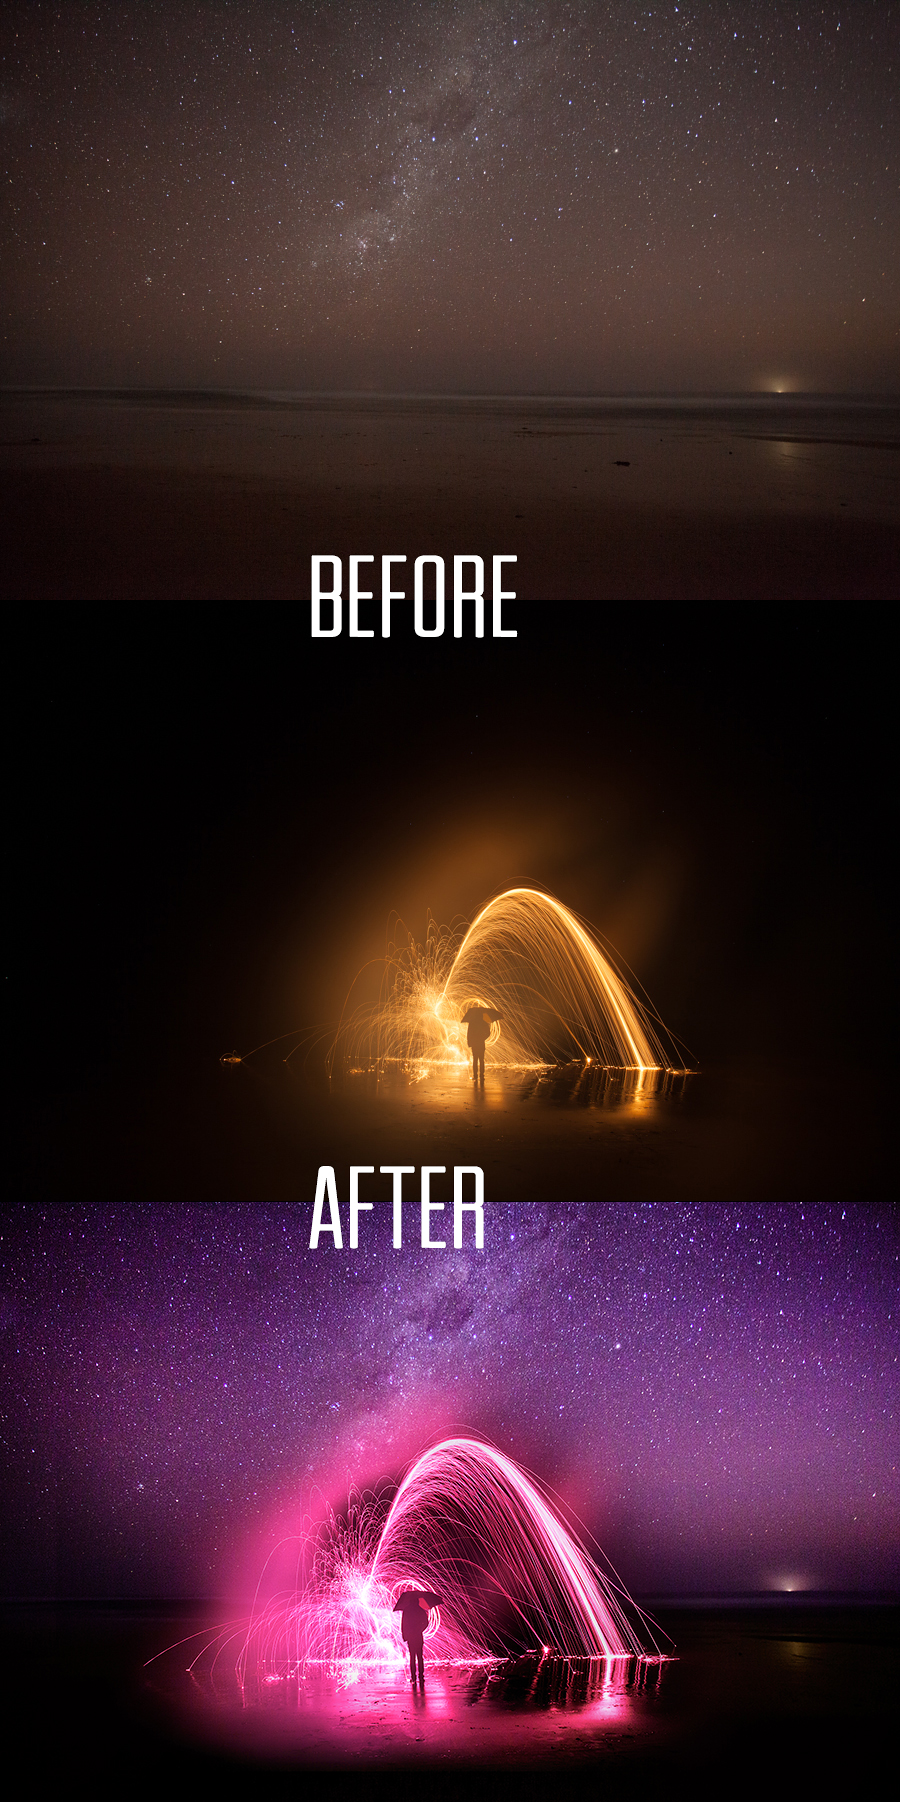
For the purpose of this article I’ll be looking at how you can stack multiple frames in changing light conditions but the effect can also be used to reduce noise in long exposure images by capturing multiple long exposures (i.e. 10 x 30 second exposures rather than a 5 minute exposure) to reduce noise in your image. 

Sunset at Heart Bay, South Australia
This image from Heart Bay, South Australia used shutter stacking to combine the nice sunset sky and the timing of a wave rushing around the rock

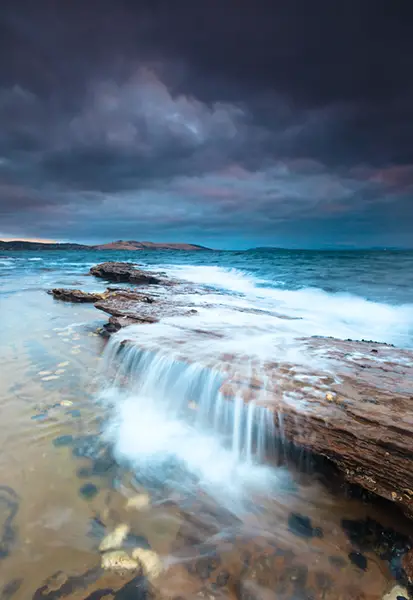
Generally when using this technique it really slows down my shooting process as I’m setting my camera up for one photo rather than running around like a mad man trying to get as many angles of the sunset as possible. So there’s a few things I’ll do as I’m taking my one photo which I’ll look to break down. If we consider the image to the right with the water rushing over the rock ledge as an example, let’s look at my process for this shot:

  1. Focus on composition – Find an interesting composition. In this case, I’ve noticed the water flowing over the rocks could come up nice with a long exposure. Oh what? The swell has dropped out and I’m about to miss the nice colour in the sky. That’s ok, I’ll capture multiple images and combine in Photoshop later using shutter stacking.
  2. Double check everything – Take some test photos to make sure everything is lined up. At this point I’ll double check what the swell is doing in case my gear is exposed (I’m hardcore but not swimming in the ocean and losing my gear hardcore)
  3. Capture your base image – With my camera firmly in position and I’m feeling confident that I’m not going to get swept out to sea, I take a photo of the scene. This image is to capture the sunset in all its glory which will form my base image.
  4. Capture the moment you’ve been waiting for – Now I wait for that wave to come through to create the waterfall effect over the rocks and complete the shot.  It goes without saying but keep your camera as steady as you can to avoid any misalignment when you got to mask the image later in Photoshop. Generally for this style of shot I’ll aim for a long exposure of around o.5″ of a second all the way to 2 seconds.
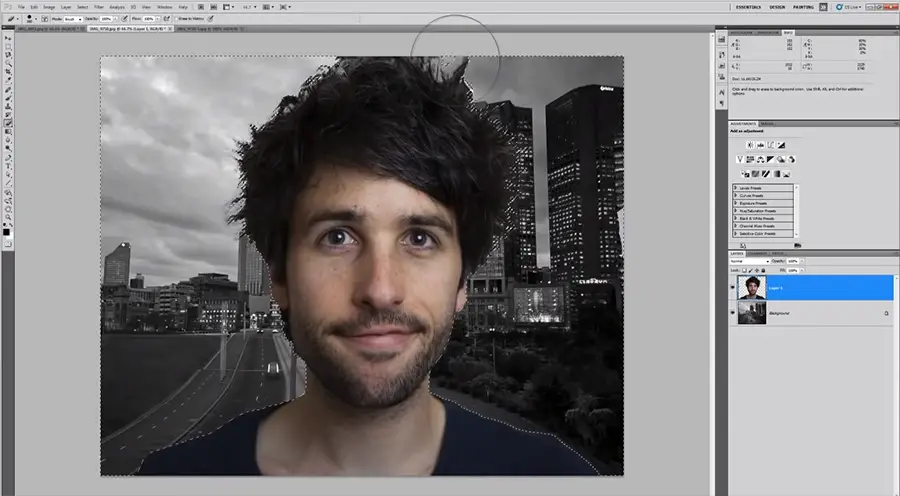
  5. Stack the images – Open the two images in Photoshop and use the layer mask tool to introduce the wave motion to my base sunset image (as roughly shown in the video below)

Let’s take a look at how the images are combined in Photoshop with this quick video I put together. The technique relies heavily on layer masking the second exposure. If layer masking isn’t something you’re familiar with then give a previous post on layer masking exposures a read or watch one of the many YouTube videos available which will quickly bring you up to speed.

For this video I tried to keep things short (as you can probably tell by my quick and dirty layer masking) but occasionally if there’s not much movement in the water I’ll shutter stack 3-4 images to exaggerate the movement of the water. The purists reading this are no doubt rolling their eyes but if the tools are available then why not make the most of them.

Thanks for reading and watching. If you have any questions about this technique feel free to contact me directly as I’d be happy to help!

Alex

Posted on 3 Comments

How to Create a Double Exposure in Photoshop

how to create a double exposure in photoshop


Creating a Double Exposure in Adobe Photoshop

A few years ago now I put together a video tutorial on YouTube on how to create a double exposure in Photoshop. At the time a few photographers were taking beautiful double exposures, achieving a similar effect to that seen in film and were doing it in camera on digital bodies. Most of these people were using the Canon 5D Mark III or other bodies which come with the ability to create double exposures in camera.

double exposure in photoshop
Blending these two images to create a double exposure effect in Photoshop

As I own the Canon 5D Mark II and the multiple exposure feature isn’t included, I was slightly disappointed and wanted to try achieve a similar effect in Photoshop. In the end I came up with a method of achieving the result. I must admit, it is messy and probably not the best way to achieve the end result. As some comments in the video indicate, there are better ways of doing it oh and apparently Phlearn is 10x better for tutorials. Harsh but true. Aaron Nace is amazing and I do recommend you look up his Photoshop and photography tutorials. They’re mind blowing and he’s really leading the field when it comes to tutorials in this area. YouTube comments are pretty amusing for the most part though. It really brings the best and worst out in people.

I’ve been meaning to put up a post on my blog about the tutorial and also link to the content I used for the tutorial in case anyone wants to have a play themselves with my ugly mug and a picture of Melbourne, Australia. It only took me 2 years… Sorry! Never too late right?

Resources for the Tutorial

For this tutorial I will be using two images which I’ve uploaded for you so you can follow the tutorial video with the exact images.
Download the city backdrop image used for the background (1.99 MB)
Download the self portrait image used for the foreground image (1.91 MB)

I’m going to let the video (and my poor audio) do the talking for a moment as I demonstrate how I blend the two images together. I’d suggest watching the tutorial first then attempt it yourself. For this tutorial, I was using Photoshop CS5 however you should have no issues doing it in previous or current versions.

As you can see in the video it’s actually really easy hey? The only frustrating part I find is feathering around the image to remove the background. As a commenter on the video said, it really is like playing minesweeper and can be a game of luck but you can make life easier for yourself by decreasing the tolerance and checking the contiguous box as others later mentioned. I do have some good news though, it is a frustrating tool the first time you play with it and does become more natural and easier to use over time.

Hope this tutorial was of use and if you have any questions be sure to get in touch as I’m always happy to help 🙂

– Alex

While your here you might also be interested in…

Posted on

Before and After Processing – Cape Woolamai

My first post for 2014! Hard to believe that January is almost over.  This year I wanted to share some behind the scenes before/after photos to give you an idea of how some of my photos look in camera and the process I follow to edit them.  Starting the series with this photo from Cape Woolamai on a moody sunset.

Before and AFter Processing

This is a photo I took a couple of years ago now at Cape Woolamai which is situated along the stunning Phillip Island coastline. I had an idea in my head of how I wanted a photo to look of the scene which captured the stunning orange lichen rocks while using the giant rock as a backdrop with a long exposure to capture the blur of the clouds and water. To capture the image I used a Canon 5D Mark II, Canon 17-40, B+W 110 and Cokin Z-Pro graduated neutral density filter.

The original shot came out quite flat and had its flaws that required some tinkering in Lightroom and Photoshop to get right. Here are the steps that I followed to get the image to its final state. Before you read, you might want to watch a video I prepared earlier that goes over using Curves in Photoshop 5. I apologise that it may be a bit long winded and confusing at times but feel free to send an email if you have an queries but basically the general jist of the editing went something like:

  • I always shoot my images with auto white balance and find towards the end of a sunset, the camera will often go for a colder lower colour temperature which results in a blue to your image. To correct this I boosted the temperature to warm the colours slightly. It was important at this stage not to increase the temperature too much as I wanted to retain the blue of the water. Normally I make most of my changes in Lightroom and that’s it but for this image I wanted to tinker quite a bit with the colours so exported to Photoshop
  • Once in Photoshop I had to remove the gaping gash that formed across the rock. It turned out that my graduated neutral density filter had got scratched in my bag (something had managed to dig through the case and scratch the filter – bummer). I didn’t realise I had scratched the filter until I got home so thought the whole trip had been a waste of time. Fortunately though, I was able to use the cloning tool to and slowly remove the scratch from the rock
  • At this stage the image was looking quite flat still so I created a Curves layer which would be the first of many curves layers used over the course of the editing process. Curves are amazing and something I’ve talked about in the past but just to quickly remind you, they allow you to make selective adjustments to the red, blue and green channels of the highlights, mid tones and shadows of an image. At this stage I’ll make a general adjustment to the overall image and then make more selective adjustments later on through the use of layer masks
  • For the image, I wanted to selectively bump up the highlights of the water to make them appear more brighter while darkening the clouds to make them appear moody. To do this I used a Curves layer once again but this time introduced a layer mask. By using layer masks, you can paint over areas where you only wish to make an adjustment. For example, if I’m only wishing to adjust the tones of the sky I would use a layer mask and paint over that area which then means any changes you make in Curves will only be to that specific area which you painted over. The same principal applies for when making adjustments to the water of the photo. Through using this method I’m able to selectively bump up parts of the image without blowing out the rest of the image. Following this technique I used the primary channel and increased the midtones and highlights of the water and decreased the shadows, midtones and highlights of the sky to create some mood.
  • When editing the sky it was important not to accidentally darken the surrounding cliff and rocks in the area. To avoid this, I used the feather tool and selected the sky using this tool. Initially when I first started using Photoshop, I was hopeless with the feather tool and it really took some practicing until I got the hang of it. So if you’re struggling, don’t give up and possibly look at some tutorials on YouTube to get a sense of how others use it. It’s a great tool but at the same time, quite painful and difficult when you’re unfamiliar with it
  • As the exposure of the water was now bright and the sky was dark, I had to balance the exposure of the rock area so created another layer mask to selectively adjust this area to balance it against the rest of the scene by using curves with some minor dodging and burning
  • Once I was happy with the exposure of the overall scene, I was once again in curves making adjustments to the different colour channels (red, green and blue). Basically the reason for this is that I wanted to play with the blue channel a bit selectively around the water to make it appear more blue and also reduce the colour cast introduced by using filters. I find using the RGB channels in Curves a great and quick way to colour correct your image to fix any issues like colour cast
  • Final adjustments to the image was a resize for web (800×600) and sharpened using ultra sharpen mask

I hope this makes sense and gives some insight into how the final image was reached. For me the most important thing is to go in with an idea of how you want the image to look in your head and work according to that (something that is easier said than done).

Thanks for reading,

Alex

Posted on

Steel Wool Beneath the Stars – Post Processing Tutorial

Transparency in photography is something I’m big on. Some photographers like to keep their techniques and tricks to themselves while others are a little more open and happy to discuss.  I fall into the later group and am big on sharing with others. For me, sharing technique makes a good way of starting the conversation about how I personally do something which then allows for others to chime in with their opinion on how they approach it or do it slightly differently. Plus I can’t help but feel that being secretive wins you no friends in a digital world where it’s important to make connections with others.

Recently I was out shooting at Phillip Island with some fellow photographers (Ricardo Da CunhaTony Middleton and Michael Bates) playing around with some steel wool. It was only a few weeks back that I first experimented with steel wool photography when I put together this small guide on how to get started with steel wool photography. Eager to experiment I got in touch with Ric with the idea for a shoot and with Tony living in the area, both himself and Michael decided to join us.

On the particular night it was a beautiful clear evening providing a great view of the stars. I was hoping to combine the two with the stars filling the top half of the frame and a steel wool long exposure at the bottom. Unfortunately after much effort it just wasn’t happening. One would over or under expose the other. It was a nightmare. Instead I opted to bracket two frames. Something I don’t normally do as my Photoshop skills could be best described as awful. So I took a frame of the stars and then another of the steel wool. Ric stood underneath an umbrella while Michael waved steel wool from above. It worked out great even if it did burn a few holes in his jumper… Oops.

So to get started let’s look at the two before images which are captured straight out of camera and then the final image which shows both images combined. It may not be to everyone’s tastes but at the time of shooting was how I envisaged the final image to look.

IMG_8339 - Copy

Editing Process

I’ve re-created the processing used for the image in a video below. Feel free to watch as it shows the edits I made in Lightroom and then the edits made to combine the two images in Photoshop. But for those unable to watch the video I’ll do my best to explain the steps taken to get the final image below.

Lightroom

Where possible I try to make 99% of my edits within Lightroom leaving only minor edits that I’m unable to make in Lightroom for Photoshop. The editing process within Lightroom included the following edits:

  • Both images had the tint heavily increased towards the pink end of the spectrum
  • Purple split toning was applied to the highlights of the steel wool image
  • Tighter crop of the steel wool was used due to there being too much wasted space which wasn’t needed for the blend
  • Hue adjustments made to the colours of the stars to bring out some feint blue
  • Curves adjustments made to both images (increase in lights & highlights with a decrease in shadows)
  • Hue saturation adjustments to the steel wool to tinker with the colour of the pink slightly
  • Adjustment brush used to under expose the land area of the star photo. This was mostly due to this part of the image being quite grainy and I thought by making it darker would allow for it to blend easier
  • Another adjustment brush was used for the steel wool photo to slightly bring down the highlights on the steel wool
  • Both images were exported

Photoshop

Both images were loaded into Photoshop with the steel wool exposure being overlaid to the star photograph. At this stage I positioned the photo in an ideal place and began to use the free transform tool to play around with the size and positioning of the photo. I aimed to have the person situated a little below the horizon.

Once the image was placed at a good level I created a layer mask on the steel wool image to subtly combine the image with the star image.  After this there wasn’t much adjustments needed other than dodge/burning around certain areas, pro contrast from Nik Soft applied and USM sharpening used to sharpen the final image.

For more information and to watch the process live see the video below for more information –

I hope this little Photoshop and Lightroom tutorial was of use for you. Apologies that the video is a little rushed but feel free to drop a line if you have any feedback or have any questions about the techniques used in the clip.

Thanks,

– Alex

Posted on 4 Comments

Photoshop Tutorial – Manually Set Black and White Points

Recently one of my Photoshop tutorials I posted on YouTube was featured on PetaPixel. It’s a neat little tutorial that shows you how to manually find the black and white points of an image and then define them within curves. The effect can be quite interesting and I’ve found can reduce the colour cast effect that is brought on from using and stacking neutral density filters like the Cokin setup.  Admittedly it’s not something I use all the time but I find it useful for when I’m lacking motivation and curious to see what effect it will have on an image.

In case you’re feeling lazy and just curious how the effect looks on an image, scroll down to the bottom of the post where I’ve included two before and after gif clips.

Apologies that my blog theme isn’t the prettiest thing when it comes to posting tutorials but bare with me.

Continue reading Photoshop Tutorial – Manually Set Black and White Points