Just a tutorial (err very rushed..) on blending images in Photoshop. I occasionally use this in my workflow as it’s a handy way of fixing over exposures or increasing dynamic range without resorting to hdr.
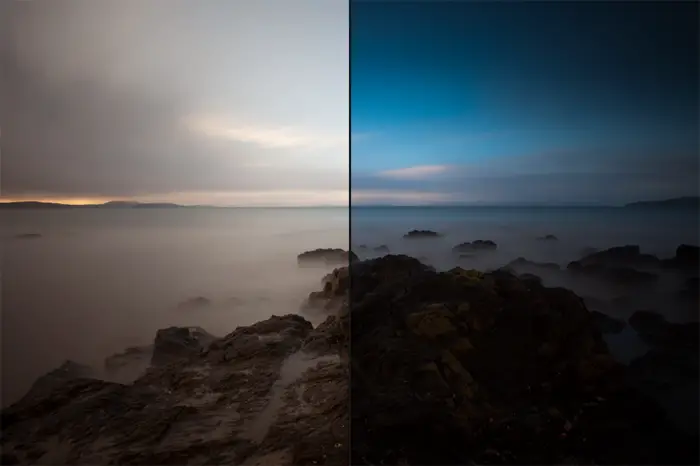
The two images below will be blended for the purpose of this tutorial. I like the exposure of the land in the first shot but the sky has been over exposed. This can be fixed through blending the sky of a darker exposure into the shot.
Assuming you have two bracketed exposures (one darker and one a little lighter) that you wish to combine, begin by opening the brighter image in Photoshop. Once open, select the image by pressing Control + A and then copy this selection by pressing Control + C.
Now open your dark exposure in Photoshop and paste the bright exposure which we just copied over the dark image by pressing Control + V. You should now have two layers similar to below.
You now need to create a layer mask to begin blending your image. With your brighter layer selected, create a layer mask by clicking the button in the image below.

Your layer should now have a beautiful white box next to it..

Ok this is where the action begins.
 I’ve now gone ahead and painted over the sky of the bright image. This has allowed me to revert back to the darker sky whilst keeping the more brighter exposure of the land.

This is the final product..

I’m sorry this is quite rushed as I wasn’t sure whether people would actually be interested. But I hope it helped someone as it’s a simple trick.

Hi Alex, just a heads up that this tutorial is close enough to be used with Pixelmator, producing the same effect. Only a couple of slight differences… one being that Pixelmator only costs $59 😛