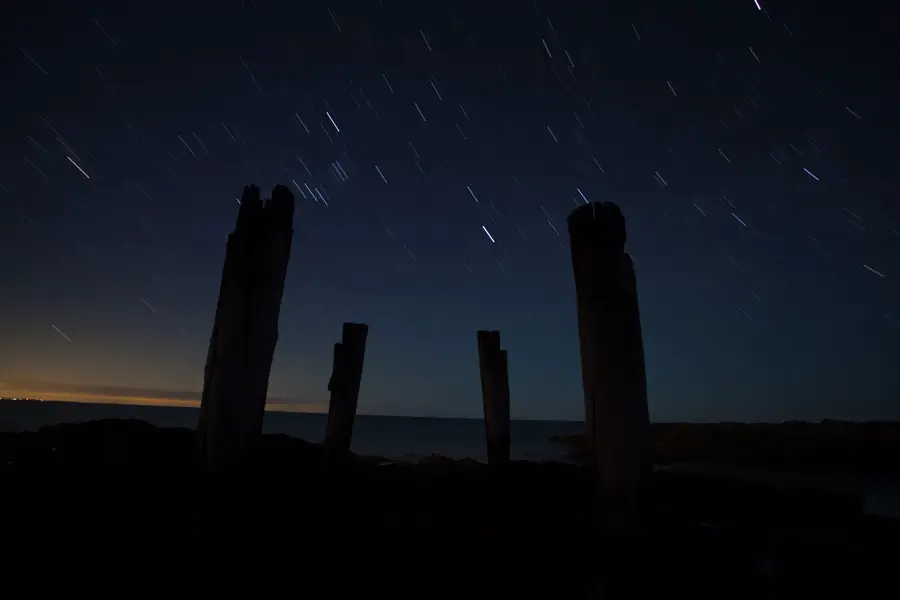
Posted on

Before and After – Wye River

[twentytwenty]wye-river-before

wye-river-after
[/twentytwenty]

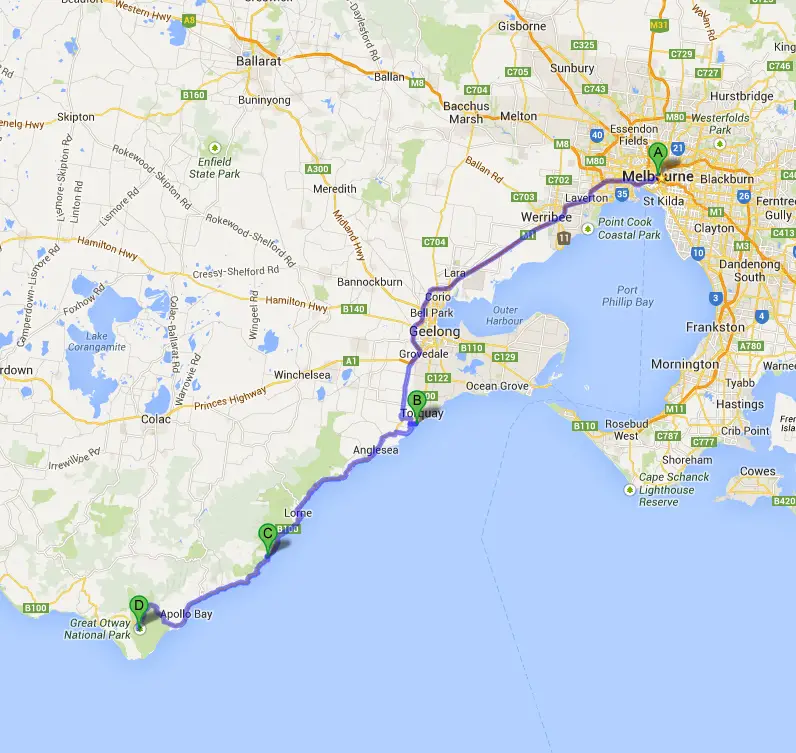
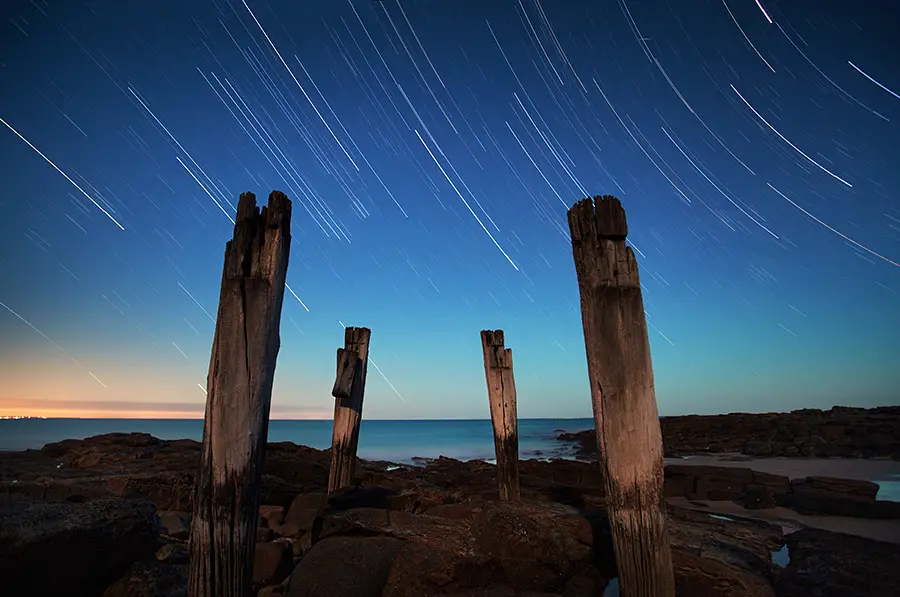
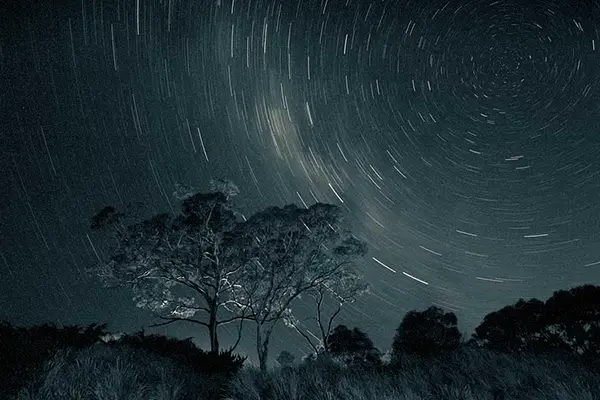
Photographing star trails is something that is forever on my to do list. I’ve photographed countless sunrise and sunsets over the years but star trails continue to elude me. On a trip down the Great Ocean Road for a few days, I was determined to pick a night and setup for some star trails. My intention was to find a reasonable composition, a rock to sit on, load my tablet up with an episode of The Newsroom (great show I might add) and sat back while the camera did the rest.

Taking the Photos

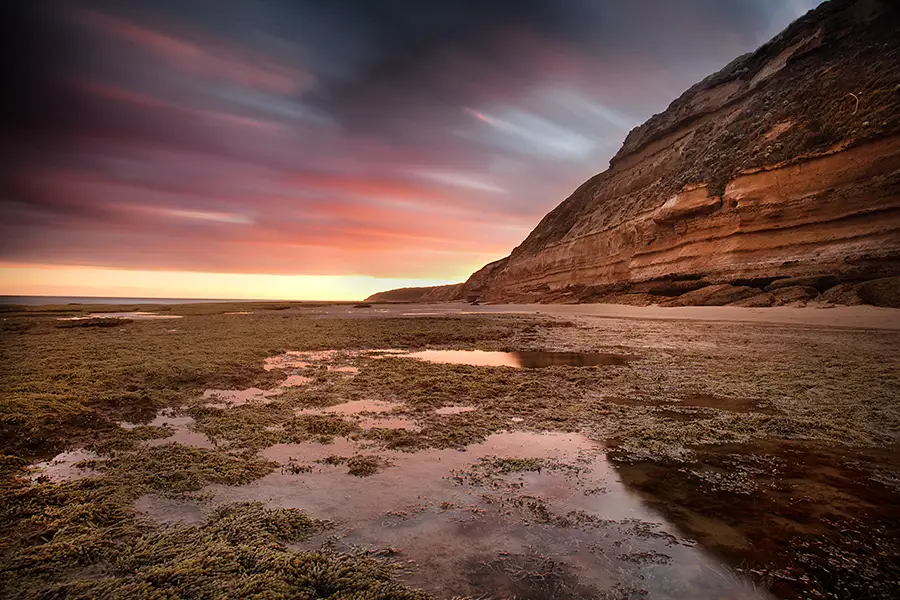
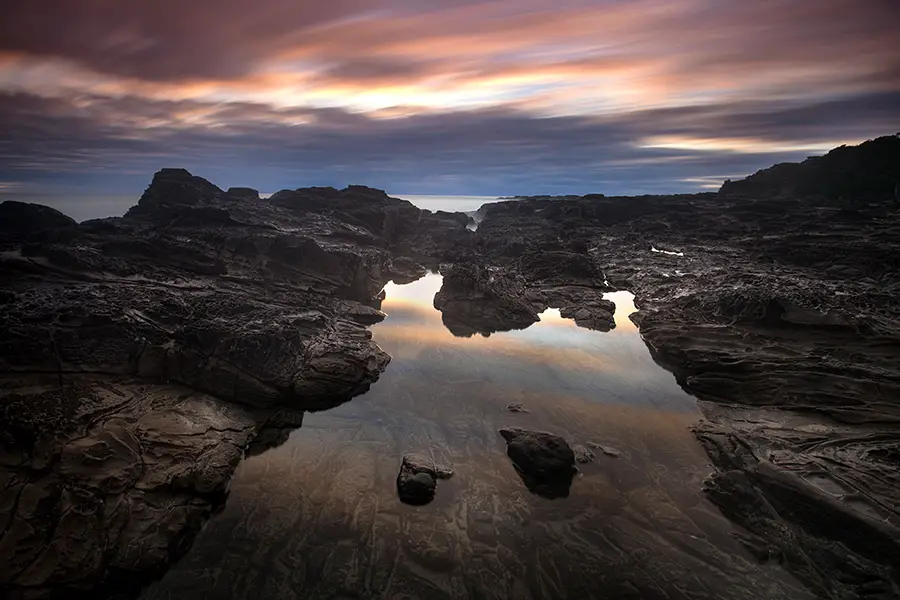
Luckily conditions were perfect for star trails with the sky being clear and the moon relatively new. When photographing star trails, those much smarter than I suggest it is better to time your star trail photography around the time of the new moon. This results in less light emitted by the moon allowing for a darker sky. Another thing that has to be considered when doing star trail photography is light pollution. This can be a real issue if you live in bigger cities. I’m from Melbourne, Australia, often we will drive 100km ~ from the city, and still struggle some light pollution that leaves some light visible in the sky. This does not make photographing stars impossible but is something to consider if you do live in a bigger city. Fortunately, for this trip, we were headed far from Melbourne with minimal light pollution so it was clear and very dark skies.  This led to some great conditions for star trails even if I still got some noise pollution through an orange glow from Geelong in the left of the frame.

One thing that has always acted as a deterrent for star trail photography is sitting around in the dark for hours on end while your camera exposes the earth moving on its natural axis (thanks wiki!). This time around I decided to come a bit better pre-planned and loaded up my tablet with episodes of The Newsroom and made myself at home while my camera exposed for 2 hours. I must admit, I love being in nature on my own but not so much when it’s pitch black dark. Let’s just say – I was happy when the exposure was over so I could get home and jump into a warm bed 😉

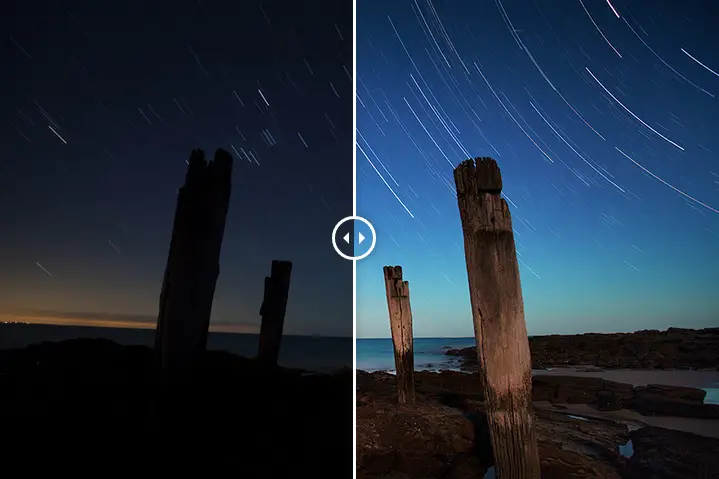
Using the pilons as my key composition, I arrived at the location around sunset with the intention of taking a photo on blue hour to capture an image while there was still a lot of light in the scene. The idea here was to get a good dynamic range shot of the pilons in case later during the night, it got too dark and difficult to get a good exposure.

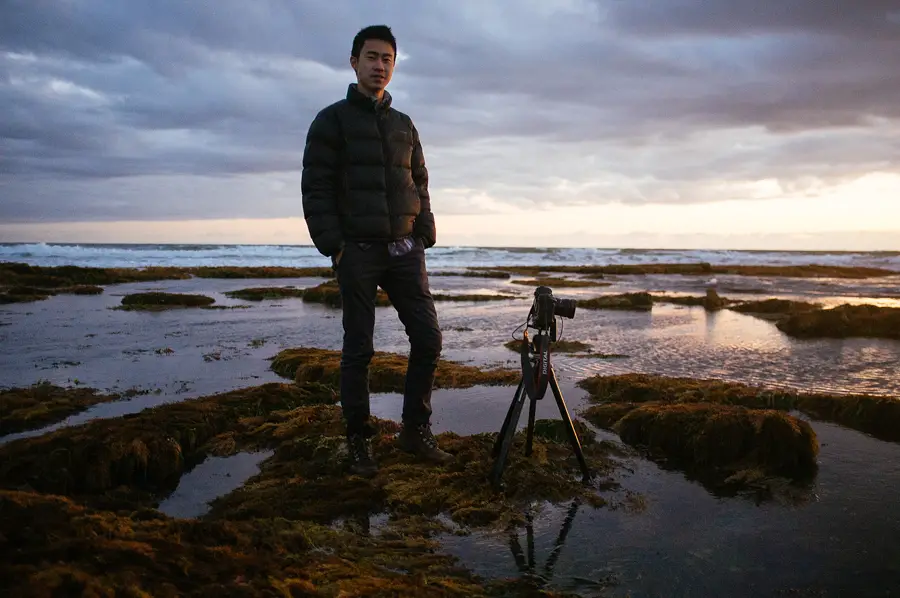
Rather than capture one 80 minute long exposure I decided to take 8 x 10 minute exposures to minimise noise in my image. Unfortunately the 5D Mark II isn’t fantastic in the dark when it comes to noise so opting to blend exposures is a nifty and cheeky way of avoiding this.  The end result was 8 x 10 minute exposures at F/5 and ISO 100.  This was made possible by using an intervalometer where I specified the exposure time, interval between photos and how many photos I was taking. Other than occasionally glancing at the LCD screen to see how the exposures were looking, I then sat back and enjoyed an episode of The Newsroom until the camera finished doing its thing.

Post Processing the Photos

Blending multiple star trail photos is made easy through the Lighten layer mode in Photoshop. I simply loaded my blue hour image up and then added the 8 images as layers. With these open, I changed the layer mode to Lighten which then combined the star trails and created some nice lines.  In case you’re still a little bit still confused I’ve put together a quick clip which demonstrates the process. It’s really that easy.

With the images blended I then went about post processing which I’ve put together into a headache inducing timelapse video. You might notice that I do a lot of flicking back and forward during the video? This isn’t the original edit of the photo and I’m simply checking back to the original during the edit to check how my edit fared in comparison to the original edit.

Through the mad scramble of the above clip I made the following changes:

  • Combined all images using the Lighten layer mode
  • Straighten of image with left over back bars fixed up using the content aware tool. I must profess – I’m a sucker for the content aware tool especially when replacing areas that are quite simple like a mark on a blue sky (more on Adobe’s website about content aware). As the black bars were appearing next to blue sky I used the content aware tool to fill in the areas and it didn’t let me down. Although with that being said, it can be a bit temperamental occasionally and force me to not be lazy 😉
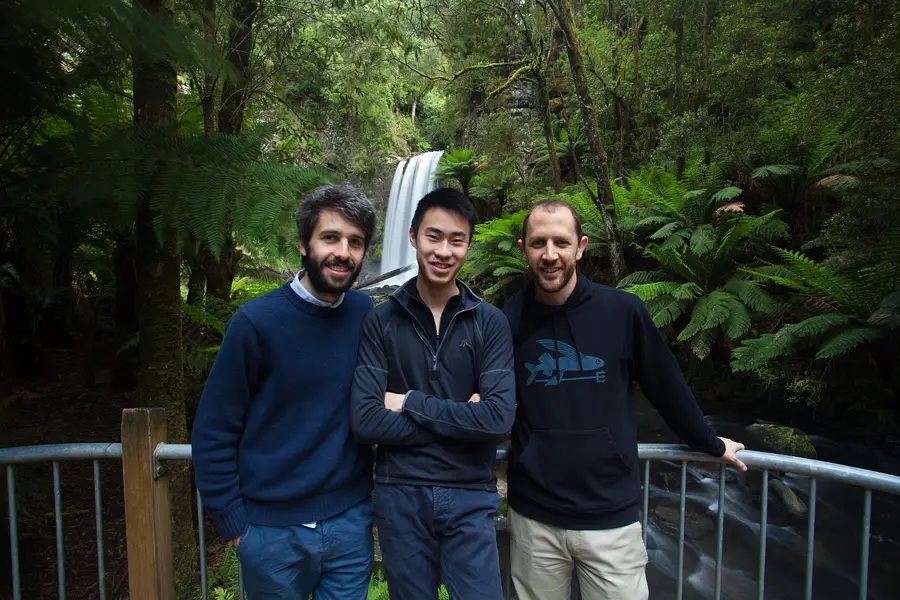
  • Removal of torch light trail. I was shooting with Jon Sander who was off shooting at another location and decided to come back to see how it was going. After sitting in the dark on my own for an hour, I must admit, I wasn’t really expecting visitors and got quite the fright. As he entered the scene, his torch left a light trail which was removed using the content aware tool
  • Curves layer for the sky to brighten the sky up and emphasize the stars
  • Curves layer for the ground by pumping up the shadows and bringing as much detail as possible
  • Subtle hue and saturation change to the sky
  • Selective brightening of the pilons using the dodge tool
  • Silver Efex Pro Contrast adjustment layer at a mid opacity to introduce a dynamic contrast to the image

Below shows the final image with the layers combined and edits made. In hindsight I I should have stayed around for another hour but after being up for sunrise, shooting all day and sunset, I was wrecked and ready for a warm bed.

The final image - Star trails at Wye River. More photos from this trip can be seen in my Great Ocean Road post.
The final image – Star trails at Wye River. More photos from this trip can be seen in my Great Ocean Road post

Hope you enjoyed this post in my Before and After series.

Cheers,

– Alex

Posted on 8 Comments

Weekend Trip down the Great Ocean Road

the great ocean road

Enroute to Wye River

Exploring the Great Ocean Road

After living in Melbourne for almost 3 years it didn’t feel right that I hadn’t been down to the Great Ocean Road since moving over. Hyped for its stunning coast line and beautiful waterfalls I had been itching to get down there and take some photos. After planning it for a while now, I finally made my way down to the Great Ocean Road and the Great Otways National Park headed towards Wye River with some friends and it did not disappoint.

As much as I love living in inner city Melbourne, I do miss being able to jump in the car and get to great coastline within 30-45 minutes like I would previously when living in Hobart and fire off some photos. So whenever an opportunity arises to get out and photograph some of Victoria’s coastline I’m always eager to go. A while ago now two friends and I decided to plan for a weekend trip down to the area for a lazy weekend and photography.

Jan Juc

Our photography route down the Great Ocean Road with a detour via Jan Juc and the Great Otways National Park

We decided to leave after work on Friday night and Melbourne being Melbourne quickly got caught in peak hour traffic. Rather than let the night go to waste we took a little detour to get some photos of the sunset as we made our way down. A quick look on Google Maps and we settled on Jan Juc. I’m pretty sure the decision was made on name alone. But luckily for us, the beach didn’t disappoint and was topped off with a stunning sunset.

The first photo was captured with a set up of the Canon 5D Mark II, Canon 17-40, tripod, B+W 110 10 stop filter and a .9 Cokin Z-Pro neutral density filter to darken the sky. One downside to using the Cokin graduated filters (other than the slight colour cast) is that you have to be careful where you position the filter. For this shot I positioned the filter on an angle (think 10pm on a clock) to have the filter coming down from the corner. This avoided the cliffs being gradually darkened which would of occured if placed at the 12 oclock position and going directly from top to bottom. For this reason graduated neutral density filters while great, definitely have their short comings and something you may want to consider if looking to purchase some.

Jan Juc Sunset
Sunset at Jan Juc (5 minute long exposure)
Ronnie Ling
Ronnie shooting at Jan Juc (Taken with my Fujifilm X100)
You have to kill time waiting for the sunset somehow right?

Wye River

As we continued down further we eventually made our way to Wye River a little later than originally planned. Wye River is a quiet little town situated along the Great Ocean Road that’s less touristy and more relaxed. I much prefer it over Apollo Bay which is often swamped with tourists.

Wye River has a stunning beach, pub, cafe and makes a great spot to situate yourself for exploring the rest of the Great Ocean Road. Our plan for the weekend was to shoot some seascapes around the area and explore inland with a trip to the Great Otway National Park which is home to Beauchamp Falls and Hopetoun Falls. Both waterfalls I had been wanting to get to for sometime now but being around 3 hours from Melbourne are a little too far for a day trip.

Wye River Sunset
Dusk at Wye River
DSCF0171
Jon capturing the sunset at Wye River
Wye River
Sunrise reflections at Wye River (3 minute long exposure)
Cold feet at Hopetoun Falls

The Great Otways National Park

After waking up early to shoot the sunrise at Wye River, we decided to grab a coffee and make our way more inland towards Hopetoun Falls and Beauchamp Falls. I had seen the two locations photographed many times before so I was keen to get down there and photograph them myself.

It was a cloudy morning as wet set off from Wye River but unfortunately on arrival to the Great Otway National Park, the sun began to slowly rise through the clouds and create patchy light over the waterfalls. While not ideal, I find if you are shooting with patchy sunlight that shooting slightly under exposed is a great way to avoid over exposure and provide you with a more even exposure. For some photos where there was patchy sun light in the photograph, I used the adjustment brush within Lightroom with the highlights and exposure decreased slightly and painted over the sun lit areas. It works well to create a more evenly lit scene. Once again, not ideal and I’d much prefer to be shooting in overlight conditions where the light is even but you have to make the most of what you’re given on the day right?

A while ago now I put together an article on waterfall photography. If you haven’t shot waterfalls before and looking to get started you may want to give it a read to get started.  It’s nothing fancy but just goes through the basics on how I photograph waterfalls with some examples of shutter speed and some basic tips.

Hopetoun Falls - Alex Wise
Hopetoun Falls (2.5 sec long exposure)
IMG_9100
Jon and Ronnie photographing Hopetoun Falls


Conditions were patchy at Hopetoun Falls with some harsh sunlight at times. It wasn't ideal but lucky for us the sun made way at times allowing for some photos
Conditions were patchy at Hopetoun Falls with some harsh sunlight at times. It wasn’t ideal but lucky for us the sun made way at times allowing for some photos
Hopetoun Falls (2 sec long exposure)
Beauchamp Falls
Beauchamp Falls (3.2 sec long exposure)
Fauna of Hopetoun Falls


Beauchamp Falls from the look out

Three ugly mugs

Doing my best to avoid the sun with this stream photo of Hopetoun Falls

Star Trails at Wye River

As part of getting down to Wye River we were also keen to shoot some star trails (a plan that was always pending what the weather had in store for us). Lucky for us, the weather and conditions were perfect for star trail photography. Generally star trails are best photographed around the new moon of every month. While not exactly the day of the new moon, our time at Wye River was a few days after the new moon (this sounds like a Twilight novel or something…) and the sky was clear which created great conditions for star trail photography.

I must admit, star trail photography is something I struggle with. I’m not sure whether it’s the impatience of waiting around for the exposure to complete (in this case 90 minutes) or just the bashing around in the pitch black dark but this time I didn’t want to let past experiences deter me so I set up on blue hour near ruins of an old jetty at Wye River. The plan was to take 10 minute exposures at F5 at ISO 100. Through taking 9 exposures at 10 minutes I then opened them as layers in Photoshop and set the layer modes to ‘Lighten’ which combines all the images and only keeps the lightest part of the images.

In hindsight I wish I shot for another 90 minutes to capture more of the star trails but with episodes of The Newsroom running low on my Nexus 7 (great show by the way!) and sitting alone in the dark I decided to call it a night with this being the final result. The beach is situated below the Great Ocean Road which created ambient light over the rocks and pylons which worked quite well.

Wye River Star Trails
Star trails at Wye River (90 minute long exposure)

Thanks

Apologies for the Great Ocean Road and Great Otways National Park image overload!

If you’re ever down this way I’d recommend you make the trip down. Most flock down this way to see the 12 Apostles but I’d take your time driving down as there’s a lot more to see along the Great Ocean Road beyond the 12 Apostles. I do hope to photograph the 12 Apostles one day but for the moment other parts of the Great Ocean Road have me tempted to further explore.  Time to get another weekend organised I think…!

Hope you had a good weekend and thanks for reading.

– Alex

Posted on 20 Comments

Long Exposure Photography Ideas

long exposure night photography ideas

For a while now I’ve been putting together small articles about long exposure photography with a how to on waterfall photography and another on daytime long exposures. It’s one thing to learn technique but what good is it if you’re struggling for ideas on what to take photos of? This guide should help you with some ideas for long exposure photography. Some styles touched on include:

  • Traffic and night long exposure photography – Using traffic to your advantage with the best angles and time to take this style of photography
  • Waterfall long exposure photography – What to look out for when taking waterfall photographs. Little secrets to make yours stand out from the  rest
  • Star trail long exposure photography – Capture spirals of stars in the sky with these tips that will help your star trail photography
  • Sea long exposure photography – Takes a look at what things I look out for when taking seascape photographs and how to combine these various elements to create a great photograph
  • Bonus ideas that don’t fall into the above  – Did you know you can use a long exposure to make a busy location like a busy pedestrian crossing appear a ghost town?  This and other neat ideas are included in this section

This list of photo ideas isn’t a definitive list and only touches the surface of what’s possible through long exposures. I love that long exposures offer photographers the ability to transform a scene to how we normally view it.  People are always pushing the envelope and finding ways to use long exposures like this beautiful series from Jakob Wagner entitled Urban Zoom that captures long exposures of cities. During the exposure he zooms the camera to create beautiful streaks. Although not necessarily new, it’s been executed perfectly and a neat little trick that shows the possibilities of long exposure photography. Don’t forget to check out another post that includes a free neutral density chart that’s a must for any photographers bag.

What You Will Need

Rather than go into great detail of the various equipment you will need for long exposures, I’ll try keep this short and a rough guide on what equipment I recommend. It is by no means the only equipment you can use (other brands are more than fine) it’s just based on the brands I personally use. A few things that I would personally recommend include:

  • A good neutral density filter like the B+W 110 helps a lot for long exposure photography
    A good neutral density filter like the B+W 110 neutral density filter helps a lot for long exposure photography

    Canon 5D Mark III – This thing is a work horse, handling noise perfectly and compliments the 17-40 nicely with its weather sealing

  • Canon 17-40 – An ultra wide angle lens suits long exposure photography perfectly especially with its weather sealing
  • Manfrotto tripod – Essential to having your camera remain still and avoid any shake during the long exposure
  • B+W 110 neutral density filter – A strong neutral density filter is great to have in your kit as this will allow you to take long exposures (2-5 minutes) during the day
  • Intervalometer – These remote controls are great as they allow you to manually dial in the exposure time you want, program it to take an exposure every X seconds (great for timelapse) and are generally just great for long exposure photography. There’s cheaper Asian brands on the market which I’d also recommend searching for if you’re on a budget

As I mentioned this is by no means the essential equipment for long exposure. Use whatever is available to you financially. I’ve seen people take some great stuff even with an iPhone so it goes to show that you don’t necessarily always need great gear but it does help 😉

Traffic and Night Long Exposures

Tasman Bridge Long Exposure Night Photograph
One of my first long exposure night photos

Long exposure night photography is where my photography all started with this photo taken looking towards the Tasman Bridge in Tasmania. It’s what started it all for me and gave me the long exposure bug.

Some ideas and tips  for capturing long exposures of traffic:

  • Look for a high vantage point that will allow you to look down on the passing traffic (see the first photo below as an example)
  • Timing is key. Try to base your timing around peak hour traffic to get a consistent flow of traffic at all times. There’s nothing worse than standing around in the dark waiting for cars to come by. Instead if you’re shooting at peak hour you’ll never have any issues with waiting for cars to come through
  • If you can’t get a high vantage point, try get close to the action. Sometimes I find setting the tripod on the corner of a busy intersection and zooming in a little will create a sense that your camera is only centimeters away from the action

  • Experiment with varying exposures from long exposures so the traffic creates red and white lines to shorter exposures where you can almost make out the detail of the passing cars. Melbourne is quite iconic for its yellow taxi’s and trams. In the two images in the bottom left hand corner below I wanted to capture the movement of these in a long exposure but to avoid blurring them out completely I opted for a shorter long exposure
  • Aim to take your traffic long exposure photographs around sunset, sunrise or blue hour. Your aim is to photograph the tail or front lights of passing cars and it’s only obvious that this will be more around time when light is limited and cars will need their lights on. The bonus of this is that your camera will be able to obtain a long exposure without the need for neutral density filters and you will get some beautiful colour in the sky. My first traffic long exposure photo taken above was taken late at night so the sky is lost and a dull black. If i was to of shot this on sunset or blue hour I would of had a lovely sky against the traffic streaks. It’s little things like this that can make a photo
  • When scouting locations suitable for long exposures of passing traffic I’ll try to base it around major entry/exit points of a city. For the top two photographs below, both are major entry and exit points to Melbourne. It was important that I timed the photos for peak hour to ensure there was a steady flow of traffic to capture
Traffic Long Exposures

Waterfall Long Exposures

A while ago I put together an article that touches on what settings to use for waterfall photography. The article looks at how to shoot long exposures in daylight for waterfalls, demonstrates the effect shutter speed can have for waterfall photography and other little tips. That aside let’s look at some ideas for waterfall long exposure photography:

  • It doesn’t have to be just about big waterfalls. Sometimes streams that come further down from the main waterfall can create great composition points for you photo. Take the second photo on the top row for example, the main waterfall is a lot further up stream but the two rocks created a nice composition point for my photo
  • Look for little swirls of foam or water coming off the waterfall or further down stream. When shooting waterfalls I’ll try to keep an eye out for little pockets of water doing interesting things. Try to study them for a few seconds and imagine how they will look if you were to use a 3-5 second long exposure. To give you an idea what I mean, check out the bottom two photos on the third row where little lines of spray were flowing down off the waterfall and created an interesting effect in the long exposure. This adds a nice touch to your composition and makes it stand out a bit more from the rest
  • Get side on to the waterfall. Most people will generally shoot a waterfall looking directly front on. Why not try something different and go to the side? Just be warned though your lens will quickly accumulate spray from the waterfall if you’re not careful. It’s a matter of quickly planting the tripod, looking through and lining things up, firing the shot and moving the camera out of the spray. Rinse and repeat until you get a shot you’re happy with
  • Long exposures are great but make sure it’s not too long. Photographing long exposures of waterfalls looks great with its blurred water but be mindful that over-doing the exposure time can introduce blur to other parts of the image where you may not want it. One example of this is the blur a long exposure can introduce to the foliage area of a photo. Instead of the foliage appearing sharp and crisp, it instead looks blurry and dull. Try to be mindful that 5 second and onward exposures is where this starts to become an issue
Waterfall Long Exposure Ideas

Star Trail Long Exposures

Admittedly star trail photography is something I’m still very much learning about but here’s some things that I’ve learnt from my experience of standing out in the cold for hours on end.

  • Get out of the city and head out for a drive somewhere that’s not near surrounding housing or industry. This will allow you to get a better view of the stars due to less ambient light from houses and industry. 
  • Star trails are best photographed on a moonless evening or when the moon is not above the horizon. When the moon is at it’s peak, it creates too much light in the sky and lightens the stars.
  • Use a torch to focus on your composition element. For the shot below I shined a torch on the tree below, focused and then turned the camera into manual focus. Don’t fall victim to my common mistake of leaving the camera in auto focus and have the camera try to find focus again after I’ve preset the exposure. Alternatively you can set the camera into manual focus and set the focus to infinity. This technique works best with an ultra wide angle lens
  • Capture the stars spiraling in the sky as the earth naturally rotates. An example of this is the shot below which is achieved by using a long exposure (30 minutes) facing the northern direction (assuming you’re in the northern hemisphere) that captured the stars moving and appearing as concentric rings. What’s that you ask? To break it down a little… As you set up the camera on the tripod facing northerly (pretending you’re in the northern hemisphere here for a moment) and you fire your long exposure, the camera captures the stars spiraling in a circle due to the earth rotating on a north-south axis. It’s a little confusing and I must confess something I’m still very much learning but don’t be put off. It’s not as daunting as it sounds
  • Bring a long a torch or head light for some light painting. Being out of the city and in a dark environment it might be hard to see composition so why not use your head torch to light up your composition midway through the exposure. I used this technique on the trees in the shot below to brighten them during the exposure

Seascape Long Exposures

Star Trails
Star Trails

Seascapes offer so much potential for photographers looking to capture long exposures as there’s so many changing elements which come alive with a long exposure. One of my first articles when starting this blog was about daytime long exposures. I love being by the sea and one of my favourite long exposure photos I’ve taken is this photo at Howden where the long exposure created a lovely blur on the clouds and captured the reflections perfectly. Some of my favourite ideas and tips for seascape long exposure photography include:

  • Depending on the location, clifftops make a great vantage point for long exposure photographs especially if there’s a wild sea with waves constantly crashing.
  • Not much water movement? Look up and take in the sky. Sometimes I’ll arrive at a scene and there won’t be much water movement but the clouds are a mix of overcast and fine which create a nice patchy cloud coverage. I find this type of coverage great as when there’s a bit of breeze about (which there normally is if shooting by the sea) they create a blur to add an extra element to your composition.  Check out the two photos on the second row to give you an idea of what I mean. Both scenes had limited water movement but lots of patchy cloud to balance out the shot in the long exposure
  • Keep an eye out for things with that have aged over time. Some of my favourites include old jetties that are still in use and even better, ruins from jetties and other things that poke out of the water. They create a great composition element through the rough textures and leading lines they can sometimes create. Generally I’ll scout around coastal towns or areas popular for fishing as there’s bound to be some old jetties or boat launch ramps that were once used for fishing. Unfortunately these seem to be slowly getting pulled down over time so get in while you can
  • Lookouts make a great vantage point for your composition. Tourist lookouts offer a great view of a location making them a great spot to setup your camera for a long exposure.  Try to be courteous of tourists and others coming to admire the view by not getting in other people’s way too much or setup elevated out of the way
Seascape photography ideas


Finding Beauty in the Unexpected

One thing I love about long exposure photography is that the possibilities are endless. We could go on all day about long exposure photography ideas but here’s a couple more of my favourite ideas not listed above:

  • Patchy skies create a great composition element. Wandering around Hobart a few years ago I snapped the second photo on the top row below.  It’s not a great shot by any means but the clouds blurred from a long exposure against the old architecture of Hobart add a diffferent touch to your average photo
  • Dial your camera into a long exposure and stick your camera out the window to capture a sense of speed
  • Grab some sparklers or a torch and run around in front of the camera for some long exposure night photography. This style of light painting works best by grabbing a torch and placing some coloured cellophane or even coloured cd cases over the front of the torch. It’s a neat little trick but has nothing on the beautiful work of Denis Smith with his Ball of Light project. A must for anyone looking for light painting inspiration
  • Use a long exposure to exaggerate fog of a scene. I hate to admit this but the forth row photo beneath a bridge on a foggy morning there actually wasn’t that much fog as the photo leads you to believe. By using a long exposure I was able to capture the fog as it moved down the river which exaggerated the fog in the photo. Although be mindful that using a long exposure during foggy conditions can fog up your camera lens if you’re not careful. Try to check your  lens often throughout the shoot to ensure you don’t get home with a card full of unusable images
  • Remove people from a busy scene with a long exposure. Living in a busy city (Melbourne, Australia) I’ll arrive at a scene to take sunset photos (like this one at St Kilda Pier) and it will be crowded with tourists.  Rather than take a photo with people cluttered all through my photo I’ll set the camera up for a long exposure. It works perfectly and I’m able to take a photo of a scene with no people getting in my shot. Just be mindful that you need quite a long exposure for this effect to work well and also for people not to stand and stop too long in your frame. This post-apocalyptic photo series by Lucie & Simon captures major cities appear as ghost towns by using this effect
Playing around with other long exposure ideas

What’s your Favourite Long Exposure Subject?

As I said in the introduction to this post that the possibilities of taking long exposure photographs are endless. What do you enjoy taking photos of using long exposure that I’ve missed?

long exposure chart
Don’t forget to get your free long exposure chart. A must for any photographer’s bag

If you found this article useful I’d be super grateful if you shared it via your favourite social networks to others who might be also interested in the topic. Feel free to follow me on Facebook, Twitter or Google+ for future posts like this. You might also be interested in a previous post called the magic cloth technique that is a very effective and easy DIY neutral density filter trick.

Have any questions or comments about the article? Feel free to drop an email as I’m always happy to help 🙂

If you enjoyed this article, be sure to give my recent article on what equipment is recommended for landscape photography a read.

Thanks for reading and i hope these long exposure photography ideas have been of help!

– Alex