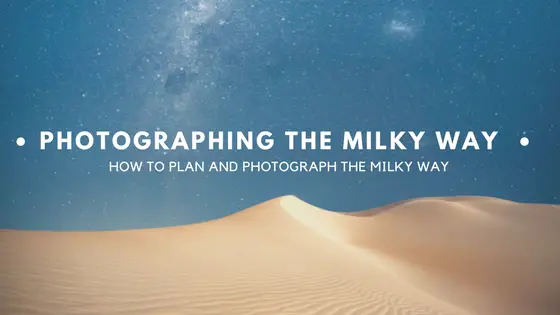
After recently moving away from the Canon 5D Mark II to a Sony A7RII, I was itching to get out and make the most of my new purchase by giving the low light performance a play with some astro photography.
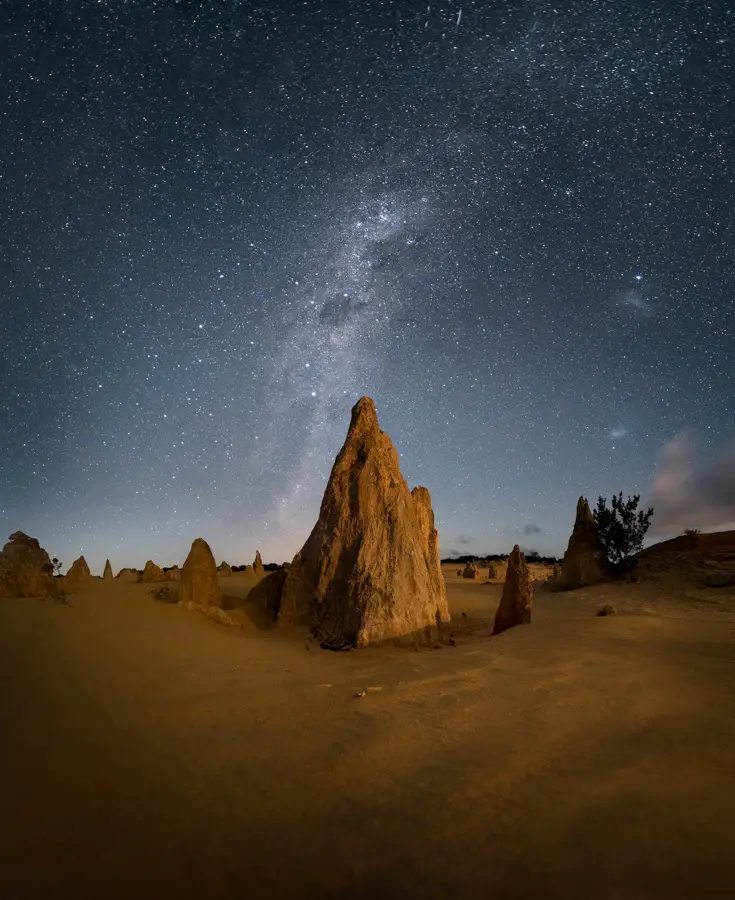
Milky way over The Pinnacles, Western Australia
Milky way photography is something that has evaded me over the years due to the Canon struggling in low light conditions (to put it politely). With the purchase of the A7RII, it was now finally time that I could get out there and shoot in low light conditions without having an image of nasty noise!
But there was one slight problem… I knew nothing about the milky way and spent too much time admiring other people’s photos to take a step back and learn about how to photograph it myself!
Things to consider when planning a milky way shoot
For the purpose of this post, I’m not going to go into great depths on how to use PhotoPills to plan a Milky Way shoot as I think other people have covered this in much better detail than I can. This tutorial by the PhotoPills team is a great starter.
There’s also some other great tools out there for planning a milky way shoot such as Stellarium and Sun Surveyor. Like anything, it comes down to personal preference and finding something that works best for you. For me, photo pills is easy to use which is good for a simpleton like me 😉
Sky tracking mounts are becoming a popular way to reduce the noise in milky way shots. A popular mount is the SkyWatcher mount which rotates to offset the movement of the night sky which in turn allows you to capture longer exposures at a smaller aperture. By doing so this allows you to photograph at a lower ISO which in turn means less noise.
This post will look to cover some of the questions I had as I was learning more about Astro photography. Sometimes it was simple things like
What is the milky way season?
How do I find a dark sky?
When is the best time to photograph the milky way?
Can you photograph the milky way while the moon is up?
How do I check the cloud forecast to ensure clear skies?
What’s the best camera settings for photographing the milky way?
Let’s get started.
When is the best time to photograph the milky way?
Northern or Southern Hemisphere?
Depending on where you are in the world, the milky way is only visible at certain parts of the year. Sure, you might be able to see some parts of the milky way but galactic centre and other parts may be out of view.
The reason that the milky way is only visible at certain parts of the year is largely due to the curvature and movement of the earth. This means for those in the northern hemisphere, your best viewing times of the milky way is between the months of November to February. For those in the southern hemisphere, is between February to October.
This is what people are referring to when they refer to the milky way season starting or finishing.
Is the milky way visible straight after sunset?
Can I just take photos once blue hour ends? Well sort of but not quite.
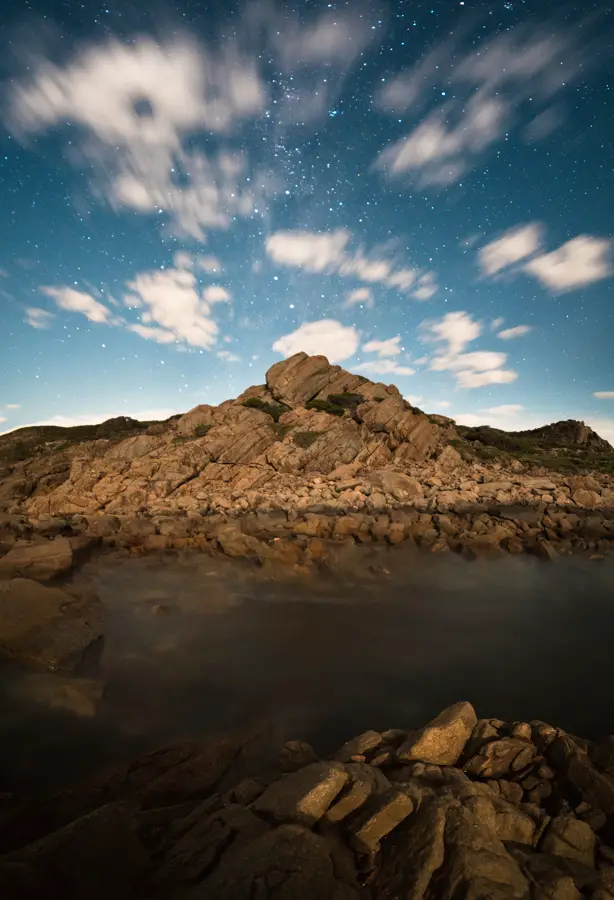
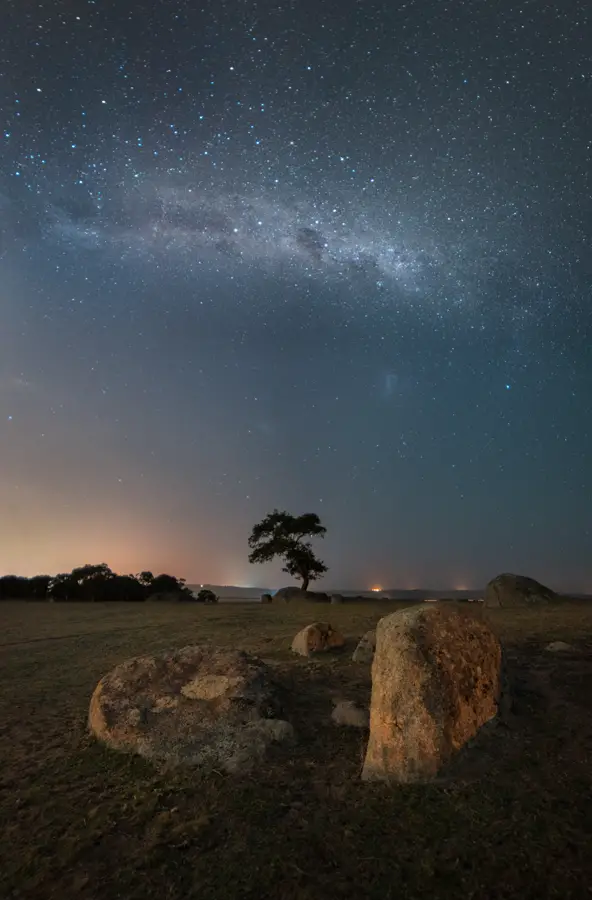
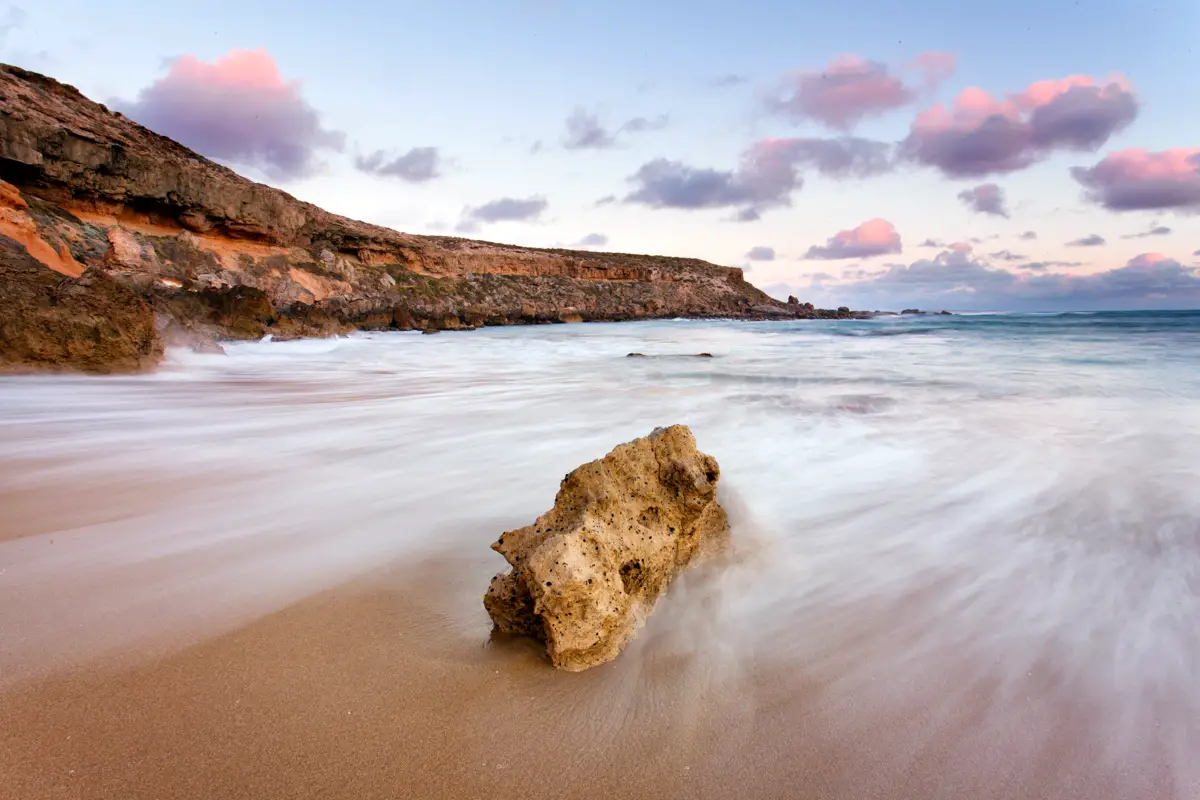
Watching the milky way rise in Lancelin, Western Australia
Like the moon and sun, the milky way begins rising in the late evening and then starts setting in the early morning. The best time to photograph the milky way and all its galactic core glory is once it has fully risen. Depending on the time of the year, this can sometimes be at crazy hours of 3 am in the morning or more comfortable times at 10:30 pm in the evening.
The reason why we wait for the milky raise to fully rise is due to the milky way being huge (100,000 light years in fact! Thanks Google…). If you try photograph the Milky Way while it is still rising, you may find some of the milky way will be cut off and sitting below the horizon. With this in mind, you can still get out there and photograph the Milky Way as its rising but you may find some of it is hidden behind the horizon until it finishes rising.
Why should I care about what phase the moon is in?
Have you ever looked up at the night sky and thought how bright the stars looked compared to other times? This often comes down to two factors… Light pollution and the moon phase.
The first factor that can influence the visibility of the night sky is based on how far you are away from light pollution when looking at the sky. Generally you will find the best skies are found in locations far away from nearby cities. This is due to the amount of light pollution which a city generates which in turn reduces your where you are far away from the light pollution generated.
The second factor which influences how dark the sky will be also comes down to which particular phase the moon is in.
Generally the most optimal time to photograph the milky way is when the moon is in the ‘new moon’ phase. During this time, the moon emits little to no light and increases your chances of seeing the milky way in all its glory. But to go one step further, I’d also recommend planning your shoot when the moon has either risen or set to increase your visibility of the milkyway. Using an app like PhotoPills will give you all this information. Alternatively, websites such as Moon Giant provide a calendar view of the calendar for a particular day of the month.
Finding a location with dark skies
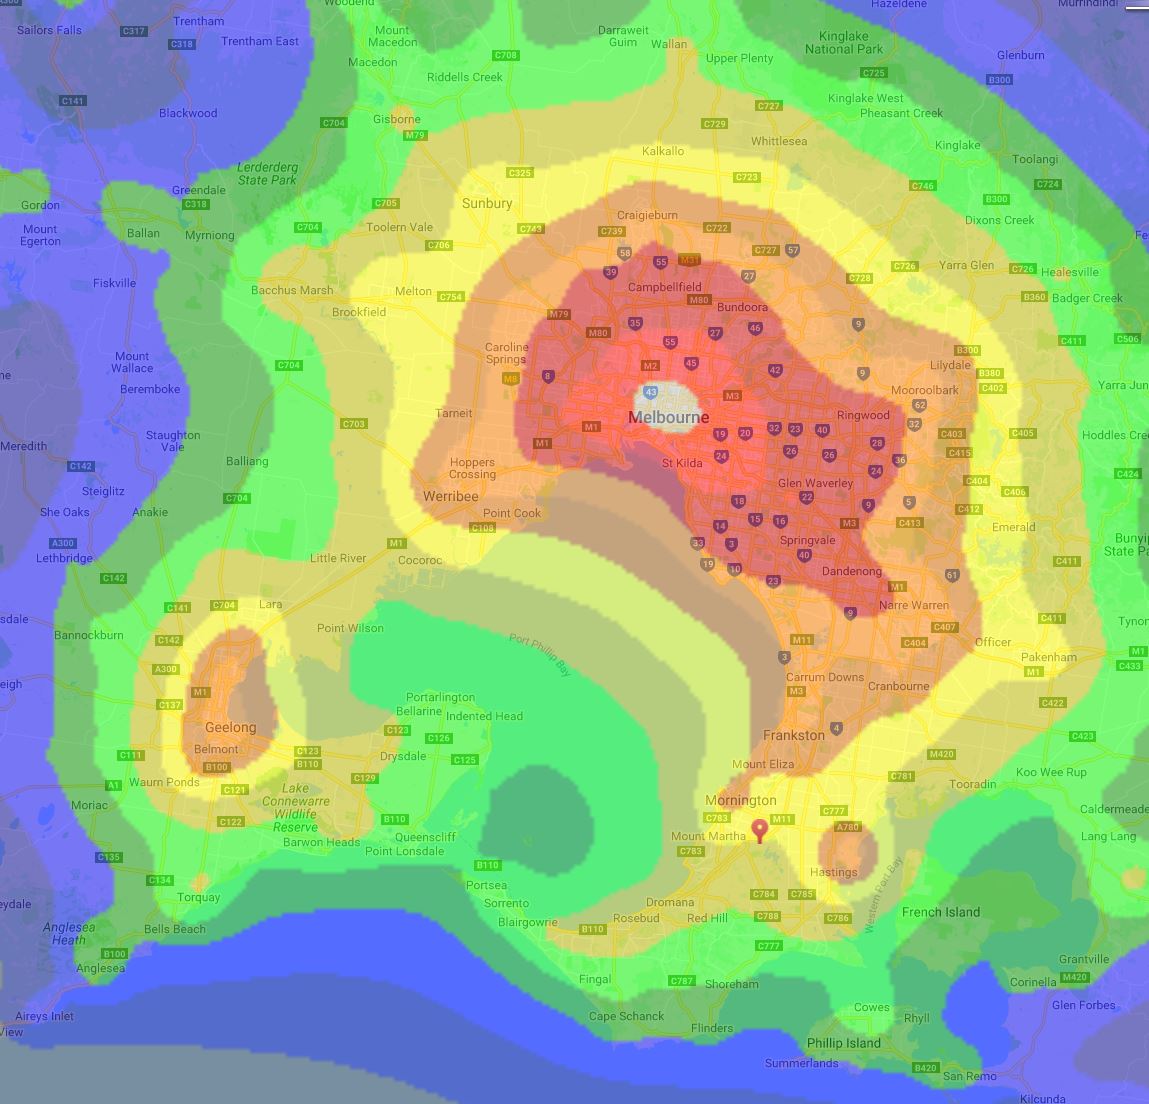
Light pollution over Melbourne, Australia
Depending on where you live, one of the challenges you will have when it comes to photographing the Milky Way is finding a location that isn’t filled with light pollution from a nearby city or town.
Luckily there are tools out there to help with understanding what the level of light pollution is at a specific location. One of my favourites is Dark Site Finder which provides an overlay over Google Maps rating the light pollution in the area from Dark to Bright.
Please note that the data used for Dark Site Finder is 10~ years old so the accuracy for some locations will vary.
But what about photographing a Milky Way under a light polluted sky? One of my favourites is this stunning photo captured of the Sydney Opera House during White Night in 2017 shows that it is more than possible to get a photograph of the Milky Way under a light polluted sky.
How do I check the cloud forecast for the night?
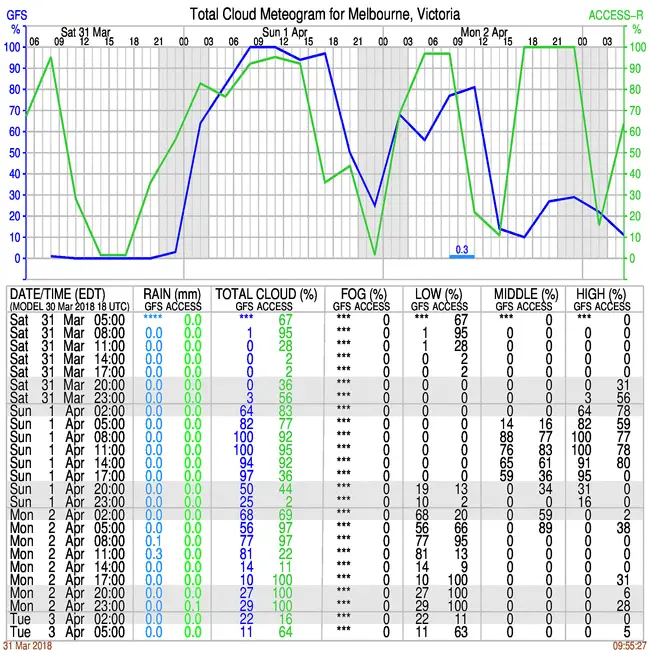
What it looks like when there’s a little bit of cloud. You can only imagine what it’s like when there’s more…
Living in inner-city Melbourne where the urban sprawl of the the city feels like it never ends, I need to venture far if I want to find nice dark skies mentioned in the previous section. As I’m sometimes driving 1-2 hours to get to a location with dark skies, I want to ensure that the location is clear and I’m not wasting my time.
Luckily there’s some great tools out there to assist with knowing what the cloud coverage is like at a specific location. Here in Australia, one of my favourite tools is Cloud Free Night. Using the below screenshot as an example, Cloud Free Night gives me a 3 day cloud forecast for the low, mid and high cloud coverage with also the forecast fog cover. When you only have a limited amount of time to photograph the milky way, cloud forecast tools are a great way to validate that your potentially long road trip and stumbling around in the dark isn’t going to be a waste of time.
Tools like Cloud Free Night are super handy for looking at what the low, mid and high level clouds are doing over 24-48 hours
For those not in Australia there’s also Clear Dark Sky which provides similar cloud forecasts.
Why do I have to wait until the time PhotoPills recommends?
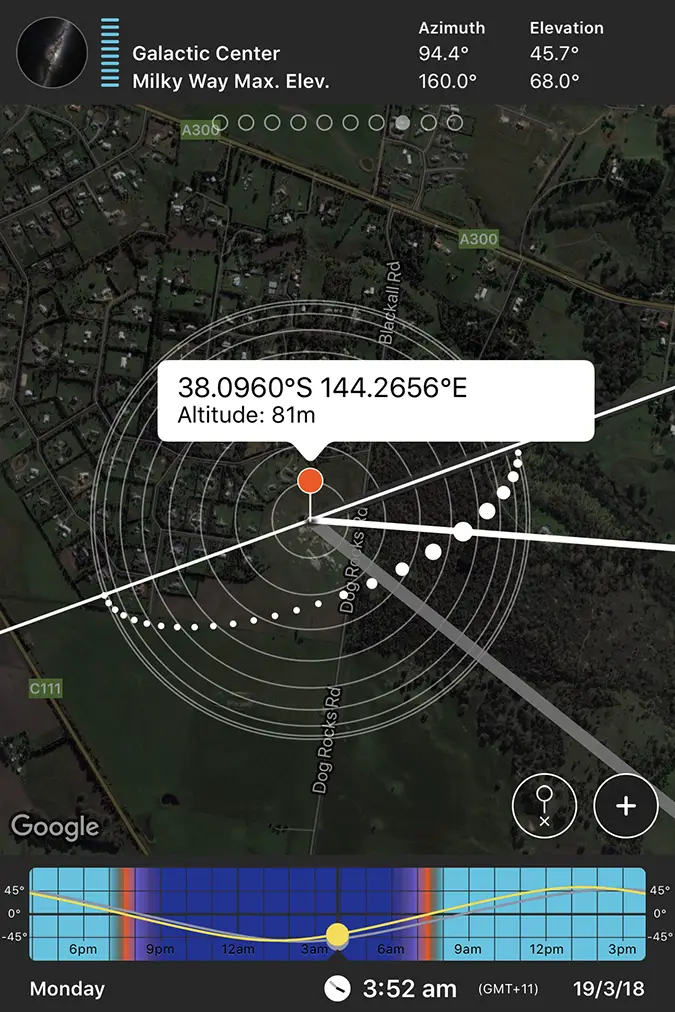
Screenshot from Photo Pills showing me the best time to photograph the milky way at Dog Rocks, Victoria as seen below
PhotoPills (and other tools) recommend a window of time to photographing the galactic core of the Milky Way. As the moon is a light source (and quite a strong one depending on where it’s at in its cycle), this brightens the sky to the point where it makes capturing the galactic core of the milky way difficult. The window of time recommended by PhotoPills is essentially when the moon has finished setting and the sky will be at its darkest. This window of time becomes the optimal time to photographing the galactic core.
Using the screenshot to the right as an example, I’m able to drop a pin to place where I will be taking a photo from which then allows me to see where the milky way will be rising from (the grey line) and where it will setting (the black line). Photo Pills is also recommending the best time of this month to photograph the milky way which is indicated by the full bars at the top of the screenshot.
Being able to see where the milky way will rise and set is super handy especially when you have a composition in mind (like a tree in this case) but are unsure where the milky way will be sitting in the sky. By using an app like Photo Pills, I’m able to cycle through the various times of the year until I find a time when the milky way is sitting in a position that works well for my composition.
I used Photo Pills to plan a recent trip to Dog Rocks, Victoria. The tool allowed me to plan exactly when the milky way would be sitting above the tree (as shown in the previous thumbnail).
Can you photograph the milky way when the moon is still setting?
Definitely!
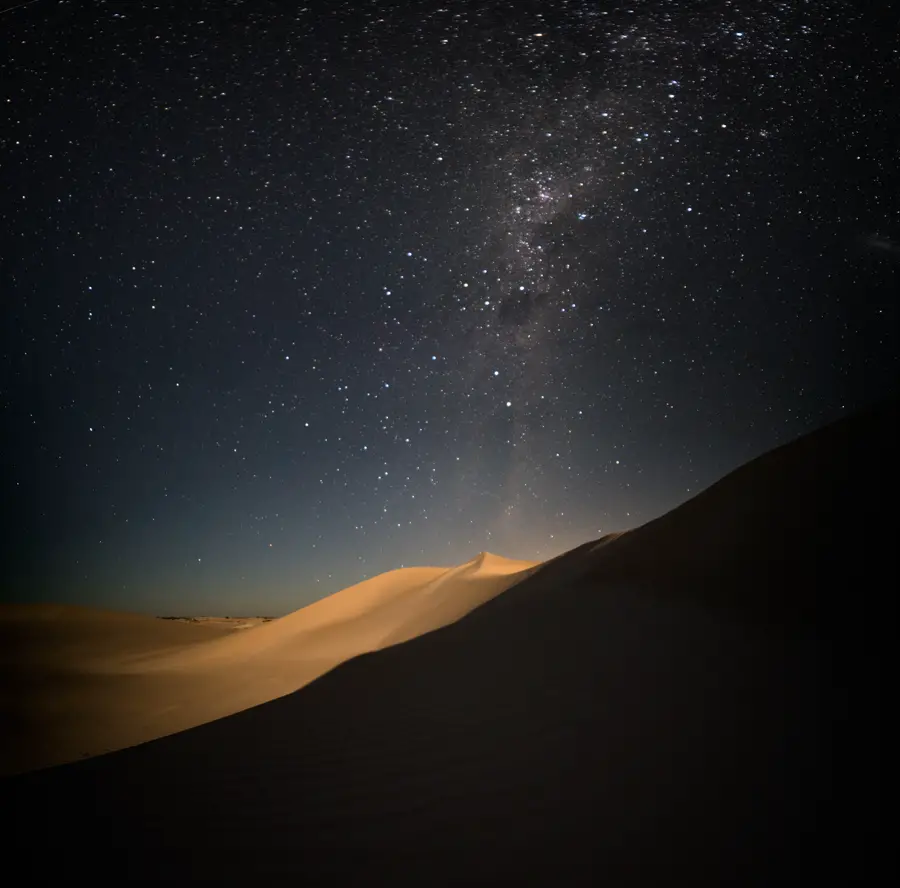
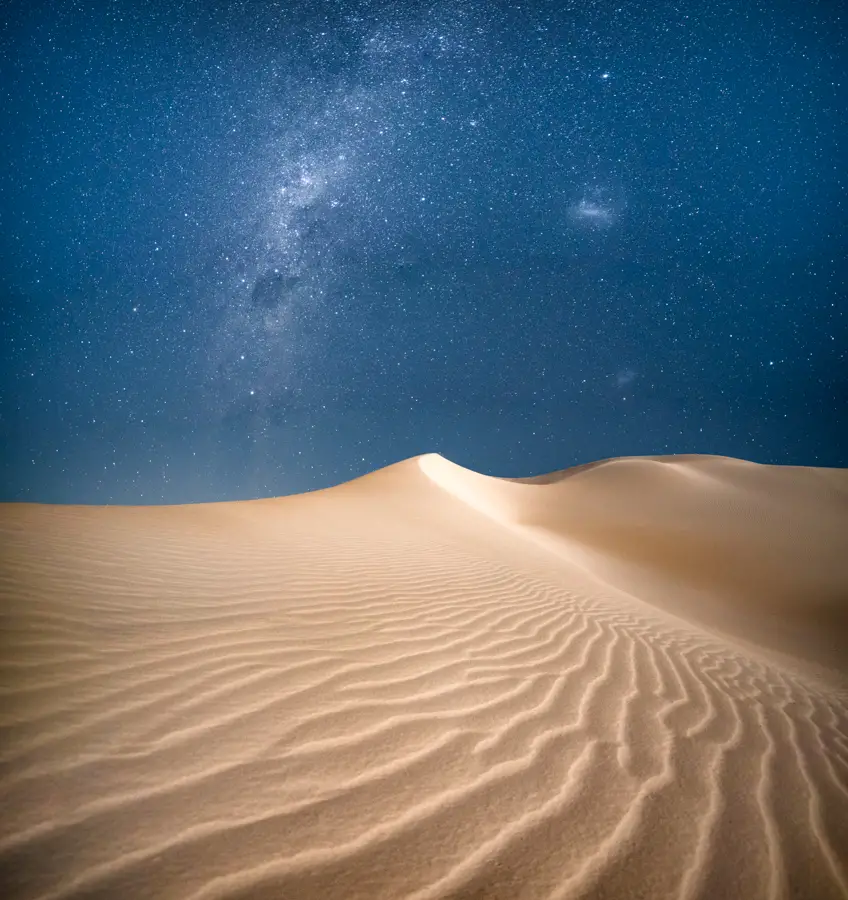
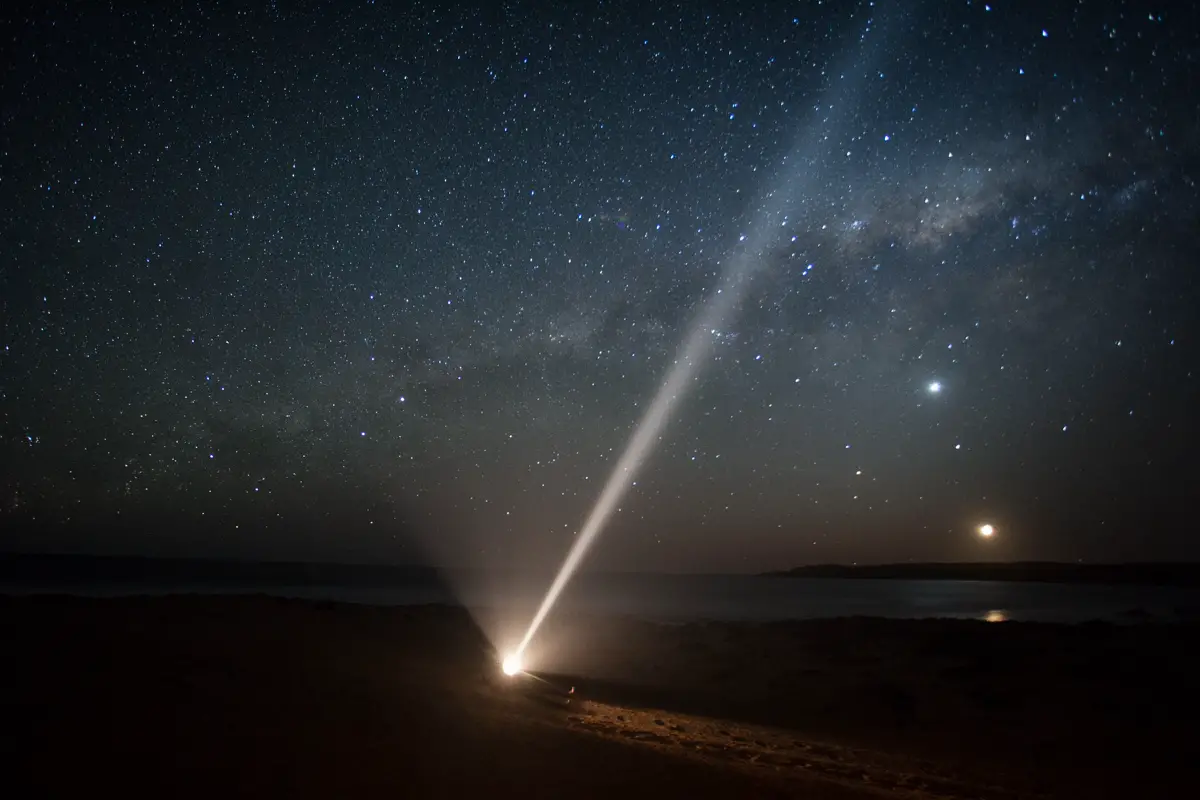
The milky way rising above moonlit dunes in Western Australia
In fact, I actually prefer photographing while the moon is still up as you have the moon acting as a light source helping illuminate your foreground.
If you are planning to shoot while the moon is still setting, I’d recommend getting out while the moon is around 0-50% of its cycle. Any more and it becomes too bright. The milky way purists will call out that you’re not getting the milky way in all its glory but the trade off is worth it if you ask me.
What are the best camera settings for photographing the milky way?
Use a camera with good low light performance – Photographing in dark conditions means you will need to take your photos with a high ISO (generally 3200-4000 but this can vary). With older cameras especially, the noise at this ISO range can be on the higher side compared to new cameras which have much lower noise when photographing at a high ISO.
Use a sturdy tripod – Shooting in low light conditions where your exposure will be around the 20 second mark, it helps to have a sturdy tripod to support your camera.
Use a fast lens – Ideally shoot with a lens around f1.4 to f4 depending on your budget. Anything higher (f4+) may make it difficult to capture the dynamic range of the milky way.
Use a mid-range ISO (3200) – Anything lower and you may have trouble capturing the milky way and anything higher may introduce too much noise depending on your camera body.
Compose with the live view – One of the challenges of photographing the milky way is trying to focus your camera. My favourite trick is to put the camera into live view and focus on to the brightest star. If that fails another option is to focus your lens to infinity.
Find a shutter speed that captures enough light without introducing blur – One trick that’s handy for shooting the milky way is knowing the 500 rule which helps with calculating the longest exposure (in seconds) before the stars begin to turn into star trails. Using this technique, you divide 500 by the focal length of your lens. As an example if you’re shooting with a 20mm lens (500/20), this would result in a shutter speed of 25 seconds.
Questions?
If you have any questions or require any clarification about the points made in this blog post, please don’t hesitate to reach out via the contact page.
What draws me into landscape photography is the solitary moments where it is just you, nature and for the most part, silence. Photography for me has never been about taking photos to share on social media but the journey in getting there. Those long trips listening to music, the silence and the time to think. It takes away the pressure of taking ‘nice photos’ and shifts the focus to enjoying the surroundings. With this in mind, when the golden light hit, I’m not madly scrambling around with my stop watch counting down until the light disappears but just taking it in and enjoying it.
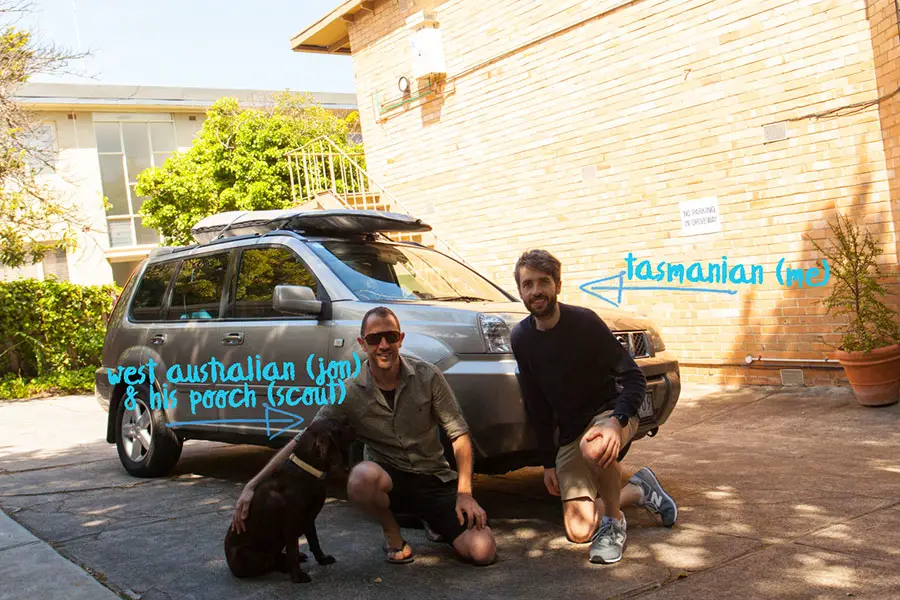
As much as I enjoy the quiet times of shooting solo, I also enjoy getting out there with others because really, who enjoys the solo long walk back to your car or tent in dark? Not this guy…
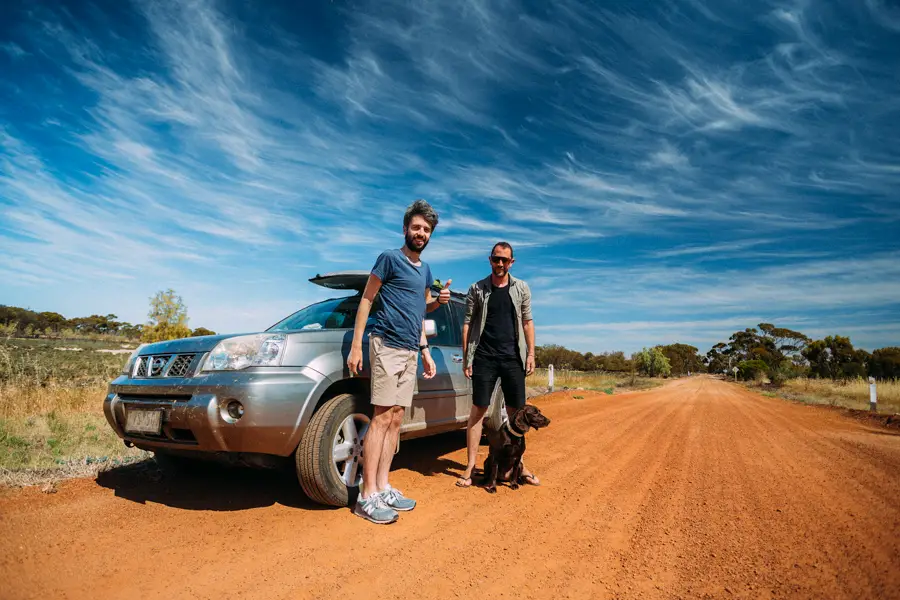
Through photography I’ve been fortunate to meet people from all walks of life who I’ve learnt from, exchanged laughs with and who I now call good friends. One of those people is Jon Sander who like me, moved from Perth and set up a base in Melbourne many moons ago. The great thing about meeting people who aren’t born and bred in Melbourne is that they don’t take Melbourne for granted. They come to Melbourne craving what their home can’t provide. For me coming from Tasmania, it wasn’t the nature calling but Melbourne had me hooked with its concrete jungle and constant flurry of people and traffic. Shooting with Jon over the years has been fun as we’ve viewed Melbourne through a different lens (terrible pun) and tried to avoid shooting just the popular locations.
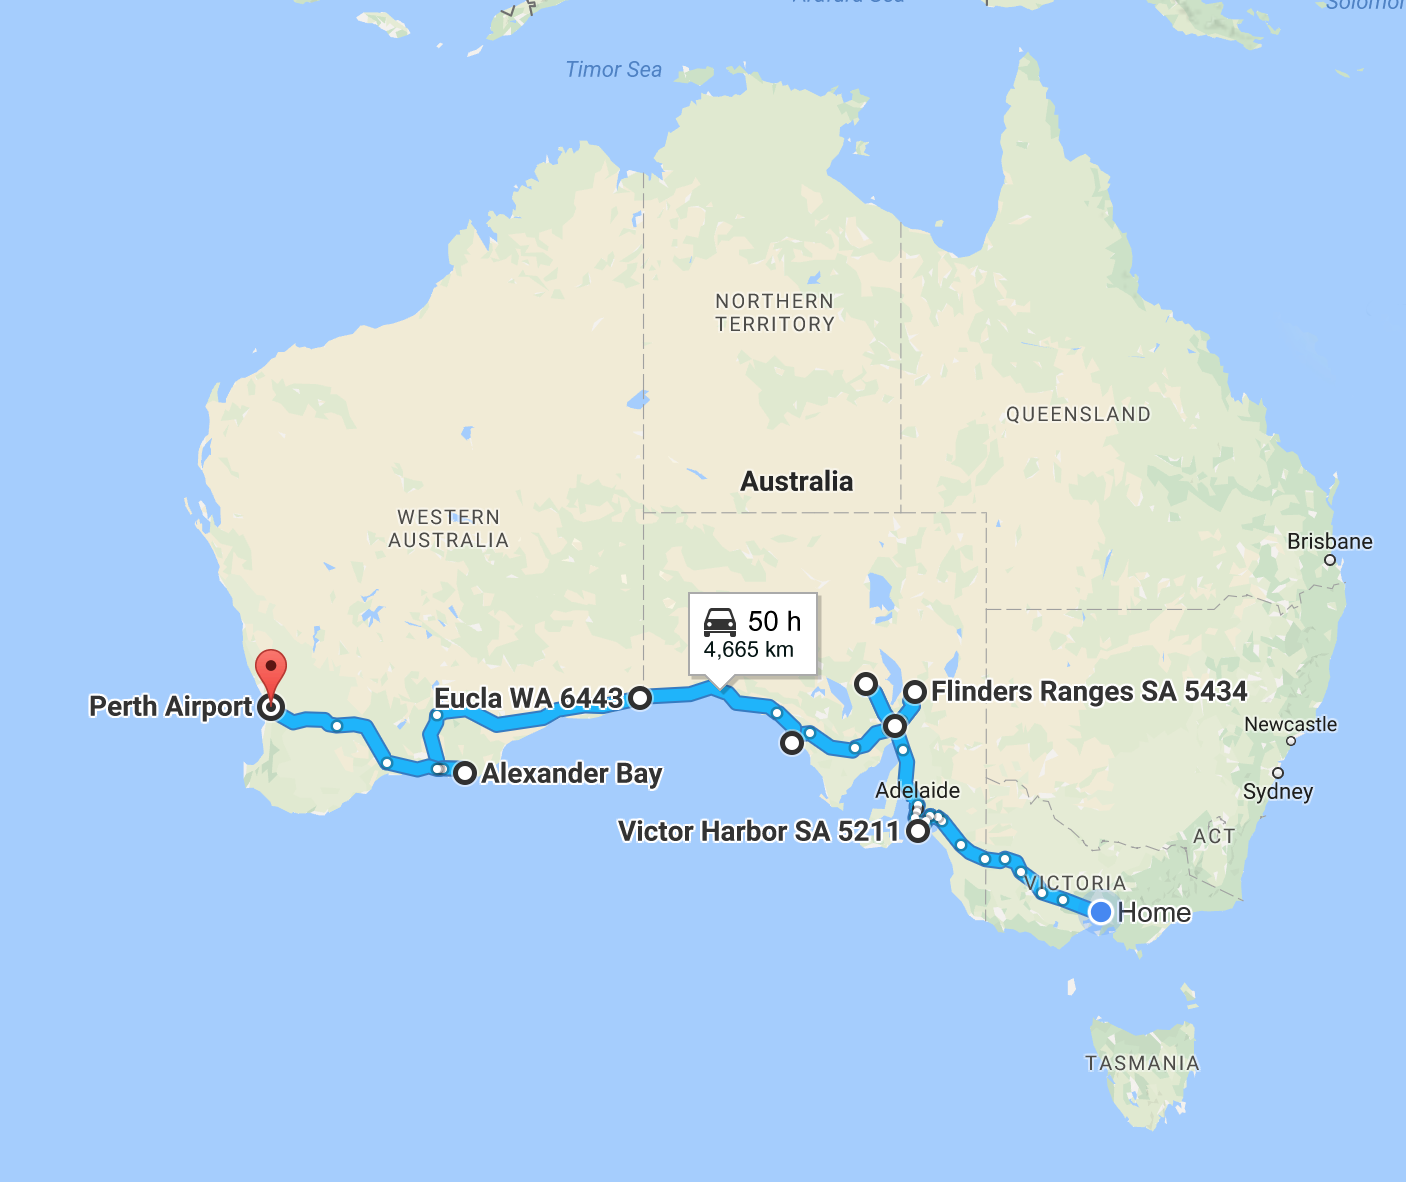
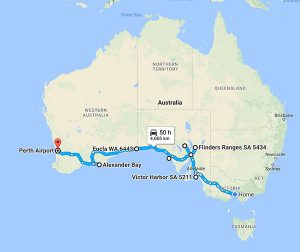
Planning a trip from Melbourne to Perth
Jon had flagged for a while that he was looking to move back to Perth towards the end of 2016 so we were keen to have one epic shoot before he moved back. So why not a roadtrip from Melbourne to Perth? With both having limited time to plan, we decided to take a gamble and base our itinerary on what looked good on Google Earth. We didn’t venture on Instagram, 500px or other social media’s to source the popular places to visit along the Nullabor. Why? Becuase, when going somewhere new, it’s nice to go in with a fresh set of eyes. If it looked good on Google Earth, we were going there. Was every spot we chose picture perfect for photos? I’ll let you be the judge. Was it a great adventure? Yes!
Melbourne to Perth Itinerary
Having shot a lot of Victoria, we umm’d and ahh’d whether to make a stop by the Great Ocean Road or the Grampians on the way out of Victoria. Knowing that both can be done on a weekend trip we opted to make a crossing straight into South Australia and visit some less travelled
Our ‘little trip’ from Melbourne to Perth
Looking to spend more time in South Australia, our itinerary wasn’t set in stone with the idea being that we could change locations if they didn’t quite work out (or alternatively if we wanted to spend longer somewhere).
Eventually our final itinerary looked like this with some epic days of driving where locations didn’t work quite well. Eucla to Alexander Bay was a last minute decision which meant we arrived around 12am in the morning. But where we did do a lot of driving, it also created some fat where we could enjoy relaxing days at Sceale Bay and Alexander Bay.
Day 1 – Melbourne to Victor Harbour, SA (8hr – 746km)
Day 2 – Victor Harbour, SA to Flinders Ranges, SA (6.5hr – 547km)
Day 3 – Flinders Ranges, SA to Pimba, SA (4hr – 343km)
Day 4 – Pimba, SA to Sceale Bay, SA (6hr – 588km)
Day 5 – Sceale Bay
Day 6 – Sceale Bay, SA to Eucla, WA (6.5hr – 629km)
Day 7 – Eucla, WA to Alexander Bay WA (10hr – 1,000km)
Day 8 – Alexander Bay, WA
Day 9 – Alexander Bay, WA to Perth (8.3hr – 805km)
It’s funny, when I was telling people about the trip, most looked at me and told me how terribly boring it would be. Not at all. In fact, I would probably do it again but first I need to convince the other half on the idea of buying a camper van 😉
The ever spacious Hotel Wise
If we were to do the trip again, I would add another day or two to the trip and spend some more time in Sceale Bay and Alexander Bay. We didn’t build enough fat in on the last day so it was a bit of a mad scramble to shoot the sunrise at 5am and make it to the airport before my 5pm flight. Luckily Western Australians haven’t jumped on the bandwagon for daylight savings which meant we were up and out of Alexander Bay by 7.
What to take?
Planning for a drive like this obviously depends on person to person and how they are planning to tackle it, especially when it comes to everyday comforts.
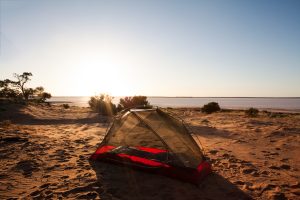
For us, we had no qualms with camping for nearly all of the trip, which meant we had to pack more food, cooking equipment, warm clothes and enough batteries to power a small town, but in a way this worked in our favour as we were equipped to go further off the beaten track. For some locations like the salt flats out from Pimba, SA or Alexander Bay, WA, accommodation was non existent. If we had been staying in accommodation we probably wouldn’t have ventured as far.
We took standard items like tents, a table, cooker, etc but there are some things that we would have been lost without:
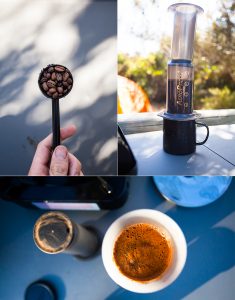
What carried me through our trip – Aeropress.
Headtorches and Eneloop batteries – A no brainer when you’re camping and need a good source of light and batteries which are reliable under all conditions.
Aeropress – Worry no more when you’re in the middle of nowhere and craving a nice coffee. The Aeropress and a hand grinder served us well over the 9 days.
Roof tarpaulin – Be ready for all conditions whether that be hot sun or wet conditions with a tarpaulin.
Logitech bluetooth speaker – Having a portable bluetooth speaker which can be charged while driving was a huge plus on our trip. We used this of a night and would charge it the next day while driving. The best part about the Logitech speaker is that its puts out decent sound for its price.
Steel wool – For those times when you don’t have stunning milky way stars above you, playing around with steel wool can be almost just as good. I put together a guide on how to use steel wool which might be of interest.
Car tyre pump – Driving on sand can cause you all sorts of headaches (more on that shortly…) so having something to quickly drop the pressure down when you get on sand was a life saver. We may have only worked it out after we managed to get bogged but it was reassuring having this in the boot.
Xiaomi power bank – If you’re going anywhere and know your access to power points will be patchy, invest in a power bank. I recommend the Xiaomi, only as I picked one up on Ozbargain for a good price but really, everyone makes power banks these days so you shouldn’t have any troubles finding one
Blitzwolf 4 port car charger – A must if you’re travelling with someone else and needing to charge phones, head torches, powerbanks, etc. The great thing about the Blitzwolf is that it comes with a fast charging technology for those rocking phones that can take advantage of it (not me unfortunately on my iPhone :()
[box size=”large”]Curious about what photography equipment I’d recommend for a trip like this? Be sure to give my landscape photography gear guide a read![/box]
Melbourne to Sceale Bay
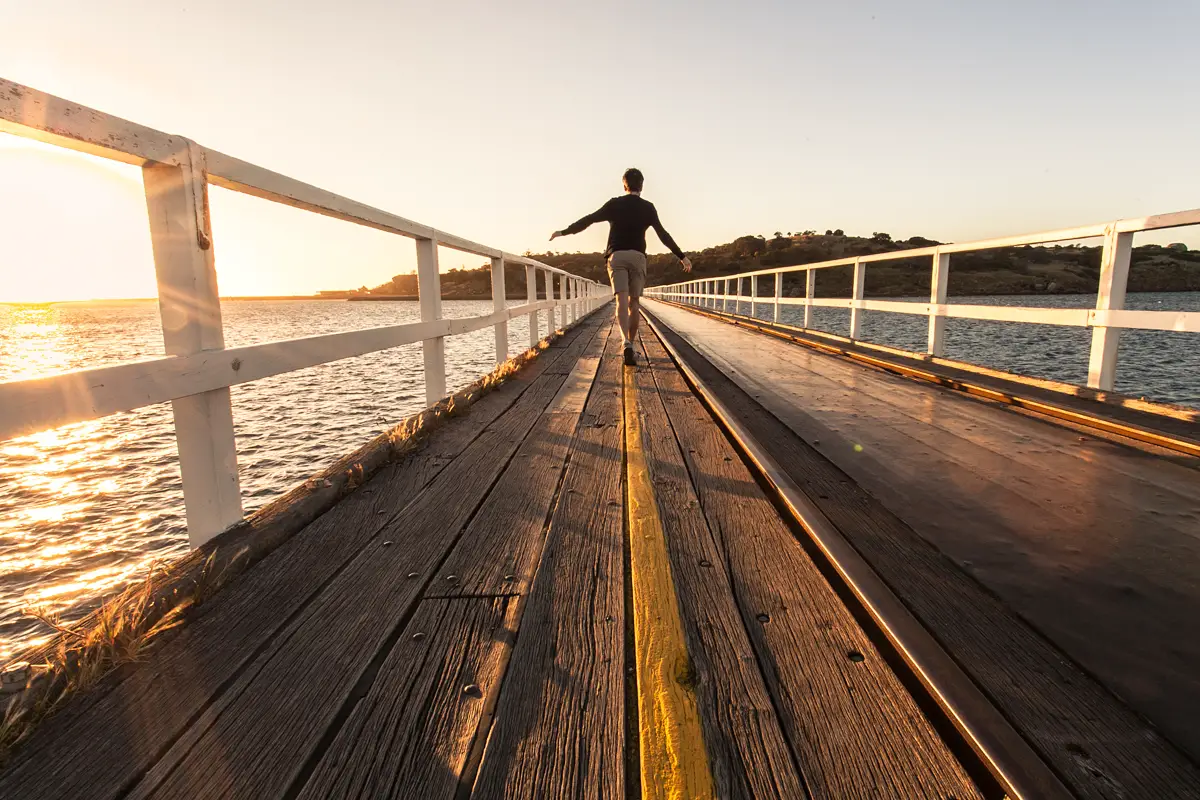
Victor Harbour
Walking out to Granite Island in Victor Harbour, SA
Having photographed Melbourne quite extensively we were quite keen to make the most of our time in South Australia so we made a dash for the border and made it to the stunning Victor Harbour.
After arriving late and setting ourselves up in the early morning, we weren’t exactly flying out of bed a few hours later for the sunrise. Missing the first half of the sunrise, we made it just in time to photograph Granite Island which is a small island accessible by a pedestrian crossing off Victor Harbour. Unfortunately we were on the move again not long after sunrise otherwise I would have loved to explore it more.
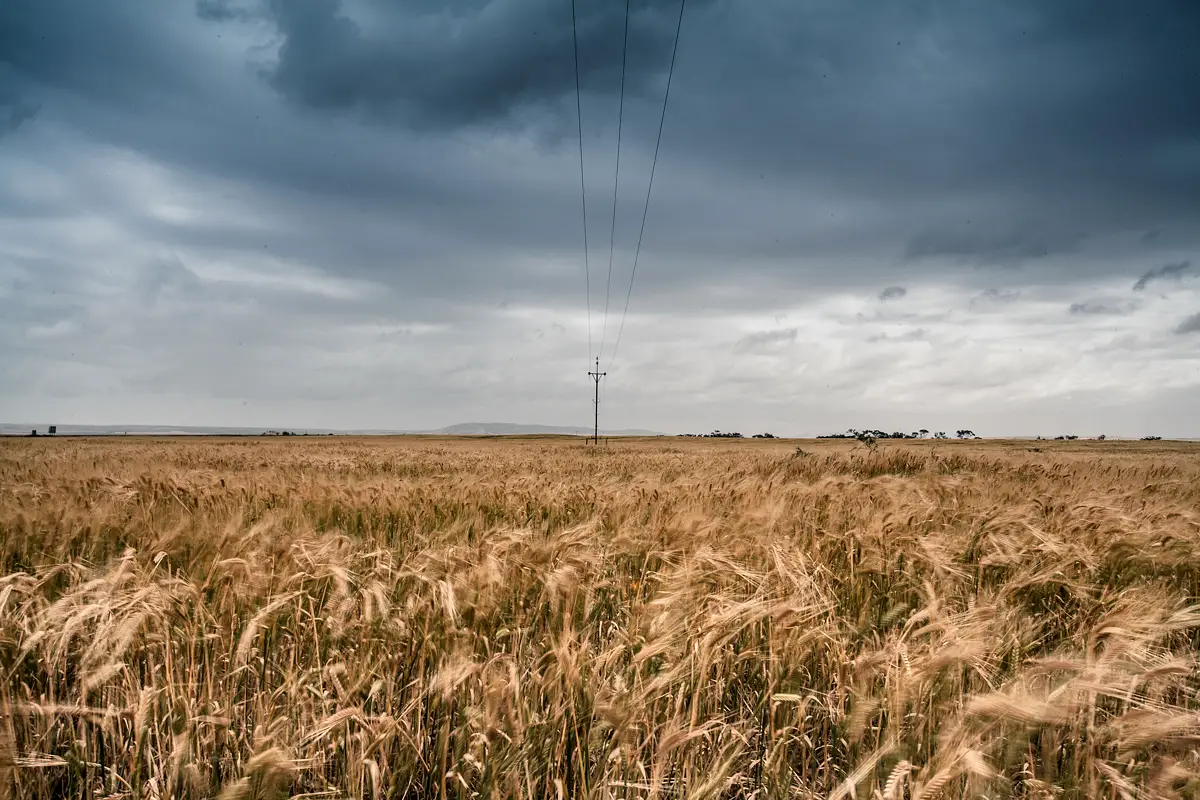
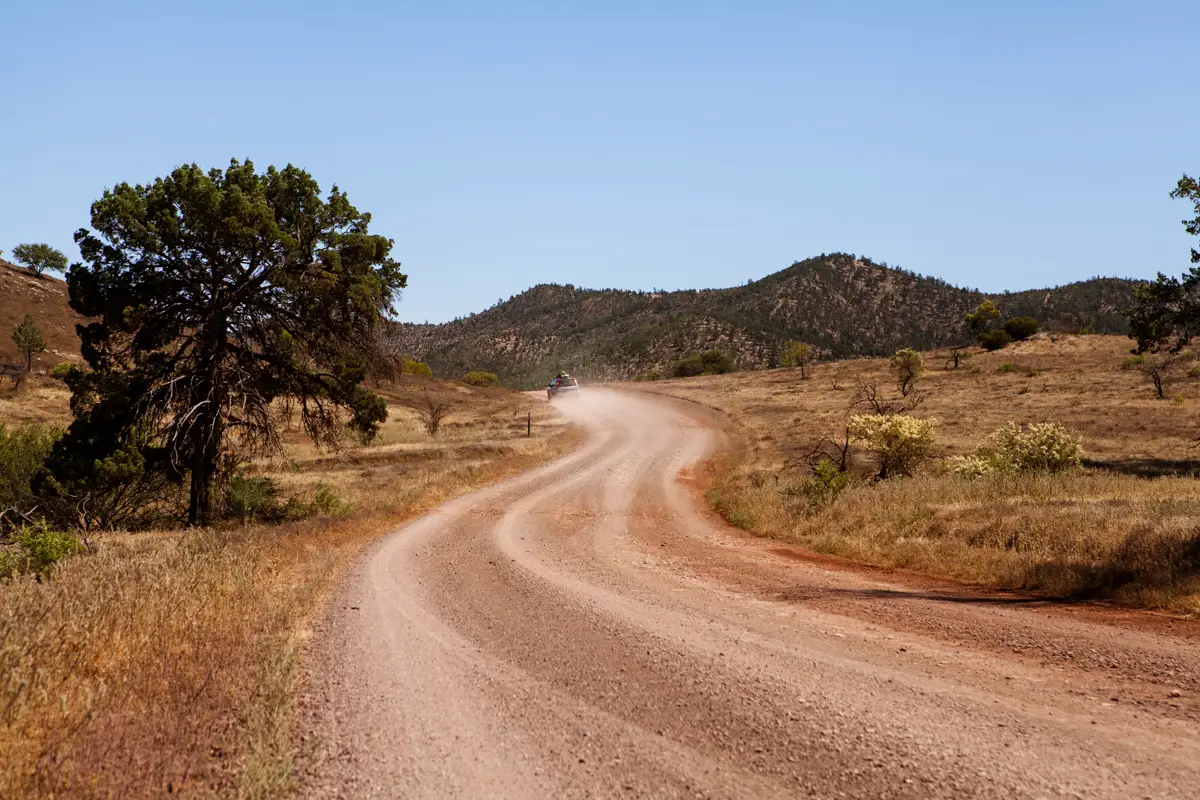
Some of the many roadside fields as we passed through South AustraliaQuick stop at the Flinders Ranges
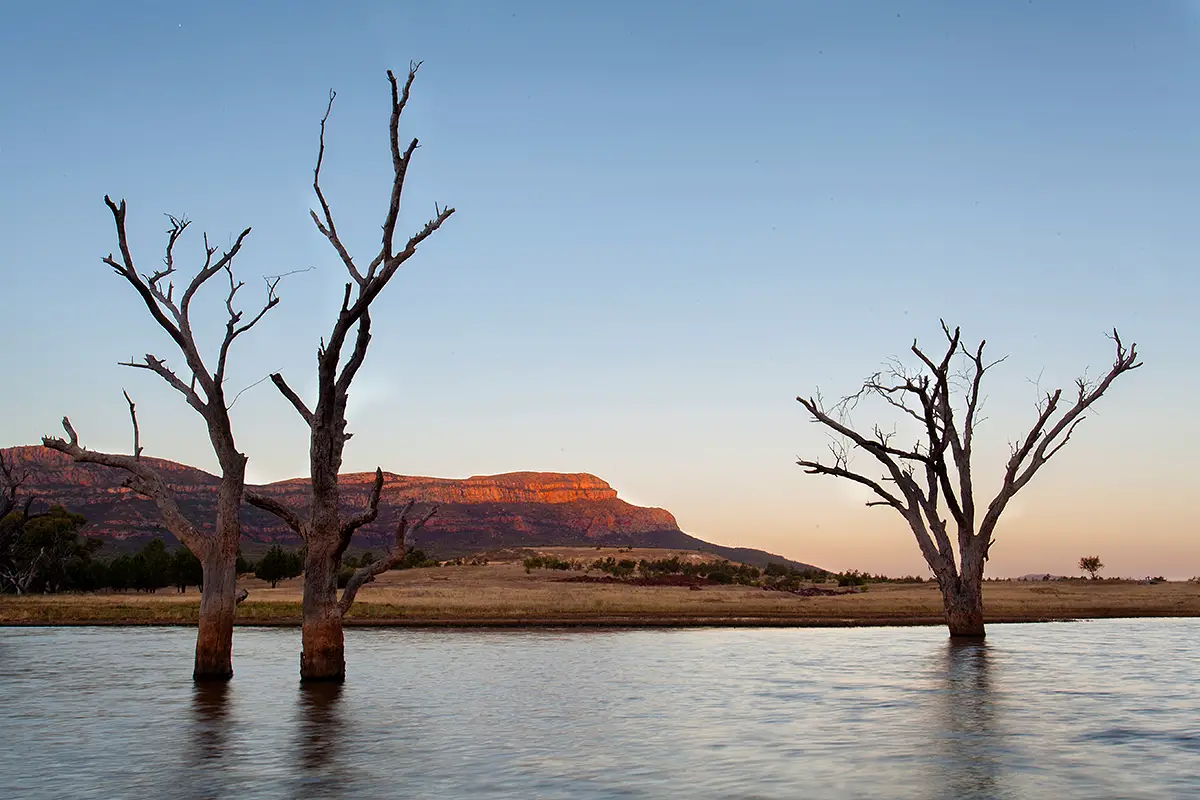
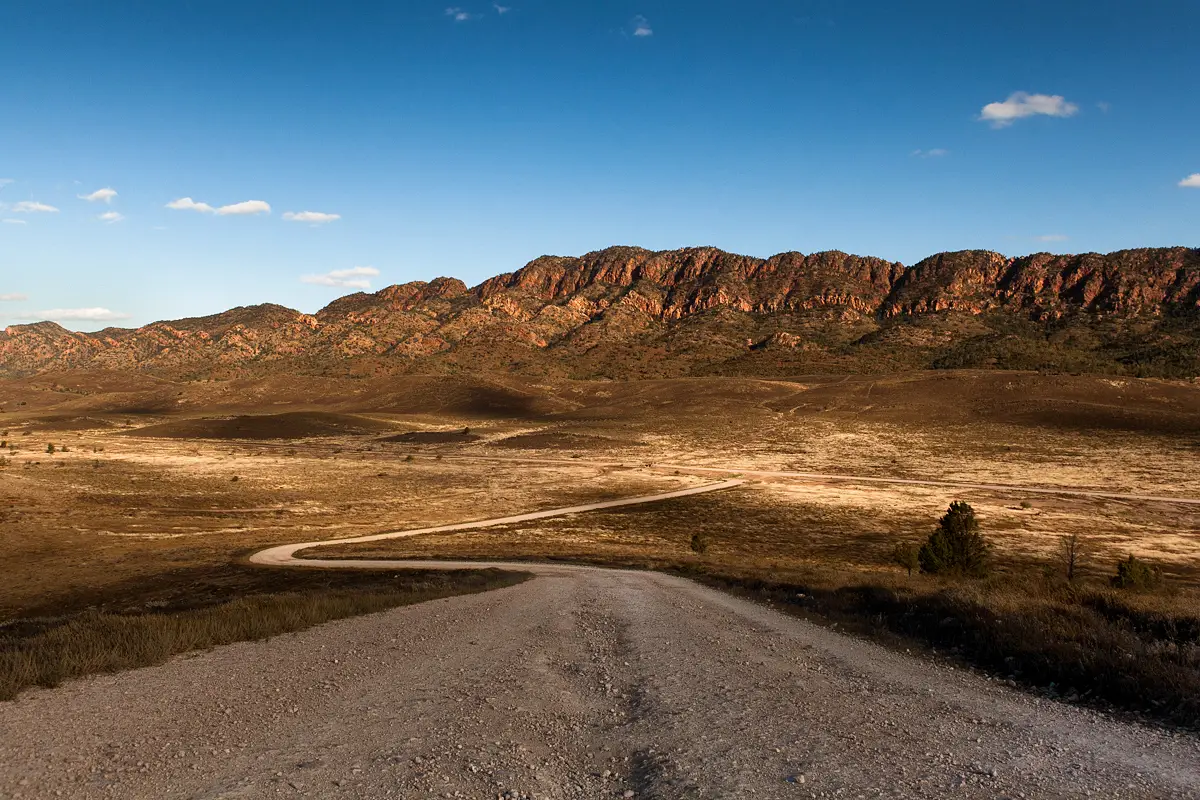
Flinders Ranges
Loaded up on coffee we headed inland to the Flinders Ranges to what I could only describe as some of the most red and picturesque Australian rural scenes that you will find south of the Northern Territory. Wow.
As the trip to the Flinders Ranges was a detour, we only spent a night here but we easily could have spent another few more days exploring. If making a similar trip, I’d recommend adding an extra day to the trip to explore the Flinders Ranges.
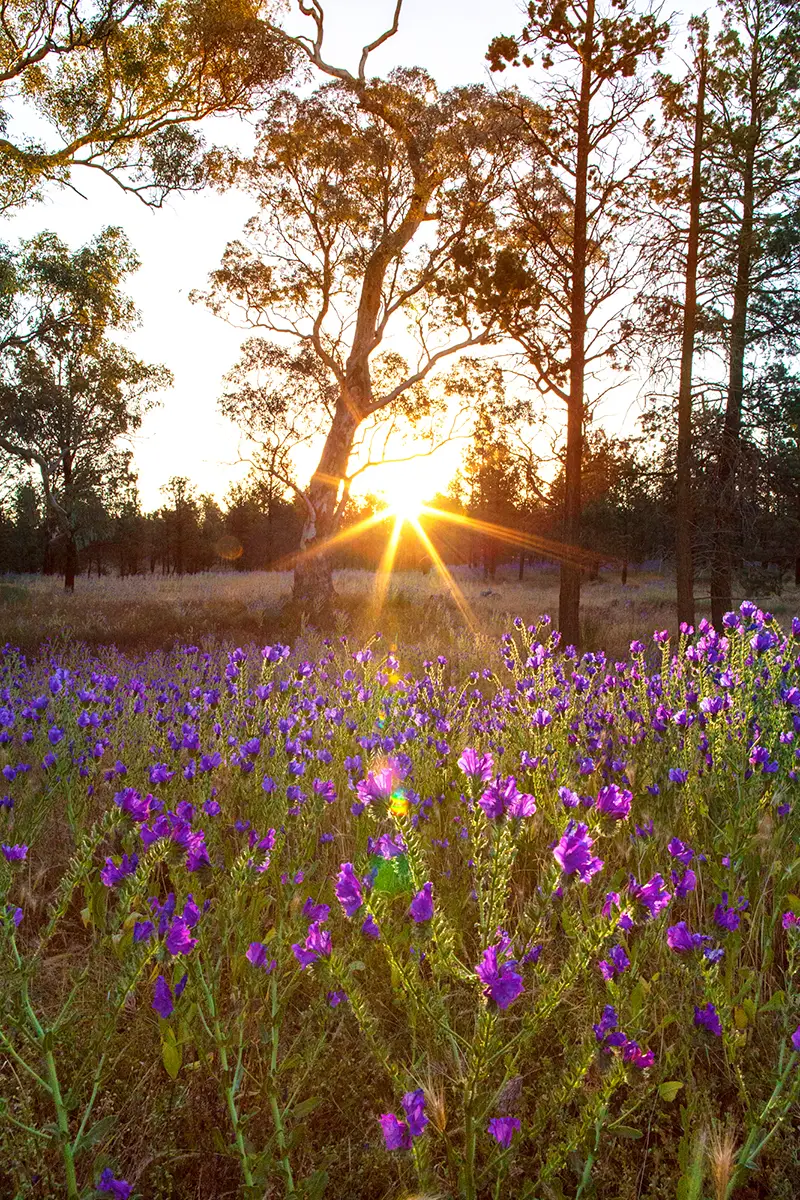
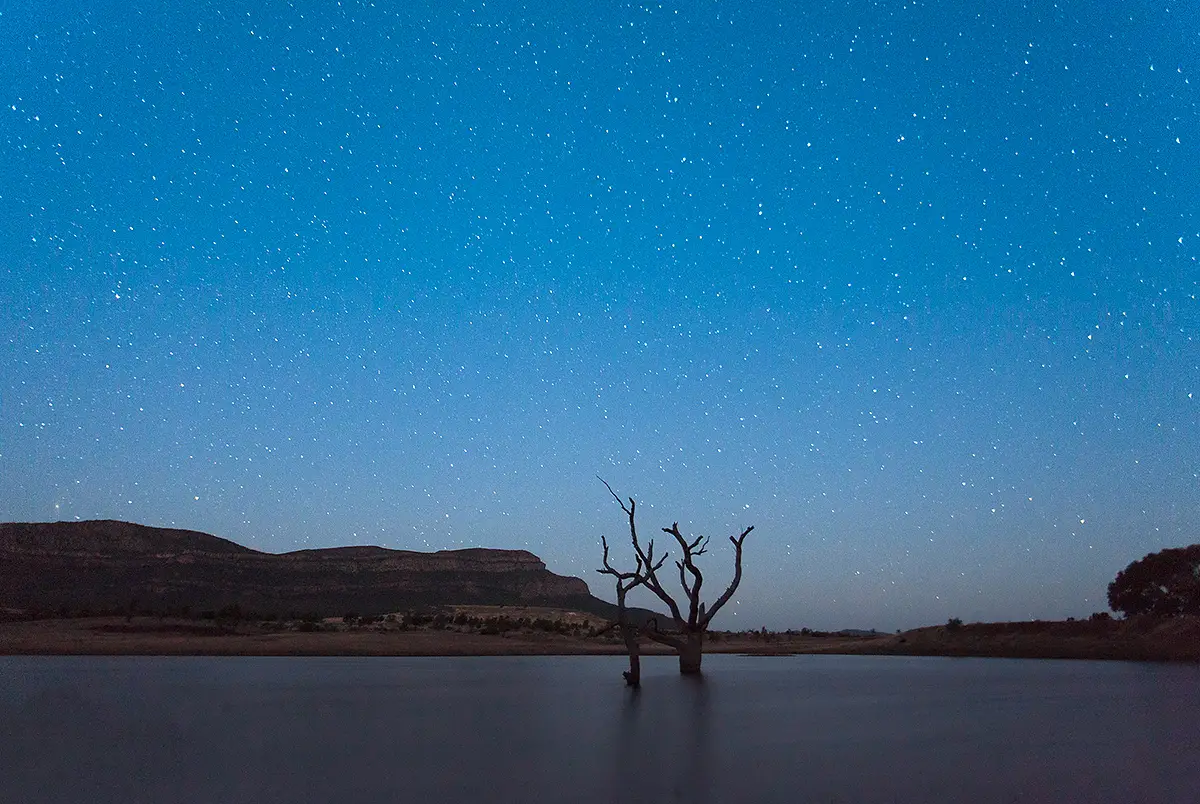
Afternoon roll through the Flinders RangesLast light at the Flinders Ranges, SAPretty backroads galore in the Flinders RangesRazorback Lookout in the Flinders RangesAfternoon light over a pocket of stunning purple flowers (solanum quadriloculatum)We were blessed with warm weather the whole trip but my goodness it got cold at night in the Flinders Ranges.Clear skies and stars. Happy Wise
This applies to the whole drive from Melbourne to Perth, but if driving at night time in the Flinders Ranges, be especially cautious of animals crossing at night time. We saw a lot of wildlife on our trip but the Flinders Ranges was something else.
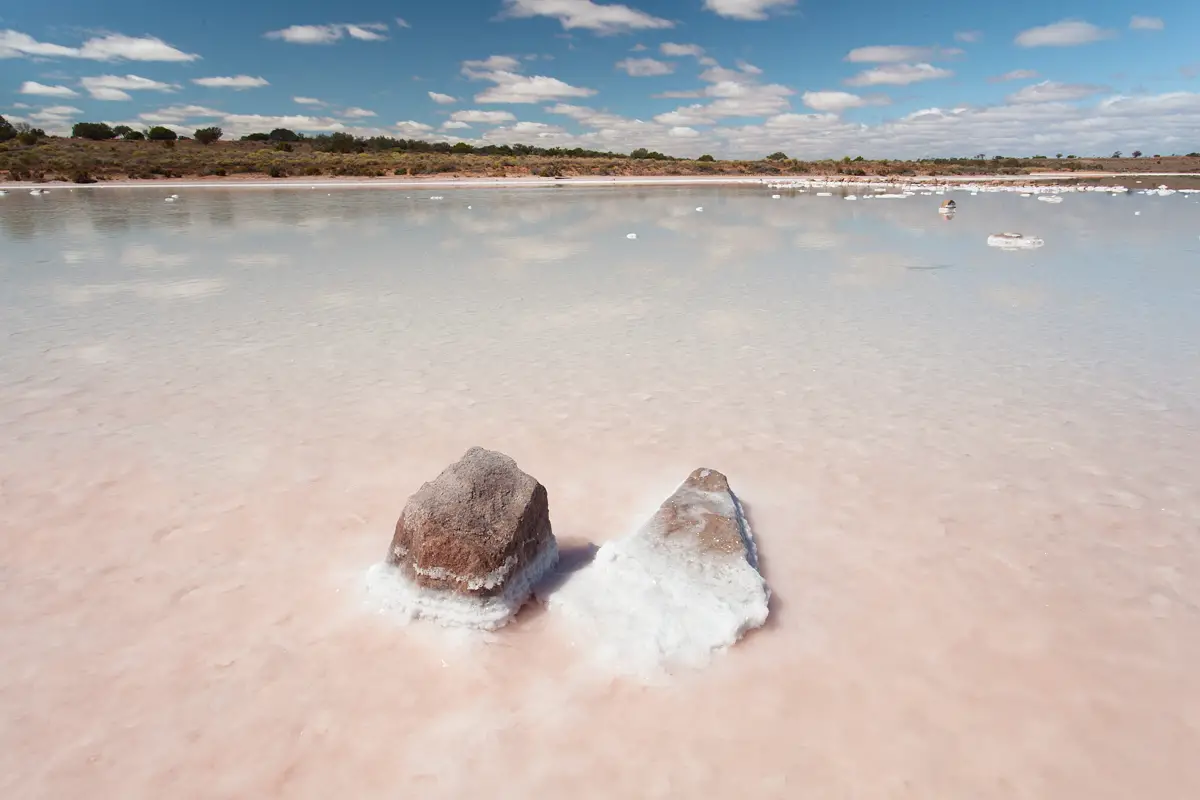
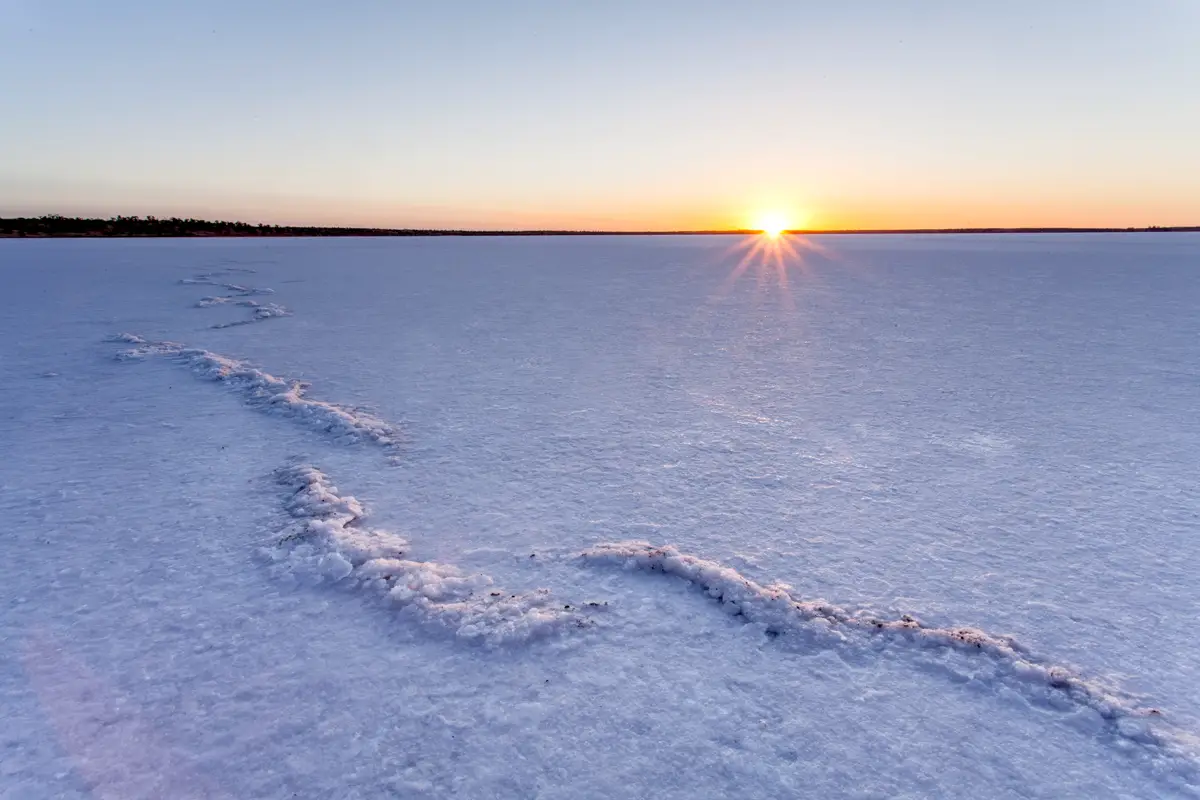
Pimba Salt Lakes
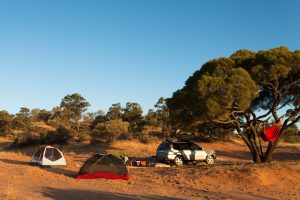
Camping at Pimba. Very much off the grid.
One thing we were both keen to explore as we crossed from South Australia into Western Australia, was a a salt lake or two. After deciding that Lake Eyre was a bit too much of a detour (good decision in hindsight…) we headed towards Woomera, South Australia. Without realising, we were on the cusp of the biggest military land-based weapons area in the world. As we detoured further and further, we eventually came across Lake Hart and set up camp for the night.
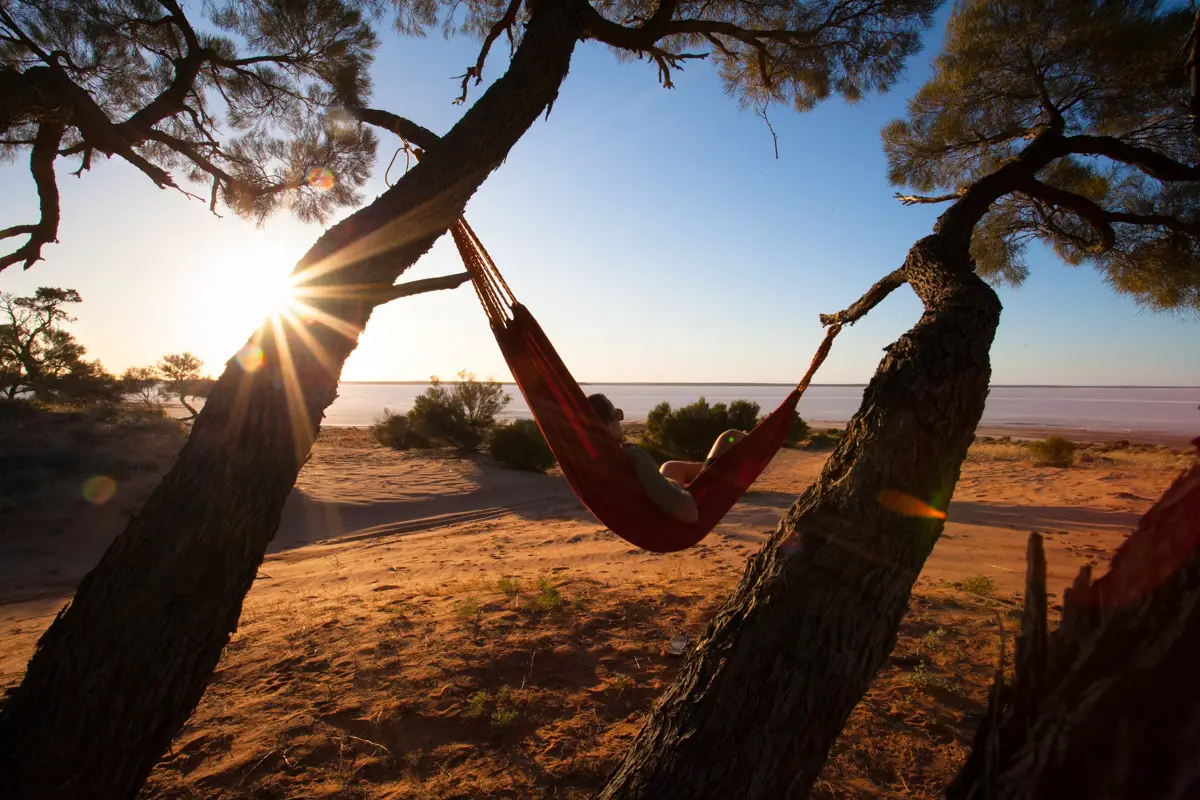
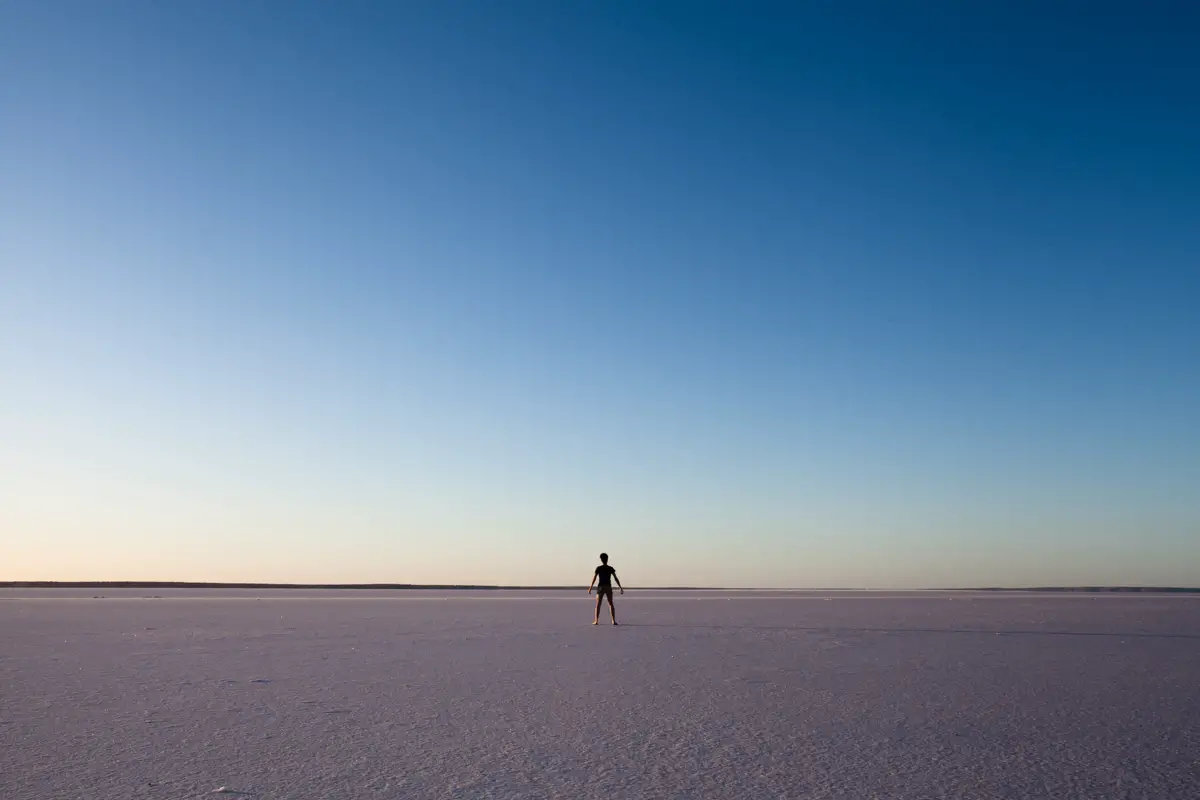
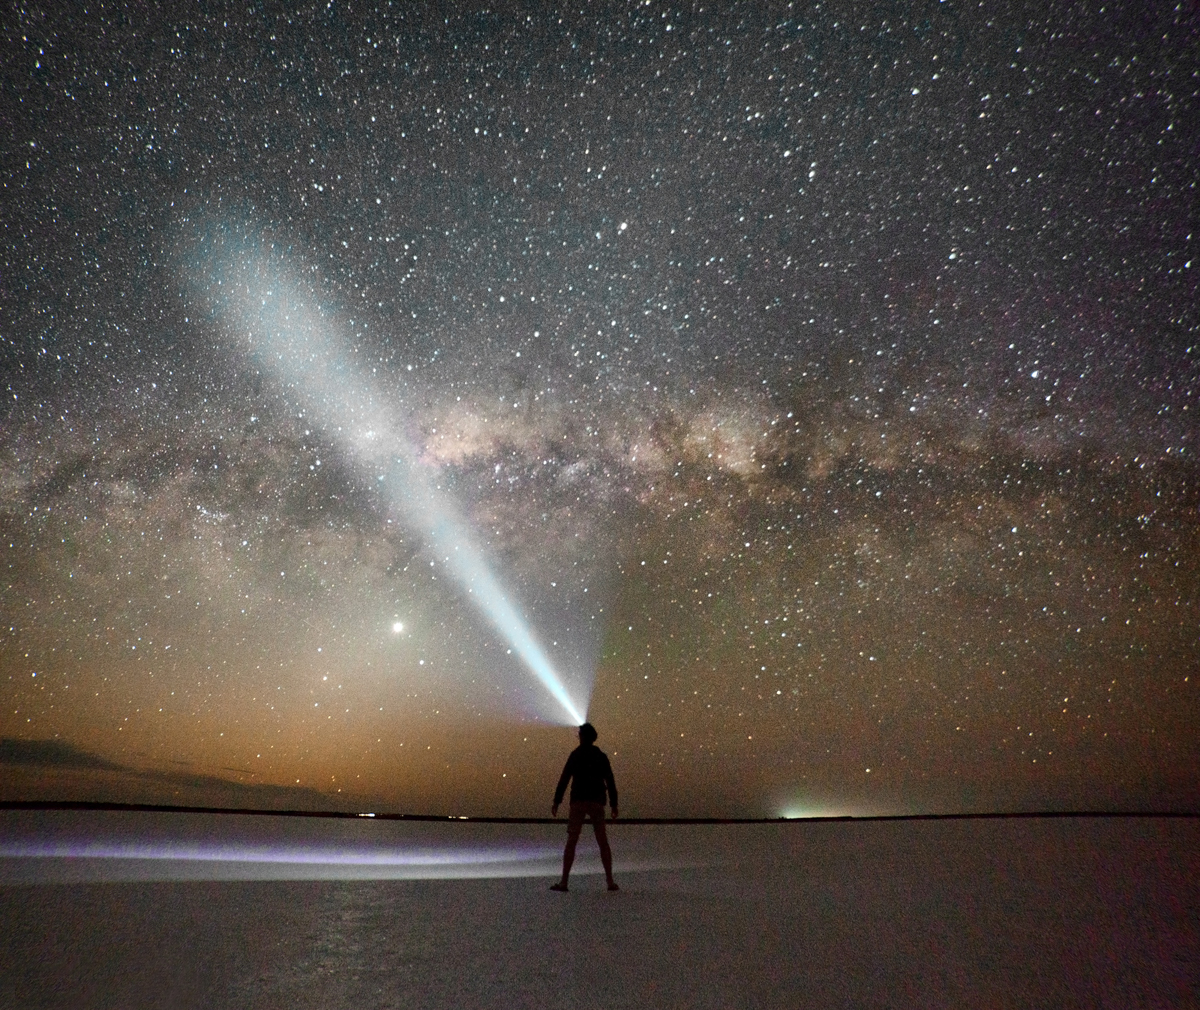
Some of the salt lakes on the way to Pimba were stunning.Lazy afternoons by a salt lake in South Australia.Last light over Lake Hart, South AustraliaFeeling tiny on the vast Lake Hart salt lake.Falling asleep under the milkyway then waking up to golden hour light wasn’t too bad…!
Camping at Lake Hart was the highlight of our drive from Melbourne to Perth. We drove past a few salt lakes on the way to Lake Hart with most being inaccessible. With the sun starting to disappear, we struck gold when we found a quiet camping spot directly off the salt lake which gave us a nice base as we photographed the sunset and milky way over the vast salt flats. It was well worth the detour even if we only made it back to Port Augusta with 3 litres of petrol…
This photo sums up nicely why I enjoyed camping at Lake Hart, SA. What an amazing place.Standing under the milkyway at Lake Hart, SA
Sceale Bay, SA to Alexander Bay, WA
Sceale Bay
Not a bad spot to park…
As mentioned in the start of the post (great that you’re still reading!) we took the gamble and planned a lot of the trip based on what looked nice from Google Earth. One place that really stood out was the area between Sceale Bay to Fowlers Bay. From Google Earth we could see some nice rocky outcrops and swell lines so were keen to explore the area for a night.
I’m not sure whether we were on a high after making it back to Port Augusta on 3 litres of petrol or seeing coastline for the first time since Victor Harbour, but it wasn’t a hard decision to spend another night around Sceale Bay recharging batteries and getting some much needed sleep. Sceale Bay is a hidden gem tucked away from the main road of Streaky Bay with a small local population mostly filled with beach houses. Being there on a week day, it was a ghost town which was perfect as there was not a sole in sight.
[box size=”large”]Interested in photographing long exposures but stuck for ideas? Give my long exposure photography idea’s post a try.[/box]
Sunset at Heart Bay, South Australia
We stayed in a beach house owned by a local who lived next door. He was a legand, giving us the run down on which locations were good to explore and access to private property. Seriously, how pretty is this path and surf around the area? A stunning part of Australia which I’d love to get back to one day. If only the drive wasn’t so far from Melbourne!
Looking out over Heart Bay, South AustraliaLast light at Heart Bay. I love this vantage point and wish I could have done it more justice…
Our visit to Sceale Bay wasn’t without a little bit of drama… Getting bogged at 11 o’clock at night when you don’t have any phone reception isn’t the greatest feeling (video for anyone curious). Fortunately, Peter, the owner of where we were staying at Sceales Beach House, came and pulled us out of the dunes at an ungodly hour and we eventually made it home in the early hours… In other words, he showed us how to be men.
Waiting for help to arrive while enjoying the milkyway at Sceale Bay, SAFirst light at Speed Point, Yanerbie, SA
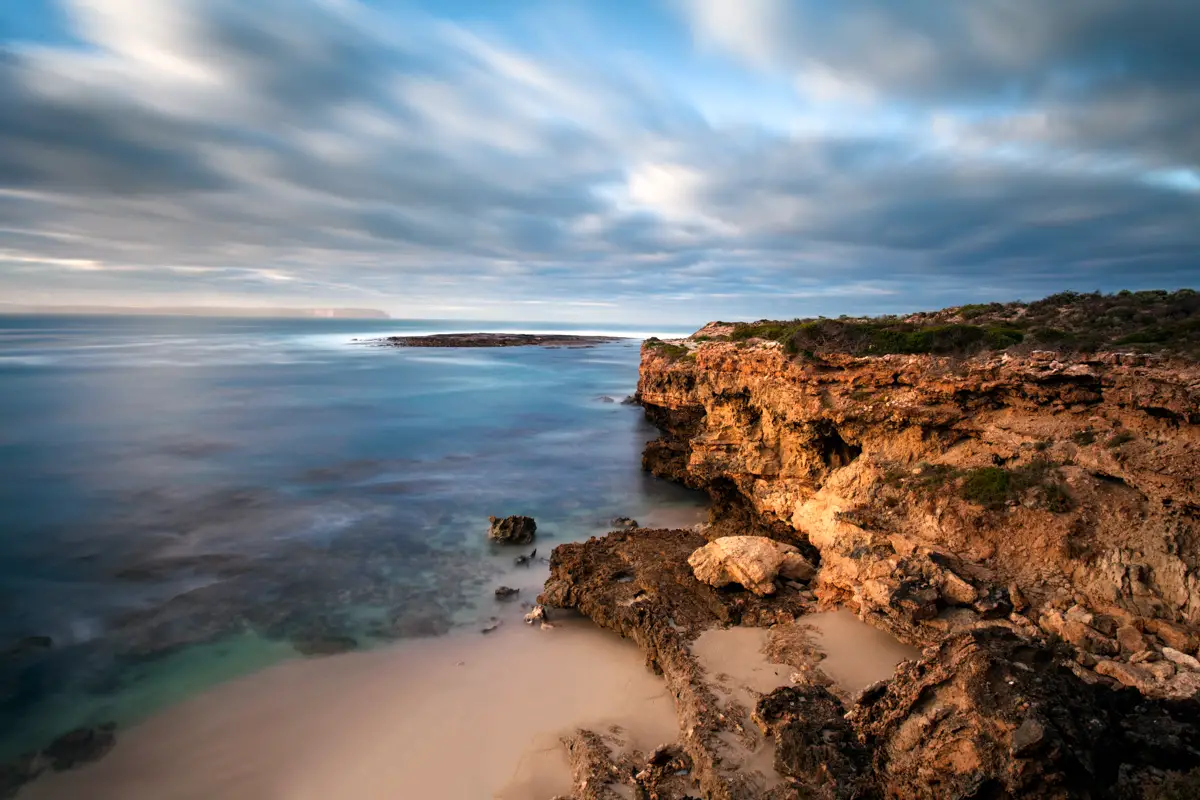
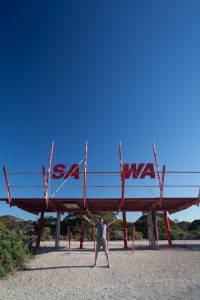
Eucla, WA
Standing between the border of South and West Australia
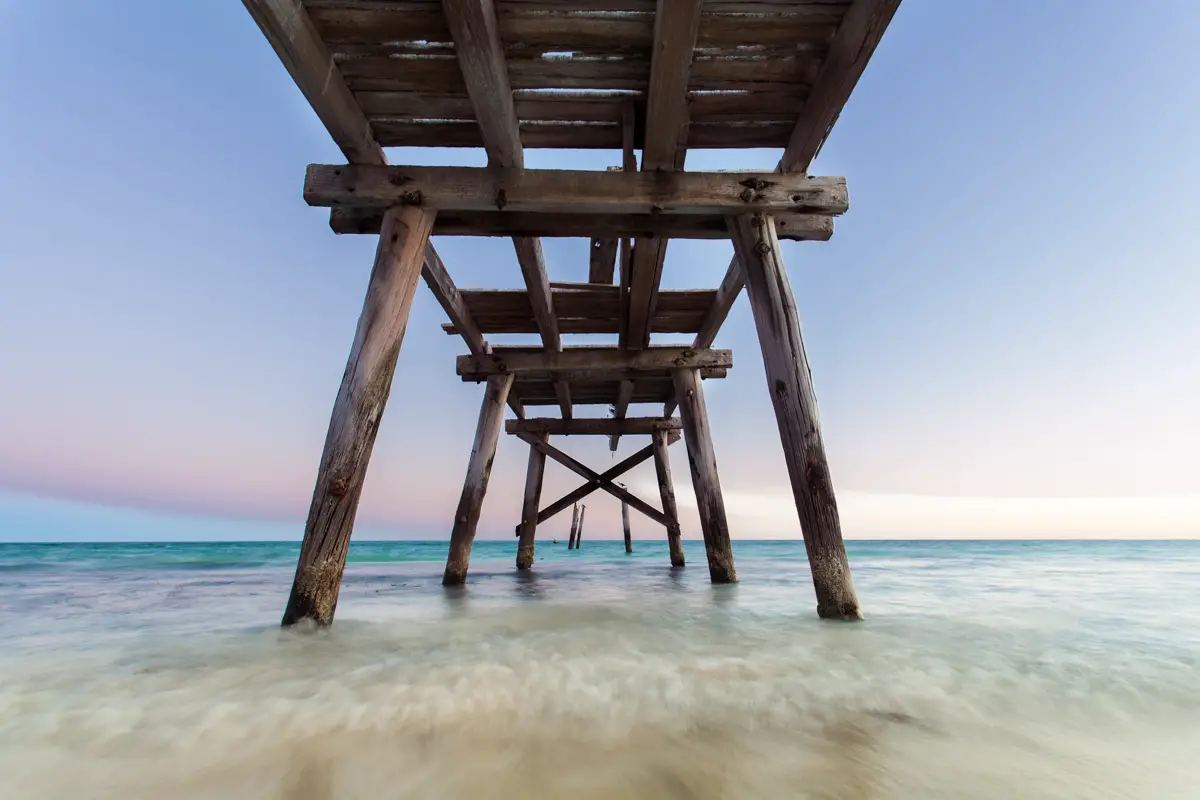
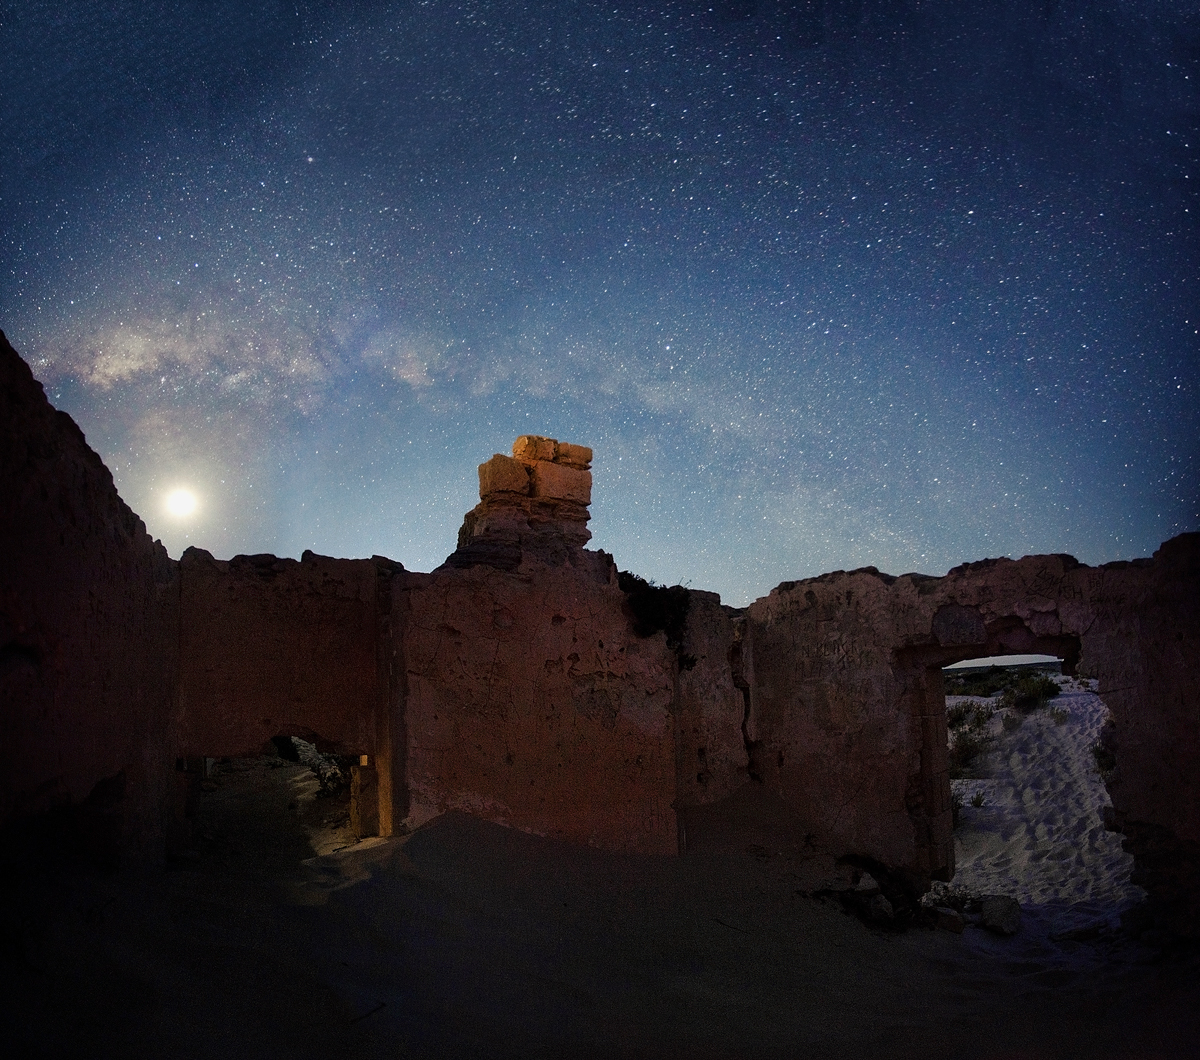
After spending a relaxing couple of days In Sceale Bay, we made the long journey along the Nullarbor towards the border with a night in Eucla. Honestly, we were expecting Eucla to be disappointing and just a border/truck stop town but we were pleasantly surprised with plenty of opportunies to photograph for the night such as old old jetty ruins on the beach at sunset and the Eucla Telegraph Station for milky way photos.
Jetty ruins at Eucla Beach, WA.Eucla Telegraph Station
Alexander Bay
It wasn’t all driving to Perth with some lazy afternoons spent with a book by the sea.
Leaving Eucla on the Friday we thought driving to Alexander Bay was a bit ambitious (1,000km / 10 hrs) so decided to head to Fraser Range (600km / 6 hrs) to photograph some salt lakes and find somewhere off the beaten track to camp.
Arriving at Fraser Range on sunset, we had a bit of a dilemma… Feeling uninspired we had to decide: Do we photograph the Fraser Range salt lakes and get an early night or continue driving well into the night and make it to Alexander Bay? All thoughts were going through our heads, what if we get got to Alexander Bay and there weren’t any camping sites being a Friday night? What if there’s no phone reception there and we get lost? What about all the wildlife about after dark? Or let me just ask the question you’re probably thinking, why do you guys procrastinate so much? Yeah, good question.
We headed off towards Alexander Bay but not before stopping for dinner at a truck stop that would make an ideal setting if they were to make another Wolf Creek movie… We finally made it to Alexander Bay in the early morning finding a nice camping spot near the beach.
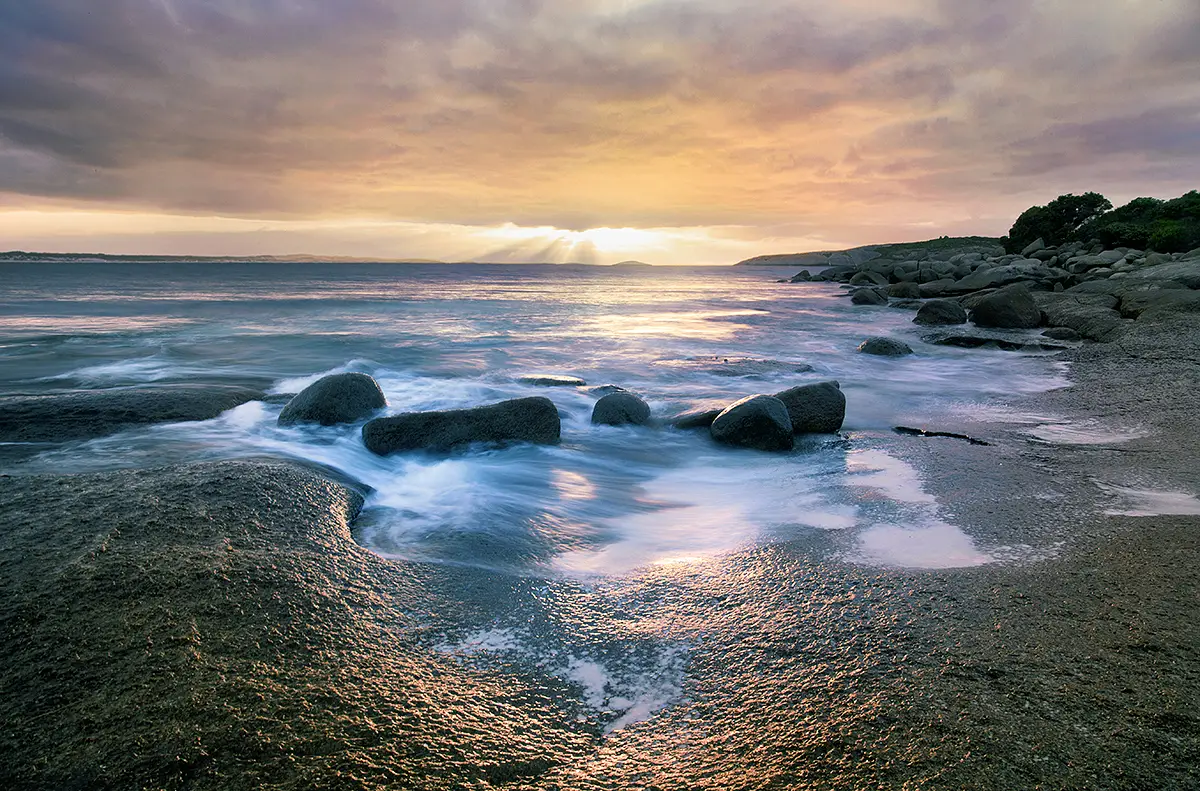
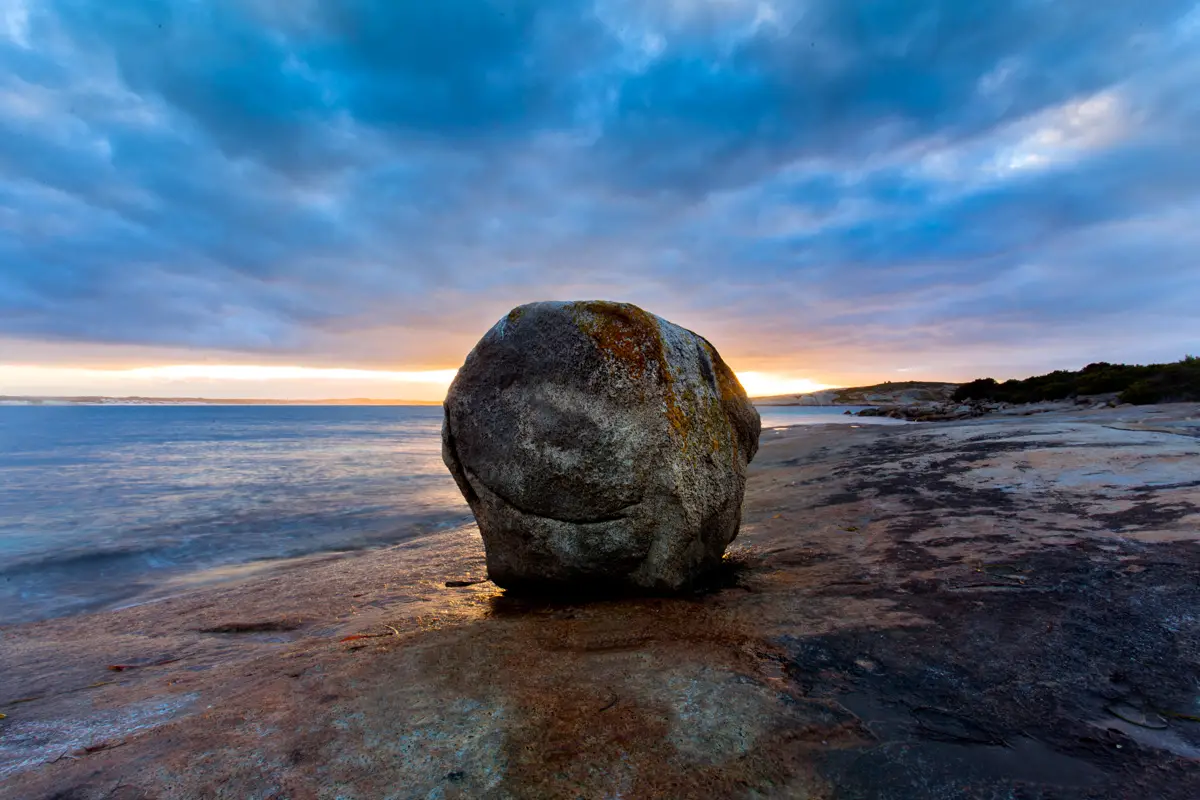
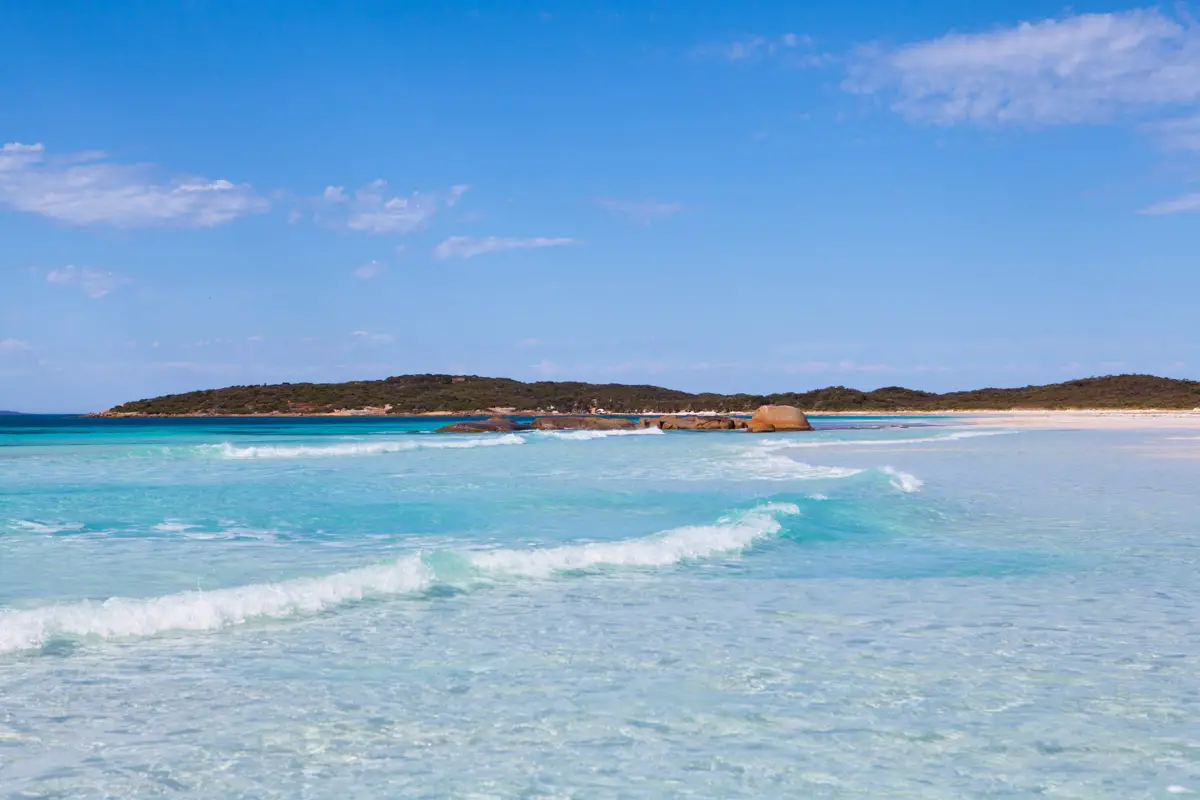
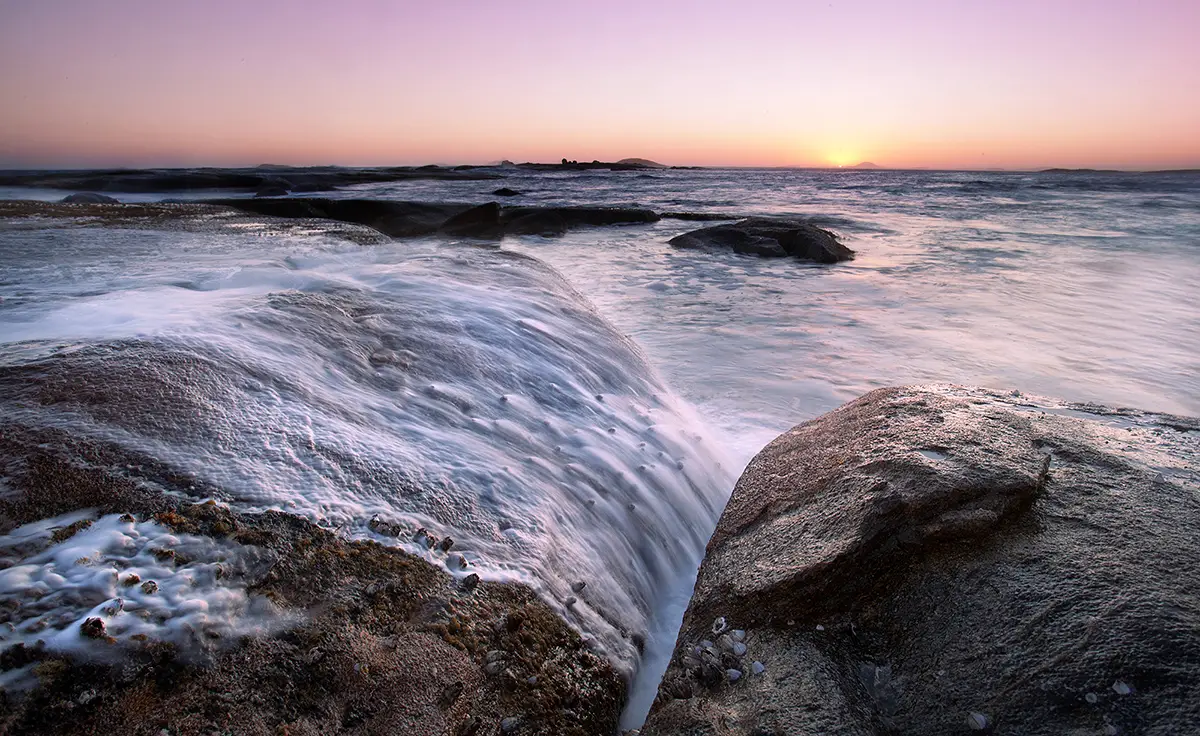
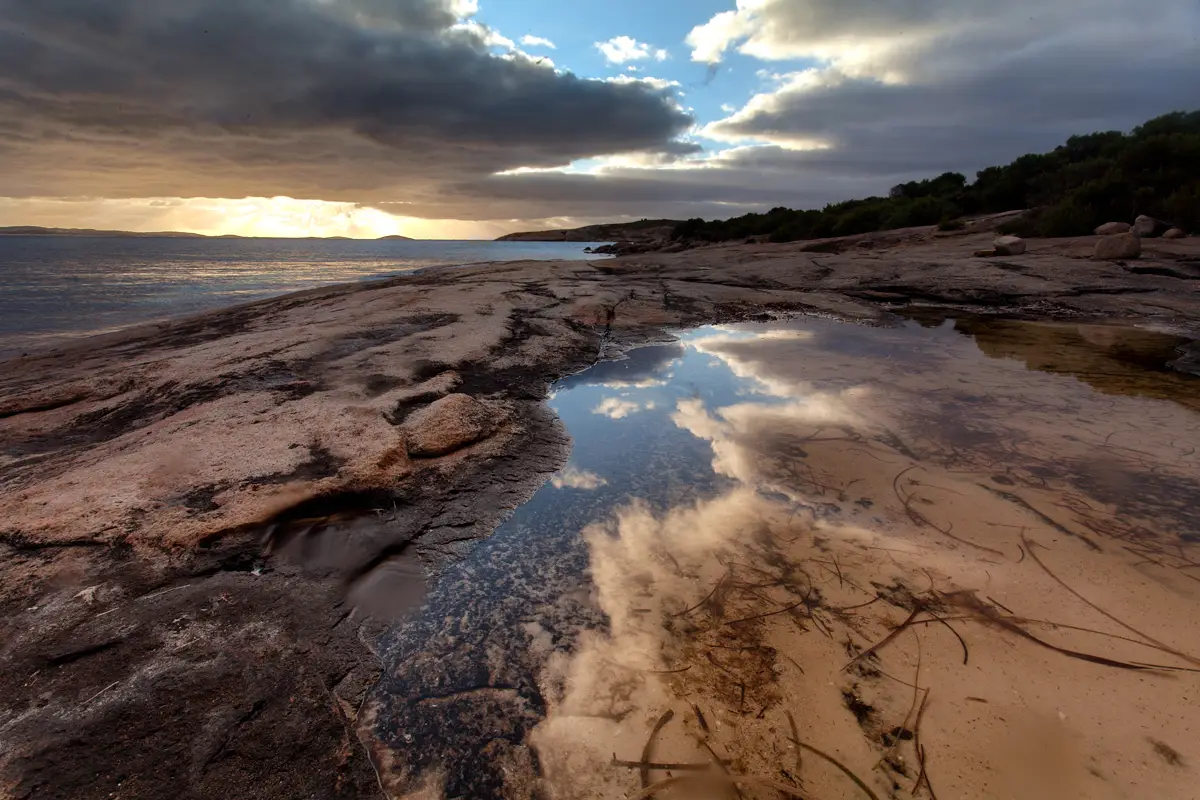
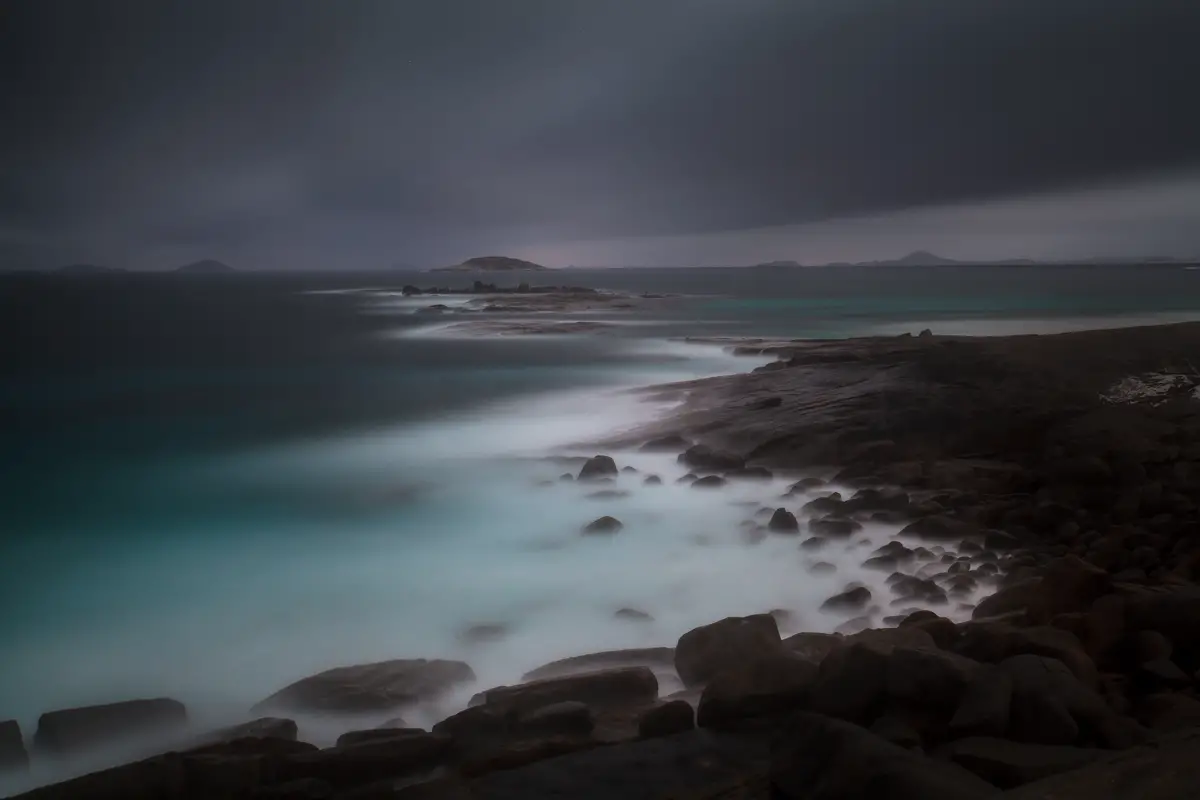
Alexander Bay is a further 85km east of Esperance and is well worth the detour if you’re looking to get away from the tourists of Esperance and enjoy some of this beautiful coastline to yourself. The drive into Alexander Bay is quite scenic making a nice scene at night time under the milkyway. The coastline itself is beautiful and very reminiscent of the Bay of Fires on the Tasmanian east coast which left me feeling a little homesick. This, combined with the warm weather, made for a great way to finish up our drive to Perth.
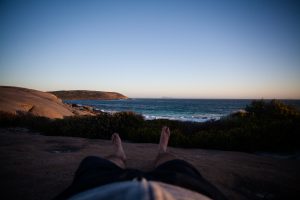
Early morning sun beams poking through at Alexander Bay, WALove the glow that comes with the first light @ Alexander Bay, EsperanceThe blue hues of Alexander Bay, Esperance. An amazing place.Getting a little too close for comfort at Alexander Bay, WAI could explore the stunning Esperance coastline for a week and not get bored. Even with a wet back from the previous photo 😉We survived 9 days without rain… Luckily on our last night.When the rain came… It poured but it was a welcome change from the clear blue skies we’d had all trip.Post trip highs.
After a weekend in Alexander Bay that brought an end to our trip. If we had our time again, we would have spent more time exploring the surrounding bays but Alexander Bay had more than enough to keep us busy for a weekend. I would love to come back to the area with a campervan spending a week slowly exploring around the area with differing weather conditions. There’s so much potential around the area from Alexander Bay to Cape Le Grand National Park and Israelite Bay which I’d love to get to one day… One day!
Thanks for reading this post. It ended up becoming longer and more picture heavy than I originally planned. Sorry! Hopefully it’s given you some inspiration to the places you can see if you’re planning a trip across the Nullarbor. Would love to do it again one day 🙂
If you’re thinking of making a similar trip or have any inquiries about licensing or how photos in this post were taken, I always love to hear from people and can be reached by the contact page or social media.
 After recently moving away from the Canon 5D Mark II to a Sony A7RII, I was itching to get out and make the most of my new purchase by giving the low light performance a play with some astro photography.