
[box type=”info” size=”large”]Neutral density filters are a great way to completely transform a scene. Using welding glass you can achieve the same effect for under $10[/box]
Creating your own neutral density filter using welding glass
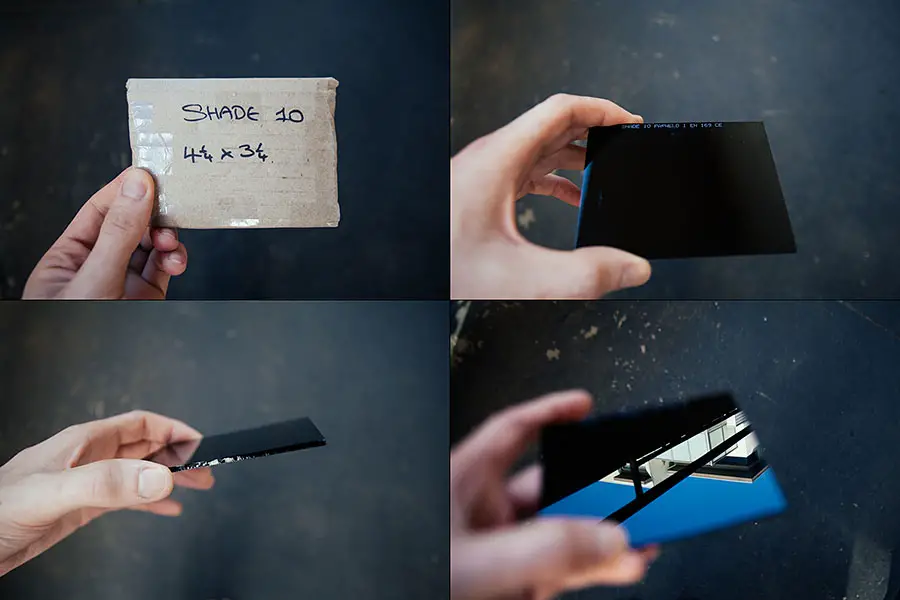
Ever since getting in to daytime long exposure photography I’ve read about people experimenting with making their own dark neutral density filters similar to that of the B+W 110 or Hoya ND400. These filters are great for day time long exposure as the filter is incredibly dark due to blocking out 10 stops of light. Rather than cough up $100 or so for one of these filters, there’s been quite a bit of experimentation with using welding glass to provide a similar effect of blocking out light so you can shoot day time long exposures for under $10. As someone who owns the B+W 110 filter I’d never had much need to experiment with using welding glass as an ND filter but recently I decided to pick up a 4¼ x 3¼ 10 shade piece of welding glass to see for myself how making your own neutral density filter really compares to the proper thing. Would there be a colour cast? How would I mount the thing to the camera lens? Would there be a reflection from mounting it to the camera lens? These were the many questions I had and I’ll use this post to highlight the good and bad aspects of going the DIY route for strong neutral density filters.
A day out with the welding glass and how it compared to a proper neutral density filter
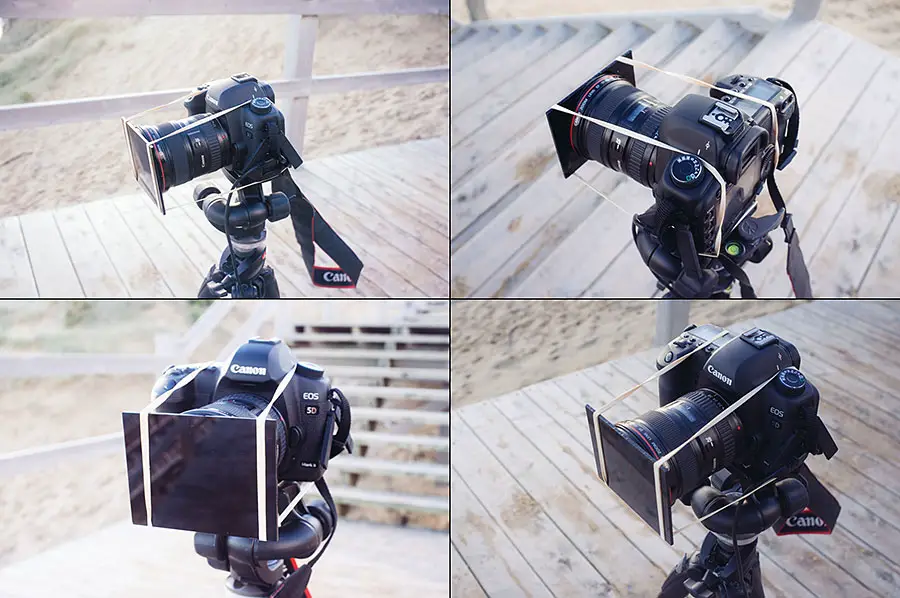
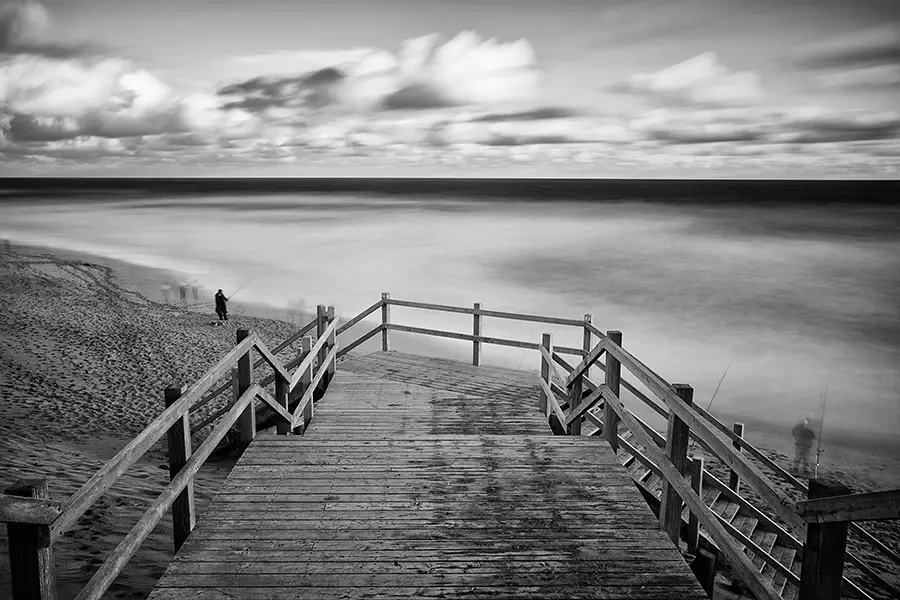
Welding glass is readily available and I picked mine up from an eBay store called Bargain-Fixings. If you’re having trouble finding some try searching for ‘4¼ x 3¼ welding glass shade’ which will bring up welding glass of various shades. Later in the post I discuss the shade number and how many f-stops of light this blocks but to give you some understanding, a shade 10 is about the same as the B+W 110 in terms of darkness and the amount of f-stops blocked. So how did it all go? My first outing using welding glass as a neutral density filter was at Gunnamatta Beach, Victoria on a windy afternoon. Unfortunately the filter was too big to fit in to my Cokin Z-Pro holder which has filters of a similar shape and size but the welding glass was too thick to fit. Some people have successfully used a Cokin filter holder but it first required them to cut down the filter. I didn’t have anything appropriate to cut the filter down so it wasn’t an option. Instead I went the ghetto option and used a rubber band (see below) to hold the filter. This method is discussed in detail over on photography-on-the-net and DIY Photography who deserve all credit for this idea. By using a rubber band and practically fixing the filter to the lens, it minimises reflection between the filter and lens. Using a Cokin filter holder could have potentially introduced some reflection due to the filter sitting 1-2cm in front of the lens.
How to calculate the exposure time
Before you can shoot though you need to understand how dark your welding glass is and how many stops of light it’s blocking out. Welding glass comes in different levels of shade where the high the number, the more stops of light that are blocked out. For this example I’m using welding glass with a shade rating of 10. If we take a look below that works out to be around 12.8 f-stops, 2.8~ stops more than the B+W 110 neutral density filter which I normally use. Understanding how many f-stops your welding glass blocks is especially useful for calculating how long of an exposure time you will need to use.
| Shade Number | F-Stop Reduction |
| 1 | 0.0 |
| 2 | 1.4 |
| 3 | 2.8 |
| 4 | 4.3 |
| 5 | 5.7 |
| 6 | 7.1 |
| 7 | 8.5 |
| 8 | 10.0 |
| 9 | 11.4 |
| 10 | 12.8 |
| 11 | 14.2 |
| 12 | 15.6 |
| 13 | 17.1 |
| 14 | 18.5 |
| 15 | 19.9 |
My shooting process when using welding glass and what I would do different next time
Similarly to when shooting with a strong neutral density filter like the B+W110 or Hoya 400, you will be unable to focus once the filter is attached and will need to pre-focus prior to attaching. Generally I find lenses which have barrels that extend as they zoom are a no go for this style of photography as it’s easy to lose focus once you attach the filter to the front of the lens. For this reason I tend to use the Canon 17-40 over my Canon 24-70 mark II which does not have a zoom lock lever. Once the camera is focused and the filter attached, change the camera to bulb mode and plug in your camera remote. This will allow you to get an exposure time longer than 30 seconds which your DSLR camera is constrained by. Once your ready to shoot, make sure you leave your camera in a low ISO setting to minimise noise and shoot away.
So how did I find the welding glass compared to the B+W 110 ND filter I normally use? Actually I thought it was great. Sure there were some limitations in using the rubber band method which was a bit awkward to attach and meant I couldn’t use my Cokin Z-Pro graduated filters but other than that, it was a great experience. If I do have one suggestion, go out and buy yourself a Cokin adapter ring to suit the lens you will be primarily using the welding glass with and superglue the glass to the adapter ring. This will allow you to conveniently screw the filter on with ease and not suffer from issues of light leaks due to their being minimal gap between the glass and camera lens.
How to remove the green colour cast in camera and using Adobe Photoshop
One issue with using welding glass as a neutral density filter is the colour cast it introduces. Sure other bought filters like the B+W 110 or Cokin Z-Pro filters can have colour cast of their own but welding glass takes colour cast to a whole new level. Before taking the photo there’s a few things you can do in camera to minimise the colour cast by using a custom white balance. This is achieved by grabbing a white piece of paper and taking a photo of it so it fills the frame. Now set this as your custom white balance to reduce the cast. It won’t remove it completely but will help slightly to decrease the amount of colour cast that the welding glass creates.
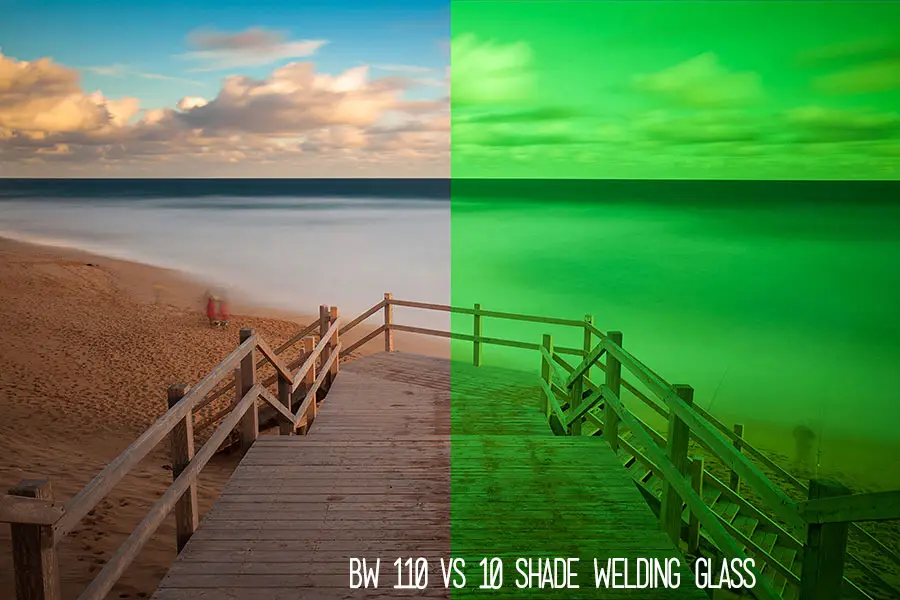
Left – B+W 110
Right – 10 shade welding glass
I’ve put together a little clip that shows how easy it is to remove the colour cast that comes from shooting with welding glass as a neutral density filter. The video walks you through how to remove the colour cast using Photoshop but can easily done in other editing programs including Lightroom. For those unable to view the clip here’s roughly how you remove the colour cast created from using welding glass in Photoshop:
- Open the raw image in Photoshop or your editor of choice
- Create a custom white balance by using the white balance tool to manually set the white point of the image. For the images used in this post I’m using the clouds as the most white point of the image
- If this method doesn’t work as expected, increase the tint away from green to pink and adjust the temperature to suit
- Using a curves layer adjust the red, green and blue colour channels to further remove the colour cast
That’s all there is to it. Upon seeing the strong colour cast over the image don’t feel deterred as the process is easy and should only take a minute to correct. Although I did find to get the colours accurate it did take some extra effort in Photoshop jumping between the different curves colour channels to get things looking right. Something that’s not an issue with the B+W or Hoya filters.
Few things to note if you’re considering buying welding glass to use as a neutral density filter
As great as using a piece of welding glass as a neutral density filter is I did find there were a few issues to note. Sure the filter is fantastic as a extremely cheap alternative to the B+W 110 or Hoya ND400 but let’s not glaze over the fact that there are some issues you need to be conscious of when shooting with the glass.
- The glass is a magnet for finger prints, dust and scratches. Sure other filters like the B+W 110 are also prone to getting dirty but this takes things to a new level. You can easily avoid this by only ever holding the glass by the edges and after use use an alcohol wipe or microfiber cloth to wipe the filter down
- Be mindful of how reflective welding glass can be especially when shooting in sunny conditions. If you plan on using this for long exposures into direct light then forget about it. One thing that you pay for with more expensive filters is the quality of glass used which reduces glare and image degradation
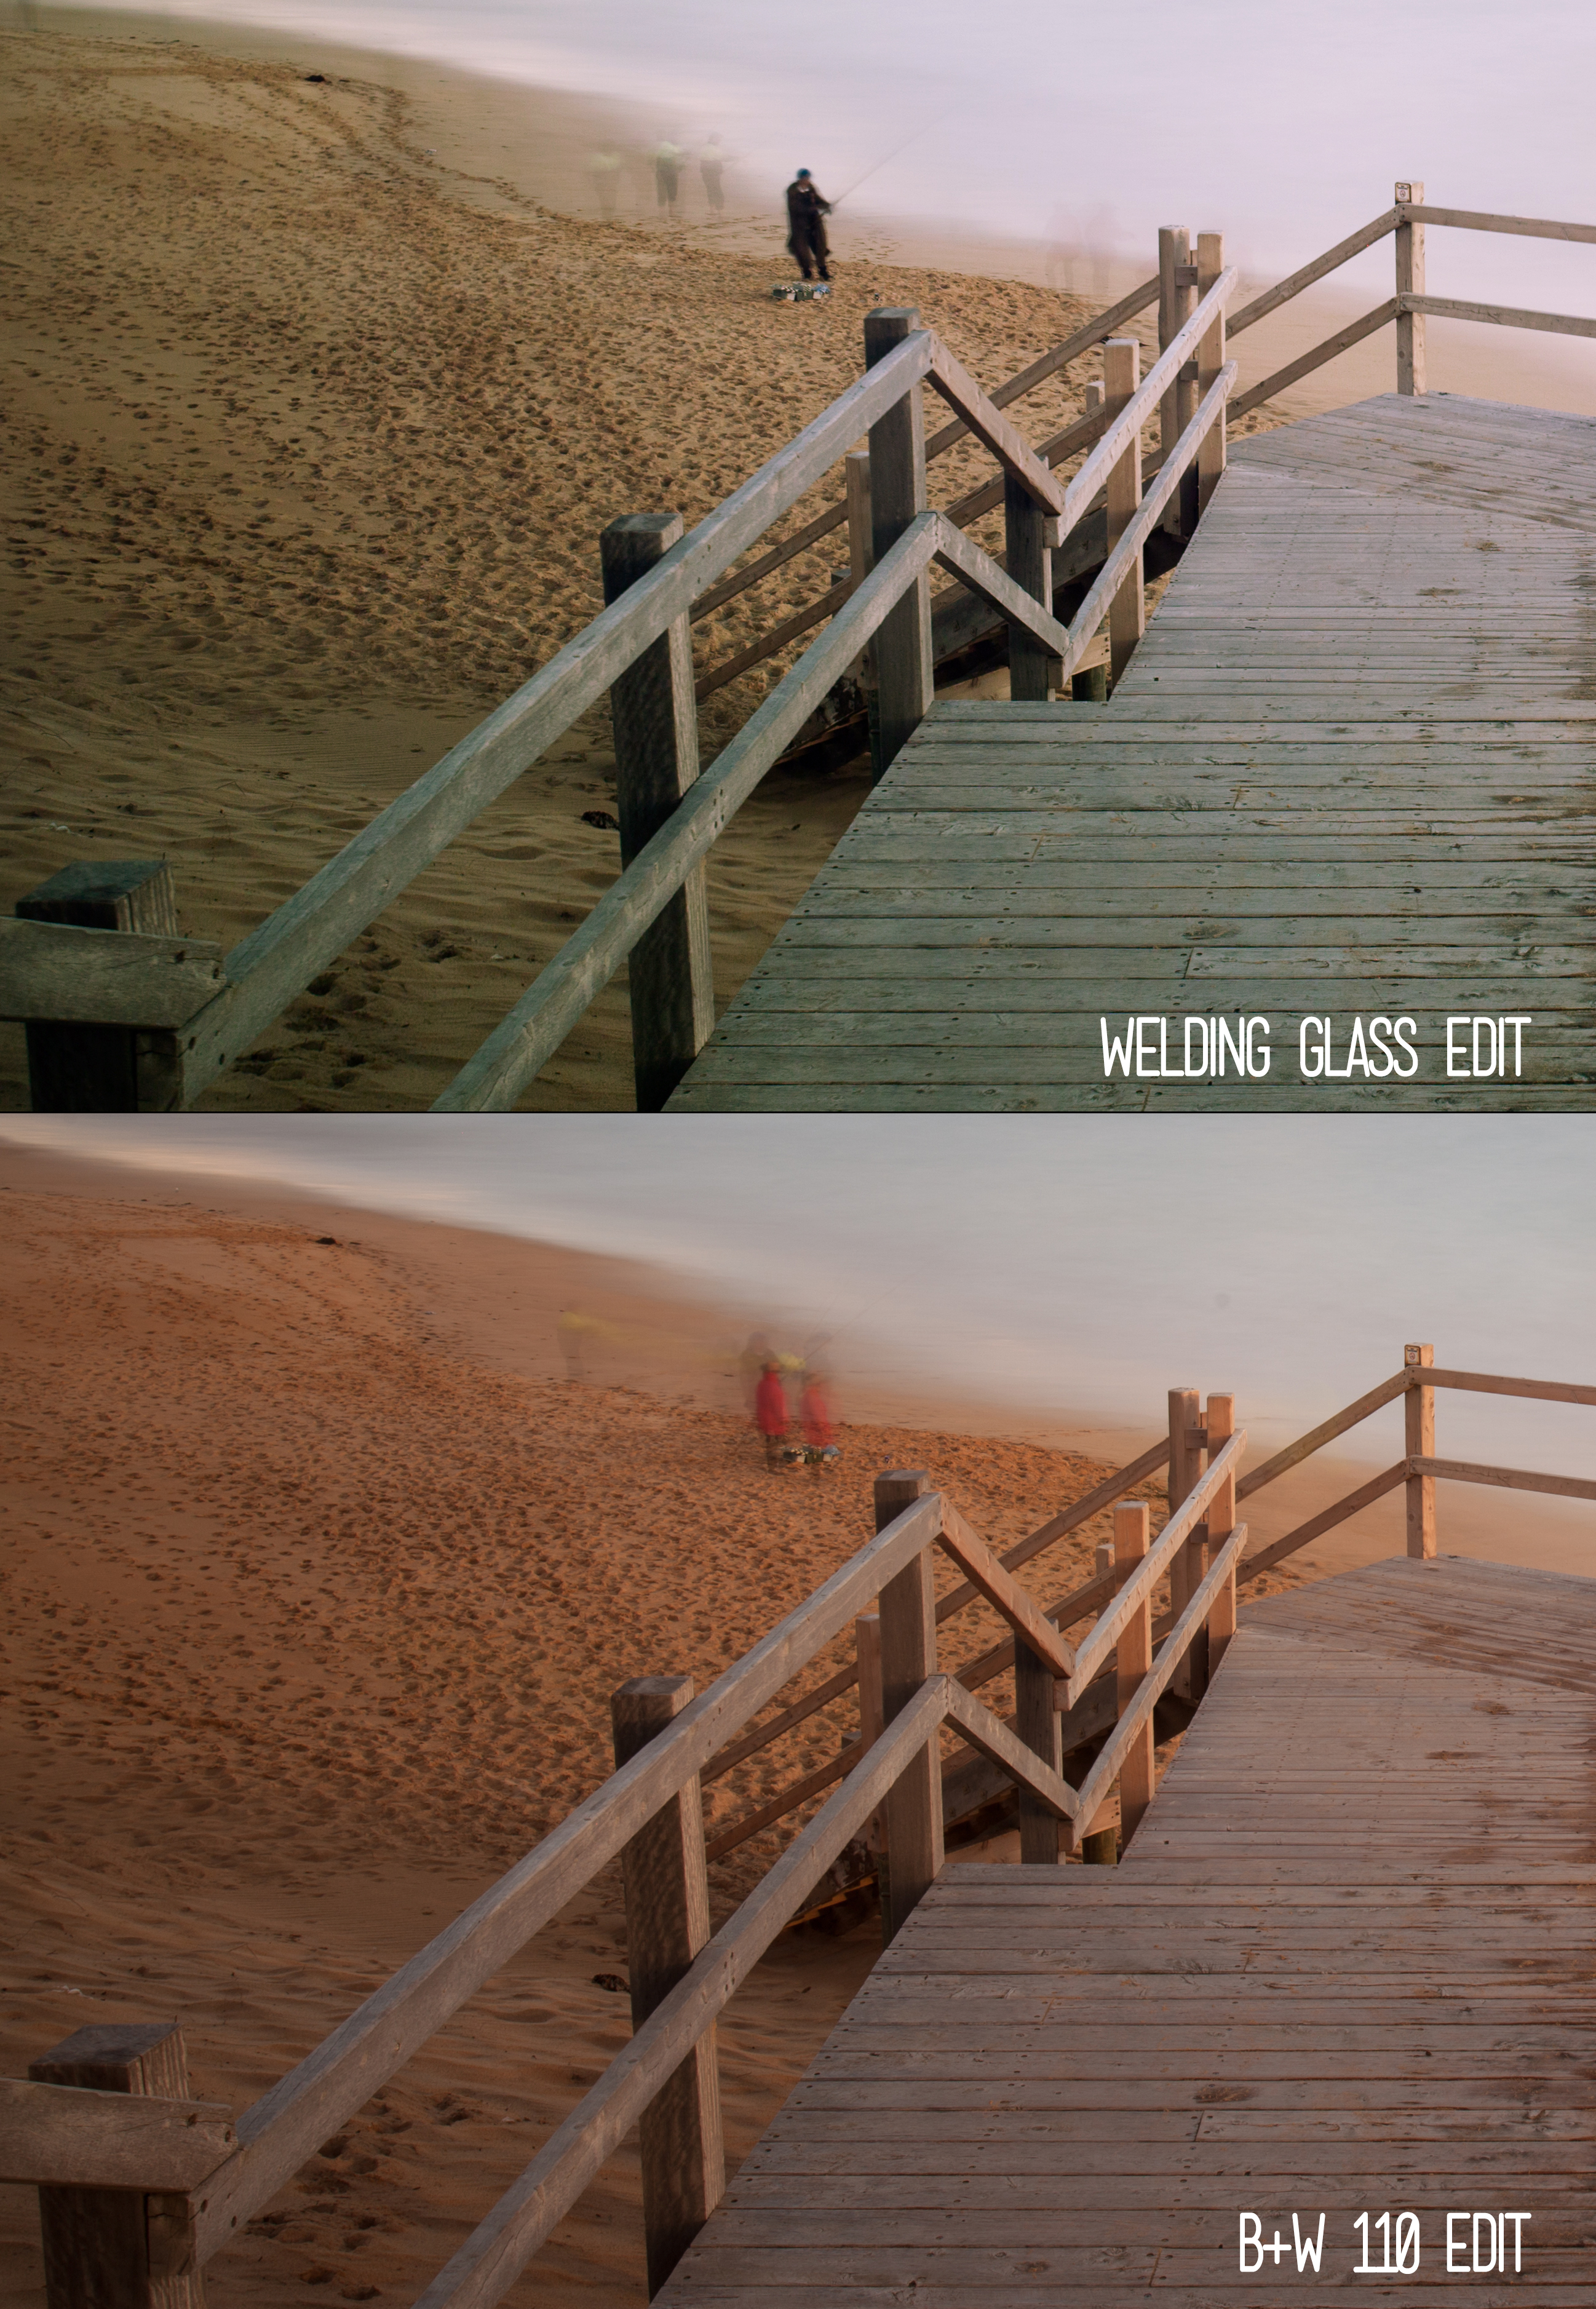
- Ignore photography purists who will tell you that using welding glass is a terrible idea as you will lose sharpness, have issues with flare and the like. I disagree. If you take a close look at this crop I have of two edited images which are both un-sharpened you can see for yourself that there is negligible difference between the two.
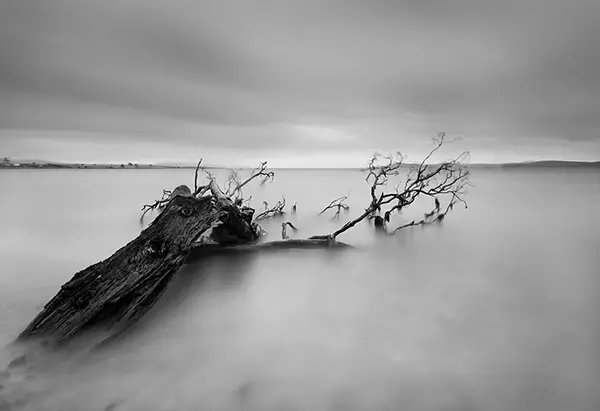
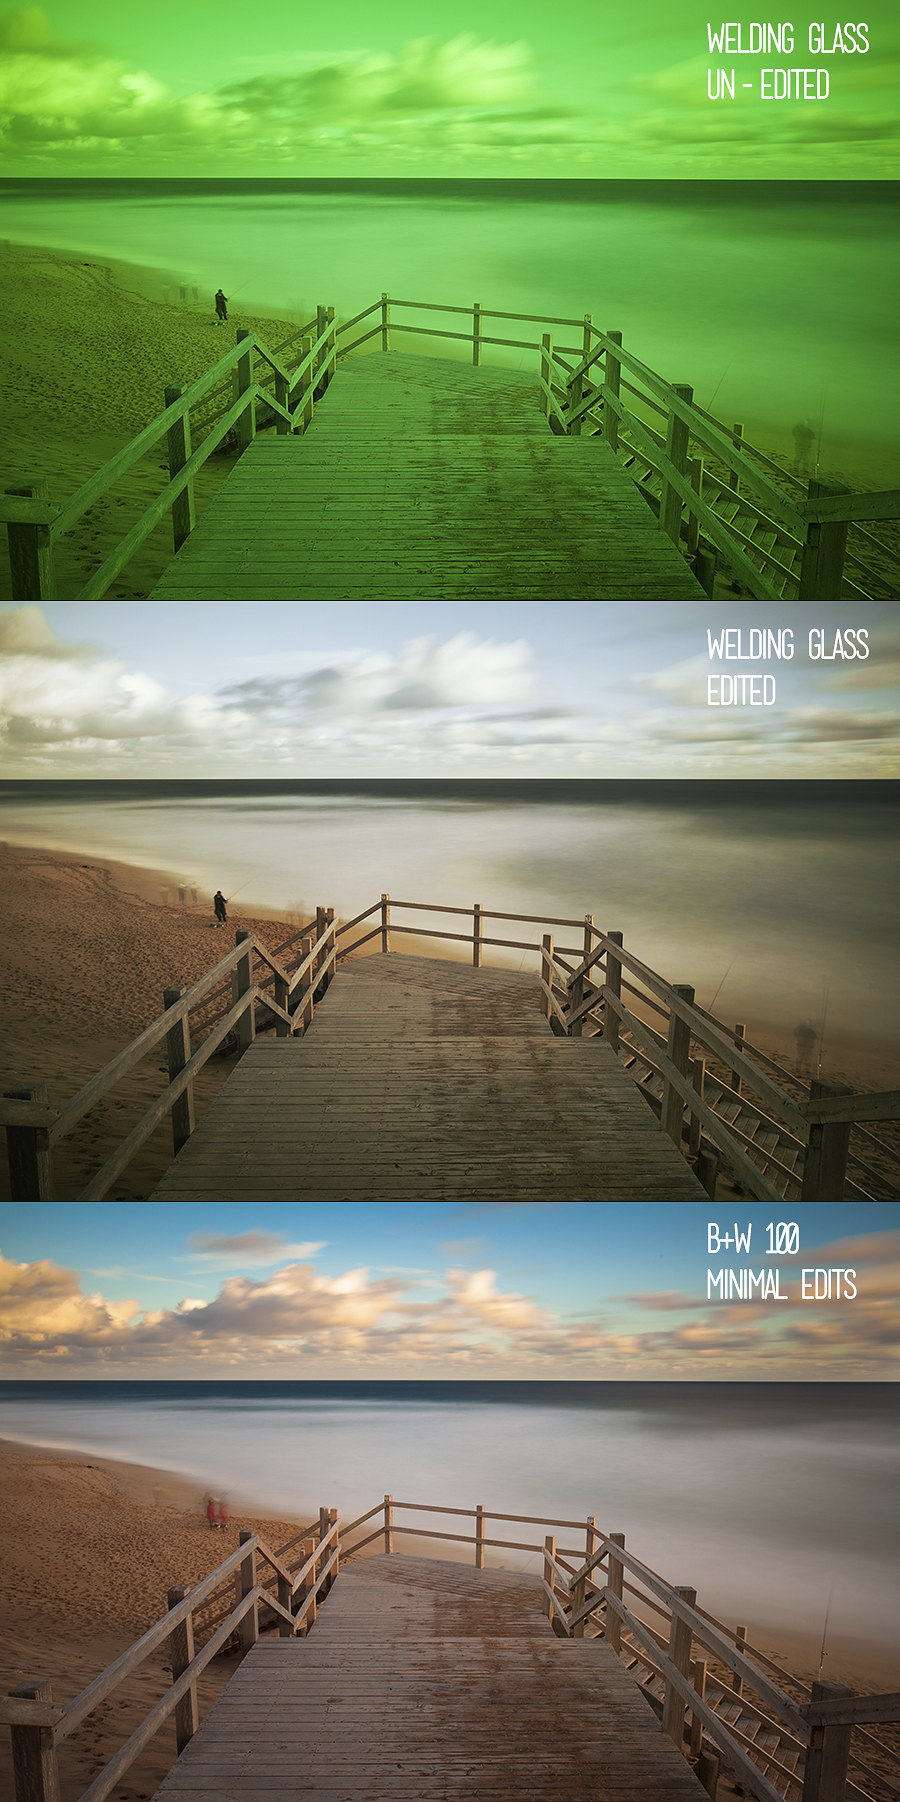
- Black and white is where the welding glass stands up with the B+W and Hoya filters. I dropped a black and white layer using NikSoft Silver Efex Pro on this photo shared earlier in the post and was really impressed with the result. If you put the image in front of someone not familiar I bet they wouldn’t be able to pick it was actually a long exposure with welding glass and not an expensive nd filter
- Getting the colours right in post can take a bit of fiddling especially if it’s something you’re not used to. Compare this to the B+W 110 where I can load a photograph taken into Lightroom and need to make minimal change to the colours. Sure there’s some colour cast that needs correcting but it’s nothing compared to the green colour cast of welding glass. But when you’re only paying $5 for a piece of glass as opposed to $100 I’m sure it’s something you can deal with
That pretty much sums up my experience in using welding glass as a neutral density filter substitute. I’d happily recommend this method to anyone looking to get into long exposure photography but aren’t quite sure whether it’s for them or not. Don’t be put off by the colour cast created by the glass as it’s easily corrected in camera and post processing especially if you drop a black and white layer over the top.
Related Reading
- What are neutral density filters? – A look at the various types of neutral density filters out there, how they are used and when to best use them
- Long exposure photography ideas – Now that you’re set up with a neutral density filter you’re probably wondering what to take photos of? I’ve put together a list of some of long exposure ideas to get you started
- How to capture daytime long exposures – Ever wondered how photographers capture exposure times longer than a second or two during the day? This article explains what equipment you need to get daytime long exposures if welding glass isn’t cutting it for you
- Guide on photographing waterfalls – Short guide on how to photograph waterfalls with information of what equipment you will need, examples of how different exposure times can affect your photograph and tips on getting a good waterfall photograph
Thanks for reading, – Alex

Interesting post mate, pretty cost effective alternative!
Cheers Jon! We need to get out soon 😉
hi Alex,
I’ve seen your great photographs. They are awesome. I’ve also tried this kind of long exposure with this cheap welding glass. Please have look at my shots, they are one of my first effort.
https://www.facebook.com/sandesh.photo
https://www.facebook.com/photo.php?fbid=384864004952425&set=a.344922372279922.1073741825.344914718947354&type=1&theater
https://www.facebook.com/photo.php?fbid=386619634776862&set=a.344922372279922.1073741825.344914718947354&type=1&theater
Have good time. 🙂
Hi Sandesh,
Thanks for stopping by and sharing photos you’ve taken with welding glass. Really digging the first one of the clouds over the trees.
Keep up the good work!
– Alex
Nice Post. Good collection of photos.
Thanks Akhil!
Damn it Al. I am going to give it a shot!
Might be a good way to help ease that break up with the Tour you’re about to experience soon 😉 Enjoy Norby.
PS, Might be time for pizza again soon…!
Very interesting read. Your long exposure shots are stunning! I’ve got a lot to learn and a lot to try-out. I use a Fuji x-100. It has a build-in ND filter, but no way to control it, adjust it. I’ve used it a few times but not for shots like yours! Thanks for sharing.
Thanks for stopping by Eric! I actually own the X100 too. You may be interested in my gallery of photos from it.
I just got this glass http://www.amazon.com/gp/product/B00166ILA8/ref=oh_details_o01_s00_i00?ie=UTF8&psc=1 in the mail today and tried it right away. There’s a haze over the photo that makes it hard to work with. Any suggestions? I’m guessing it was too bright out and the light reflecting on the glass did this.
Hey Wes, nice to hear you picked up a piece of glass. You’re right it would have been the reflection of the sun causing the flare up unfortunately. I find the welding glass especially prone to flare but you can minimise this by ensuring that the glass is kept as close to the lens element as possible. The larger the gap the more likely you will introduce glare.
Good luck with it and would love to see your results when you get out with it.
– Alex
Very useful post. Thanks for taking time and sharing experience with us.
You’re welcome. 🙂