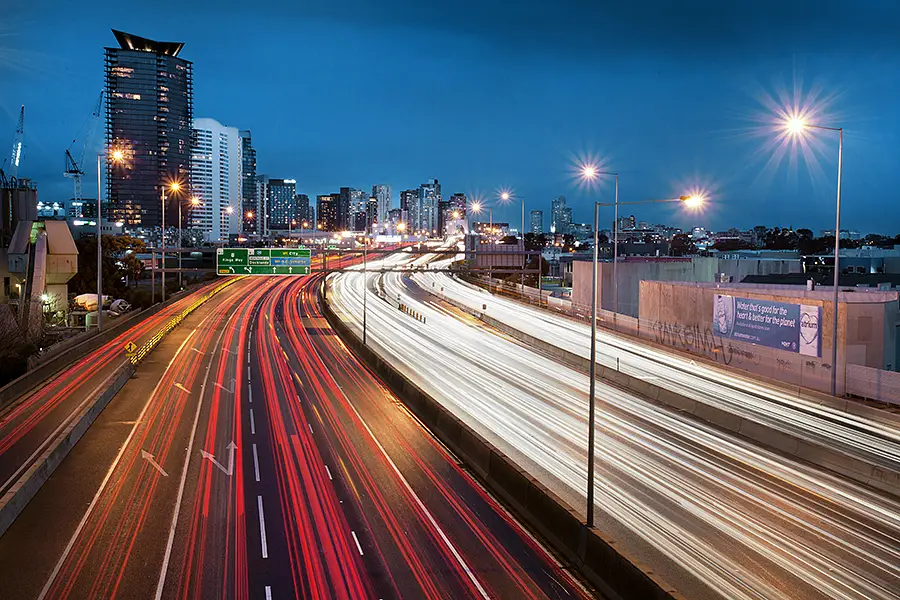
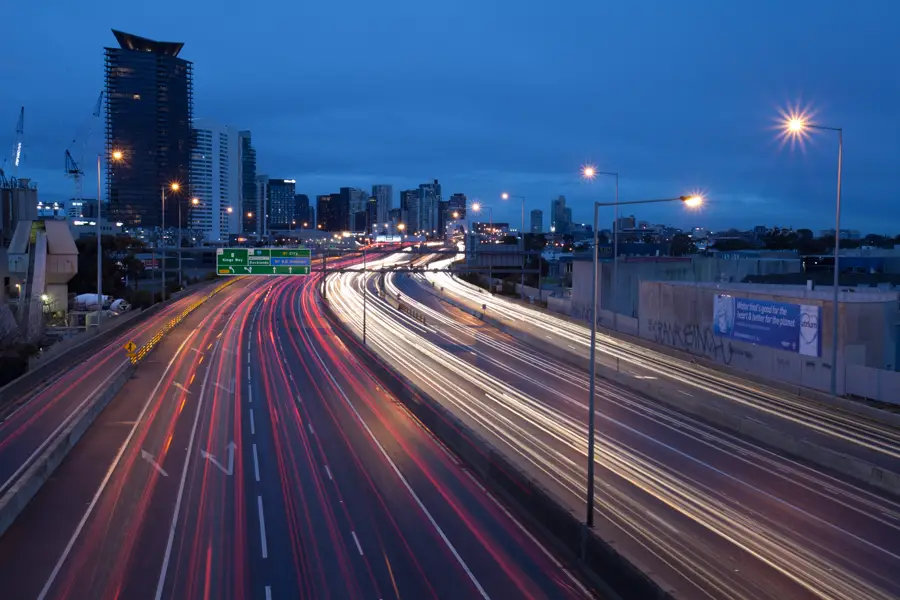
Driving around Port Melbourne on a rainy Sunday with Jon Sander last winter, we stumbled across this overpass that provides a great view of one of Melbourne’s busier highways. We were fortunate that the overpass was quiet and isolated away from the traffic below making its way in and out of Melbourne.
So… The photo you see is actually a composite of three images. One image formed the base with an additional two images being used to exaggerate the amount of traffic. Sure, I could have kept the shutter open for longer but to be honest – I am slightly pedantic when it comes to these things. Sometimes it can be easier to capture the base image and snap seperate frames when you see a large lump of traffic or a truck coming. Using layer-masks makes dropping the additional traffic into the frame quite easy. Over the top? Probably.
When it came to the colour grading of the image, I wanted to keep the cold feel from the day (keeping the sky looking cold and gloomy) but wanted some warmth to parts of the image. Using layer masks and a warmer temperature, I warmed the bottom half of the image while leaving the top half of the frame with a cold feel (using a layer mask to ensure the top half remain untouched).
For the remainder of the image, I used a range of dodge and burning to:
Bring out the star effect in the lights
Lighten the surrounding buildings
Add mood to the sky
And that’s that 🙂 Apologies that this post isn’t glamorous with interesting information. It wasn’t the most complex scene or photo to edit. The only trickery here was around the multiple layers used to exaggerate the flow of traffic.
If you have any questions, be sure to comment or drop an email!
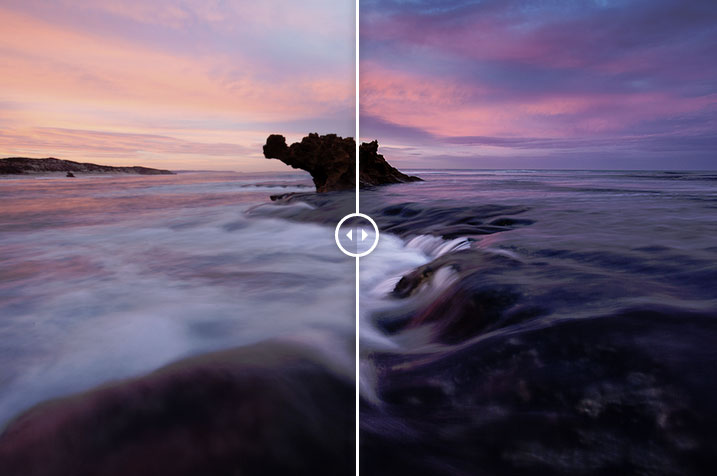
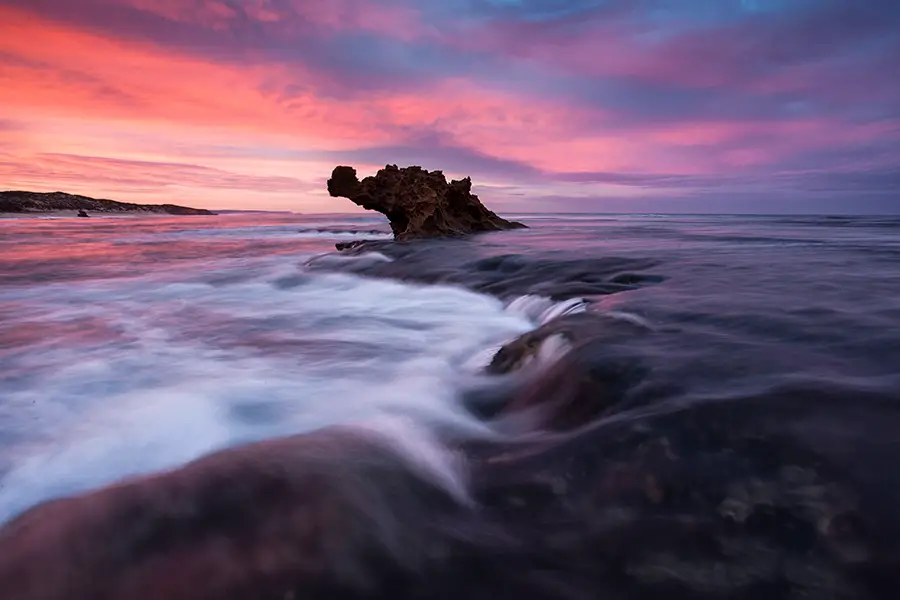
Dragon’s Head is located at Number Sixteen beach, Rye, Victoria and has been on my to do list for a while now. A few months ago, I finally got around to shooting it with an early start for a sunrise shoot. Having not been to the location before, walking out the rock ledge, dodging the little rock pools and trying to find a good angle of the ‘Dragon’s Head’ without taking an accidental swim made for a rather different but enjoyable way to start my Saturday morning.
Finding an Angle
Composing my image I clearly wanted to make the ‘Dragon’s Head’ the key part of my image. But with this in mind, I needed some other things in the photo to balance the photo out and give it my own personal touch. That’s not to say someone before me hasn’t taken the exact same photo but I needed something more than just a photo of the object. For this reason I opted to use the water cascading over the small rock ledge as a foreground element and leading line to the Dragon’s Head. Getting this angle required me to get low and a few attempts until the right surge of water came across (and a few yanks of the camera to safety.. Crisis averted luckily ;)).
In person, Dragon’s Head is actually quite small, so much so, it took me a bit of stumbling around in the dark with the head torch to actually notice it. For this reason, I really had to leverage traditional composition techniques by using a leading line, in this case, the water cascading over the rock ledge to lead the viewer to the rock. I think it worked well but I’d be keen to hear otherwise.
Shooting the Image
The photo was shot with a Canon 5D Mark II, Canon 17-40 and Cokin Z-Pro graduated filter with a 2.5 second exposure at F/16. Using the graduated neutral density filter was useful for holding back the sun rising to the left of the frame which would have otherwise created a partial highlight in the left of the frame. Through using a graduated neutral density filter for this part of the shot, this allowed me to not get any highlights in my sky while maintaining a good exposure of the bottom of the frame. I find this provides you with more of a neutral/flat look to your straight out of camera image but gives you a lot more space to work with when it comes to post processing the image.
Post Processing the Image
Working with a photo of a sunrise which doesn’t have any sharp highlights or shadows saves a lot of time when it comes to post processing. For this reason, post processing for this image of Dragon’s Head was processed in Lightroom and included:
Straightening the image
Applying a graduated neutral density filter in Lightroom to darken the sky and further bring out the sunrise colours
Using the adujstment brush to paint over the Dragon’s Head and the bottom of the frame to make both appear brighter
Simple curves adjustment over the whole image adjusting the shadows, midtones and highlights to give it a bit more of a punchy contrast
Without going overboard on an image that could have almost passed straight out of camera, that was the extent of the processing and that was that.
Thanks for reading and if you ever get a chance, be sure to visit Dragon’s Head down at Rye on the Mornington Peninsular on sunrise. A stunning place.
Photographing star trails is something that is forever on my to do list. I’ve photographed countless sunrise and sunsets over the years but star trails continue to elude me. On a trip down the Great Ocean Road for a few days, I was determined to pick a night and setup for some star trails. My intention was to find a reasonable composition, a rock to sit on, load my tablet up with an episode of The Newsroom (great show I might add) and sat back while the camera did the rest.
Taking the Photos
Luckily conditions were perfect for star trails with the sky being clear and the moon relatively new. When photographing star trails, those much smarter than I suggest it is better to time your star trail photography around the time of the new moon. This results in less light emitted by the moon allowing for a darker sky. Another thing that has to be considered when doing star trail photography is light pollution. This can be a real issue if you live in bigger cities. I’m from Melbourne, Australia, often we will drive 100km ~ from the city, and still struggle some light pollution that leaves some light visible in the sky. This does not make photographing stars impossible but is something to consider if you do live in a bigger city. Fortunately, for this trip, we were headed far from Melbourne with minimal light pollution so it was clear and very dark skies. This led to some great conditions for star trails even if I still got some noise pollution through an orange glow from Geelong in the left of the frame.
One thing that has always acted as a deterrent for star trail photography is sitting around in the dark for hours on end while your camera exposes the earth moving on its natural axis (thanks wiki!).This time around I decided to come a bit better pre-planned and loaded up my tablet with episodes of The Newsroom and made myself at home while my camera exposed for 2 hours. I must admit, I love being in nature on my own but not so much when it’s pitch black dark. Let’s just say – I was happy when the exposure was over so I could get home and jump into a warm bed 😉
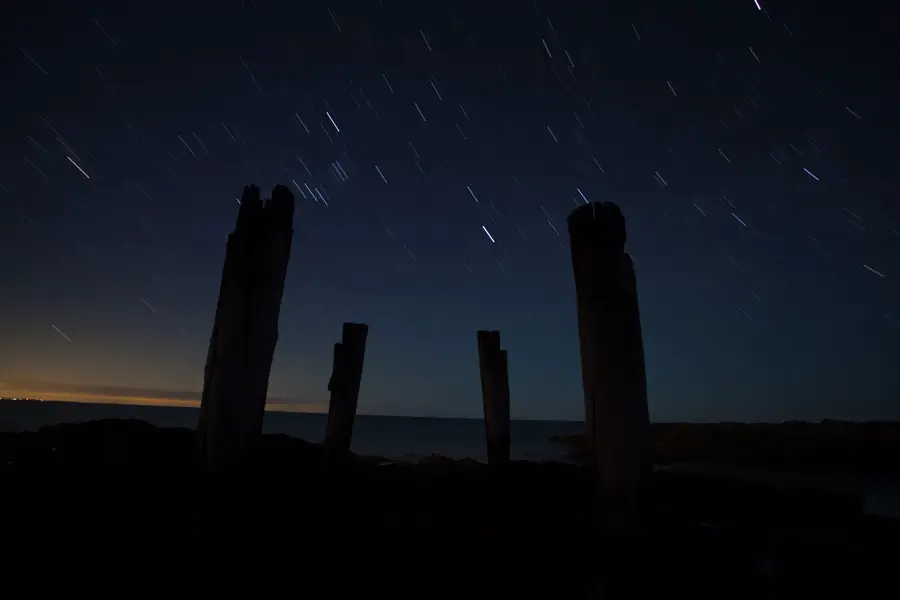
Using the pilons as my key composition, I arrived at the location around sunset with the intention of taking a photo on blue hour to capture an image while there was still a lot of light in the scene. The idea here was to get a good dynamic range shot of the pilons in case later during the night, it got too dark and difficult to get a good exposure.
Rather than capture one 80 minute long exposure I decided to take 8 x 10 minute exposures to minimise noise in my image. Unfortunately the 5D Mark II isn’t fantastic in the dark when it comes to noise so opting to blend exposures is a nifty and cheeky way of avoiding this. The end result was 8 x 10 minute exposures at F/5 and ISO 100. This was made possible by using an intervalometer where I specified the exposure time, interval between photos and how many photos I was taking. Other than occasionally glancing at the LCD screen to see how the exposures were looking, I then sat back and enjoyed an episode of The Newsroom until the camera finished doing its thing.
Post Processing the Photos
Blending multiple star trail photos is made easy through the Lighten layer mode in Photoshop. I simply loaded my blue hour image up and then added the 8 images as layers. With these open, I changed the layer mode to Lighten which then combined the star trails and created some nice lines. In case you’re still a little bit still confused I’ve put together a quick clip which demonstrates the process. It’s really that easy.
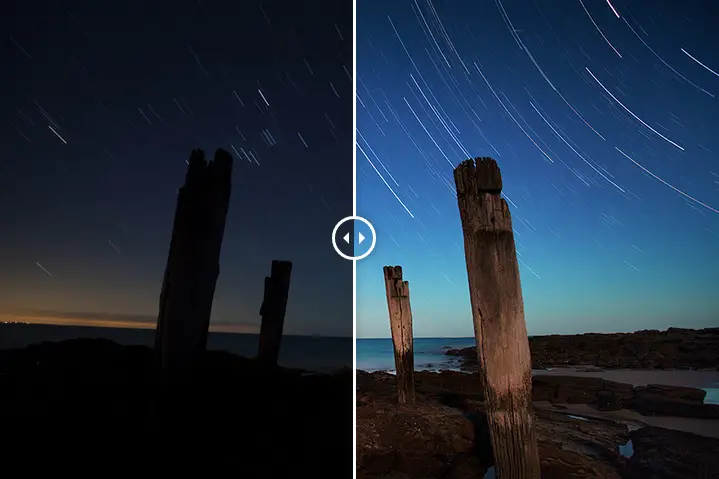
With the images blended I then went about post processing which I’ve put together into a headache inducing timelapse video. You might notice that I do a lot of flicking back and forward during the video? This isn’t the original edit of the photo and I’m simply checking back to the original during the edit to check how my edit fared in comparison to the original edit.
Through the mad scramble of the above clip I made the following changes:
Combined all images using the Lighten layer mode
Straighten of image with left over back bars fixed up using the content aware tool. I must profess – I’m a sucker for the content aware tool especially when replacing areas that are quite simple like a mark on a blue sky (more on Adobe’s website about content aware). As the black bars were appearing next to blue sky I used the content aware tool to fill in the areas and it didn’t let me down. Although with that being said, it can be a bit temperamental occasionally and force me to not be lazy 😉
Removal of torch light trail. I was shooting with Jon Sander who was off shooting at another location and decided to come back to see how it was going. After sitting in the dark on my own for an hour, I must admit, I wasn’t really expecting visitors and got quite the fright. As he entered the scene, his torch left a light trail which was removed using the content aware tool
Curves layer for the sky to brighten the sky up and emphasize the stars
Curves layer for the ground by pumping up the shadows and bringing as much detail as possible
Subtle hue and saturation change to the sky
Selective brightening of the pilons using the dodge tool
Silver Efex Pro Contrast adjustment layer at a mid opacity to introduce a dynamic contrast to the image
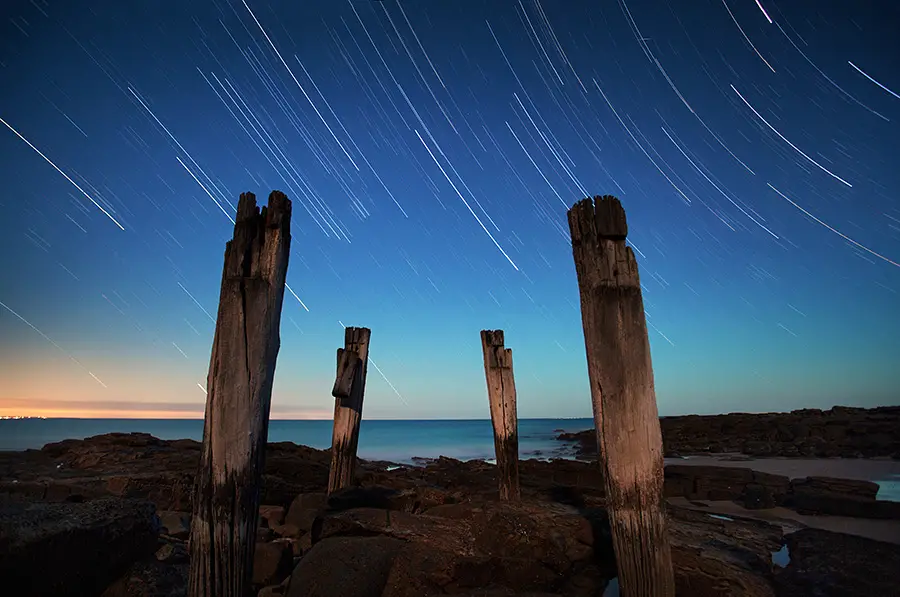
Below shows the final image with the layers combined and edits made. In hindsight I I should have stayed around for another hour but after being up for sunrise, shooting all day and sunset, I was wrecked and ready for a warm bed.
The final image – Star trails at Wye River. More photos from this trip can be seen in my Great Ocean Road post
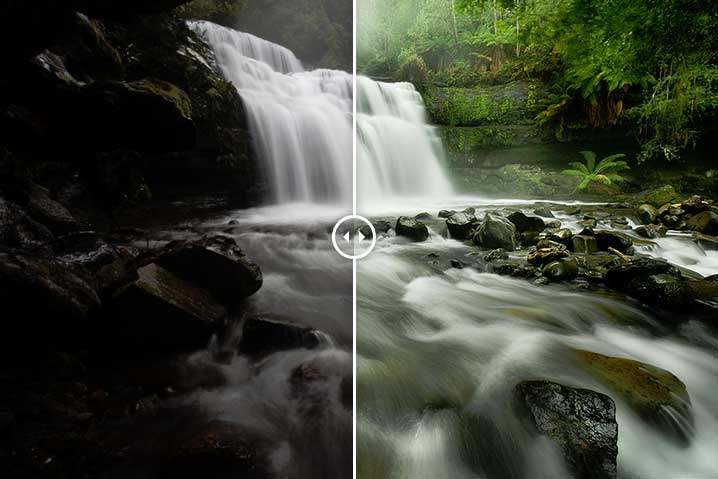
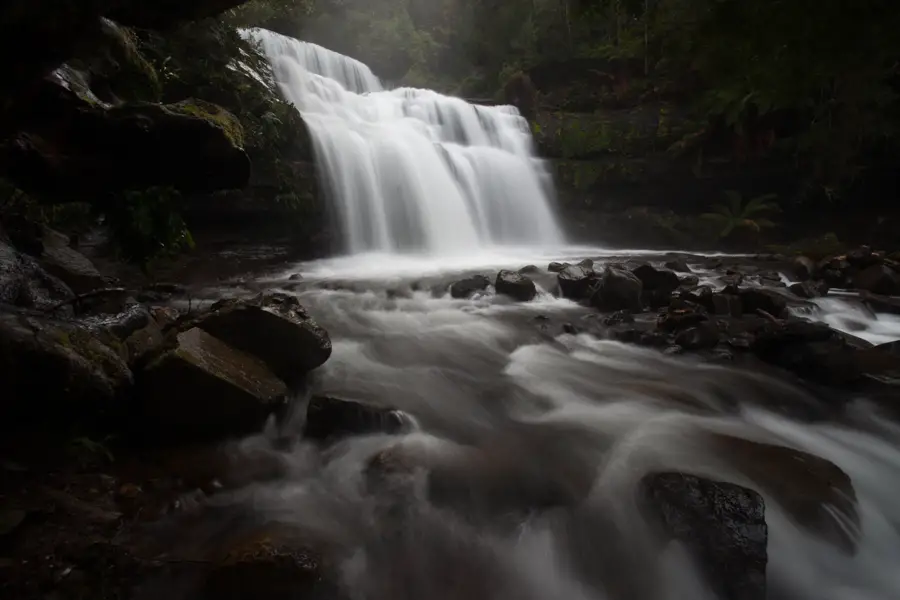
As a photographer, we all have one or two images that are personal favourites. For me, this is mine. It’s a photo captured at Liffey Falls, Tasmania on a wet and wintery day.
Generally personal favourites for me are images that have back stories that make them what they are. Before taking this photograph I had spent 4 days driving around the Tasmanian West Coast in constant torrential rain without much opportunity to get the photos I’d hoped for. Sure it was beautiful walking along those empty beaches in the pouring rain and exploring the quiet towns of the West Coast but at the same time disappointing not to be able to photograph it in all its glory. Feeling a bit tired and over it all, I decided to make a last ditch attempt for some photos at Liffey Falls even if it was pouring with rain.
Taking the Photograph
The rain over the trip seemed relentless and upon arriving it was still constant even through the towering trees. Luckily for this photo I managed to find a nice little spot underneath a large rock slightly covered from the downpour. Being close to the waterfall created its own challenges with water from the waterfall creating a constant spray over my lens. I couldn’t escape the rain! But eventually after taking a photo, wiping the lens and repeating, I eventually got something without water spray all over the image. It was nice walking away from driving around 1200km over 4 days to walk away with one image I was happy with. Regardless thoughI would have probably been happy with nothing. Exploring the Tasmanian West Coast is a joy in itself. Such a beautiful part of the world. In case you’re interested, photos from this trip to the Tasmanian West Coast can be found in a previous post.
The image was captured with a Canon 5D Mark II, Canon 17-40, manfrotto tripod and Hoya Circular Polariser with a 1 second exposure at f/18. Generally I’ll try to shoot a waterfall for a little longer but due to the constant spray from the waterfall I had to settle with a shorter exposure to get a photo without spray all over the lens.
With the amount of spray coming off the waterfall it made the shoot quite the shoot and dash affair. With this in mind, I deliberately shot the image a little under exposed with the intention of pulling back detail in post. Generally shooting slightly under exposed is a good rule of thumb as it offers you a lot of flexibility in post as you are able to recover detail. Shooting over exposed and trying to recover detail is another story and not generally recommended.
Blending two exposures
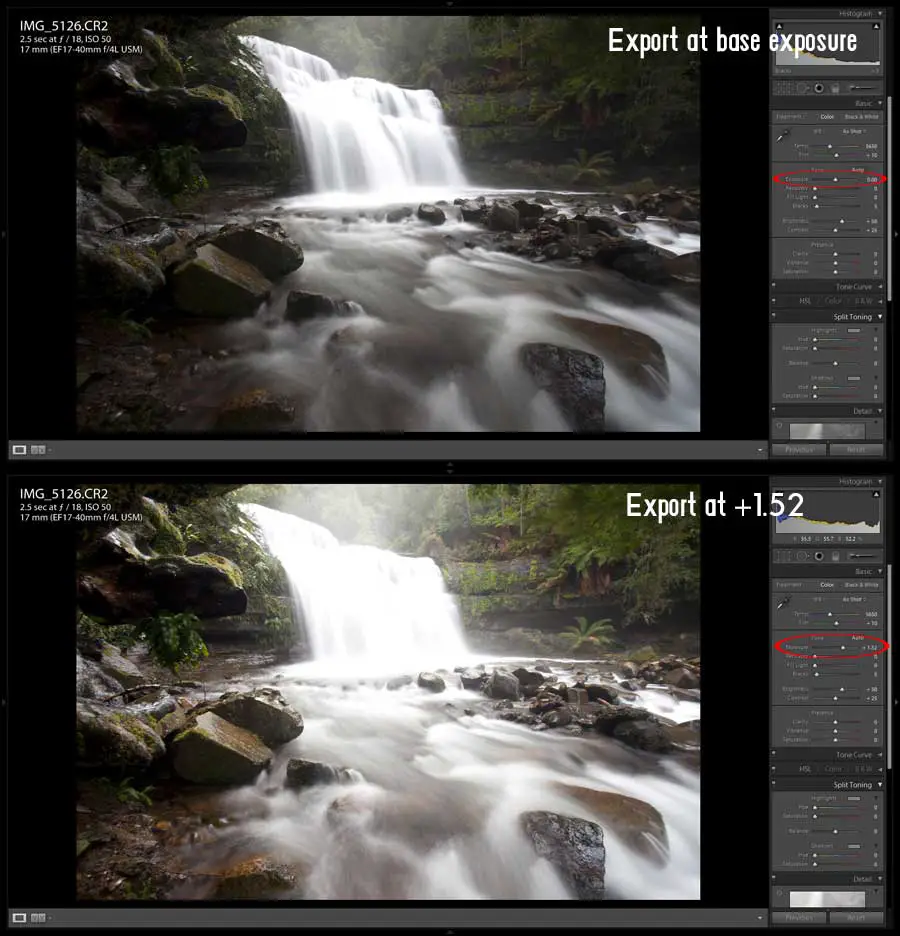
With the image shot under exposed, I went about loading the image into Lightroom and exporting two images from the RAW. One at the normal exposure that the photo was shot at and another over exposed at +1.52.
The two images used for blending in Photoshop. One at a neutral exposure and another +1.52 stops over exposed
The intention here was to use the over exposed image (+1.52) to bring out detail in areas that were quite dark in the original exposure in particular the foliage areas around the waterfall. Combining parts of the over exposed/second image was through the use of layer masks. I’ve written about the layer mask technique previously and funnily enough, the example image in the post is this photo from Liffey Falls so I’ll let that post do the talking.
Colour Correcting
The end result of blending the two images was recovering detail around the waterfall that was otherwise lost in the normal exposure. With the foliage recovered, I then went about making shifts to the red, green and blue colour channels via the curves tool.
In case you’re not familiar with the Curves tool, this gives you the ability to make adjustments to the shadows, midtones and highlights of an image. But for those seeking more control, you can select either the Red, Green or Blue channels and specifically just adjust the shadows of that channel of an image. It’s generally my go to when editing an image in terms of colour correction and changes to the dynamic range of an image. For a quick look into the clip be sure to give this little clip about Photoshop Curves I put together. Not too sure what I was thinking in terms of song choice that day…
I wanted to give the foliage a boost to appear more green and vibrant. Using the curves tool, I made some aggressive changes to the green channel and used layer masks to restrict the changes to the foliage area of the image. This was to avoid introducing a strong green colour cast over the water in the image. With the change to the foliage done, I then went about making some subtle changes to the hue and saturation of the water.
Faking a bit of fog…
So this is where I’m potentially going to lose you… I thought when editing the image “Wow, how great would some fog look at the top of the waterfall? There was a little bit of fog from the rain and low hanging cloud but I must be honest – nothing to the effect as seen in the photograph.Ok so hopefully you’re still with me and I haven’t lost you after coming clean about the fog 😉 But in faking the fog it was actually super easy. Using the dodge brush, I used a mixture of dodging the highlights and midtones around the top of the waterfall gradually introducing it to give this effect.
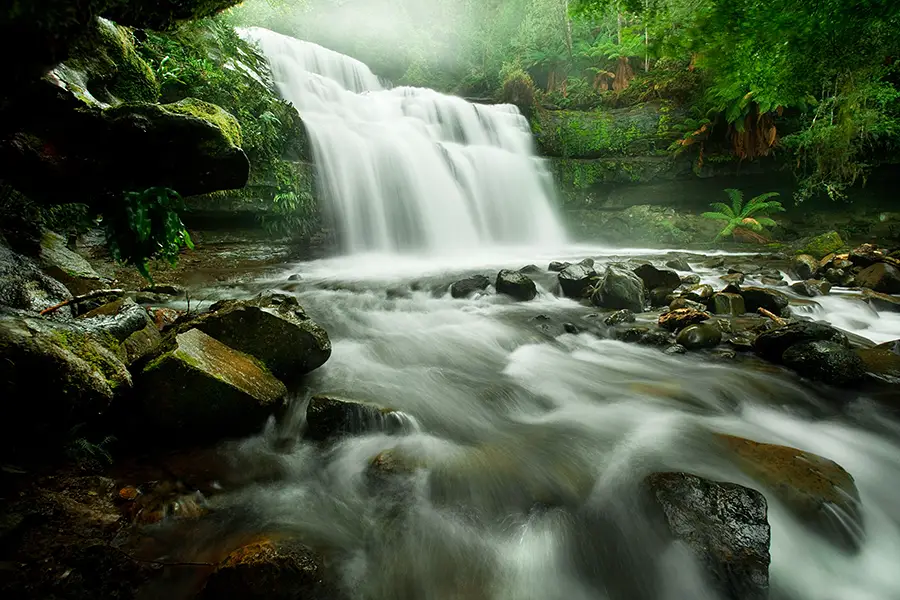
Final Touches
With the image in a state that I was happy with I went about adding the final touches of selectively sharpening parts of the image using layer masks and some dodge/burning to parts of the image. This was the finished product.
As always, feel free to send an email or leave a comment if you have any questions or feedback.
Don’t forget to give my Facebook Page a like to keep up to date with future posts from my blog or even give this post a like if you’re feeling generous 😉
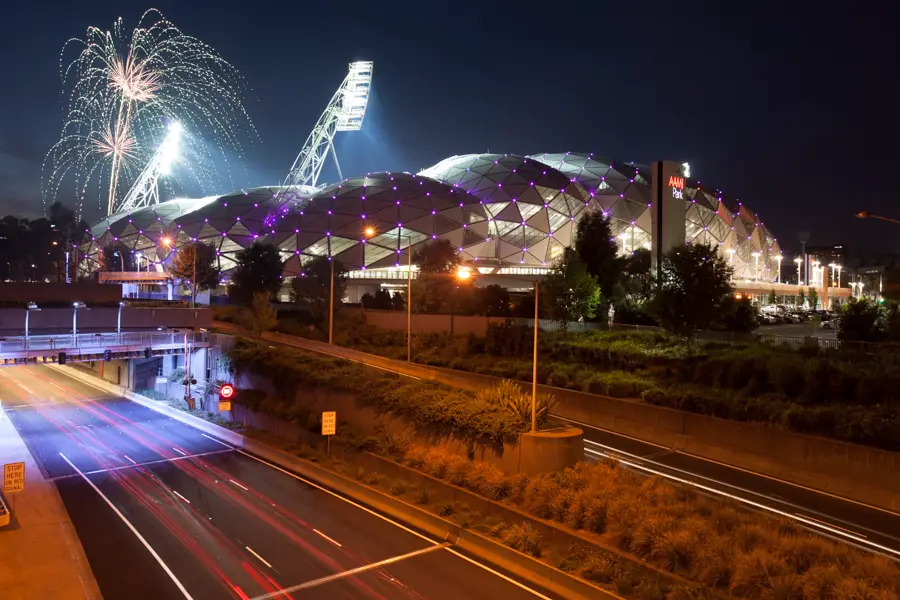
Fireworks at AAMI Park as captured in 2011 during a sports game at one of Melbourne’s iconic sports venues.
After passing by it on my commute every day to work, I’d always wanted to capture a long exposure of the traffic going beneath the bridge with the stadium all lit up with a game being on. Timing for this photo was key where I wanted it to be a clear forecast so I could get a nice blue sky around blue hour. I waited a few weekends where an event would be on but the forecast wasn’t really on my side. Eventually I got lucky with the forecast and luckily there was a time playing so decided to pounce. The plan was to arrive just on sunset to setup and capture an image around blue hour which would provide a nice even light over the scene and allow me to capture the lines from the constant flowing traffic beneath.
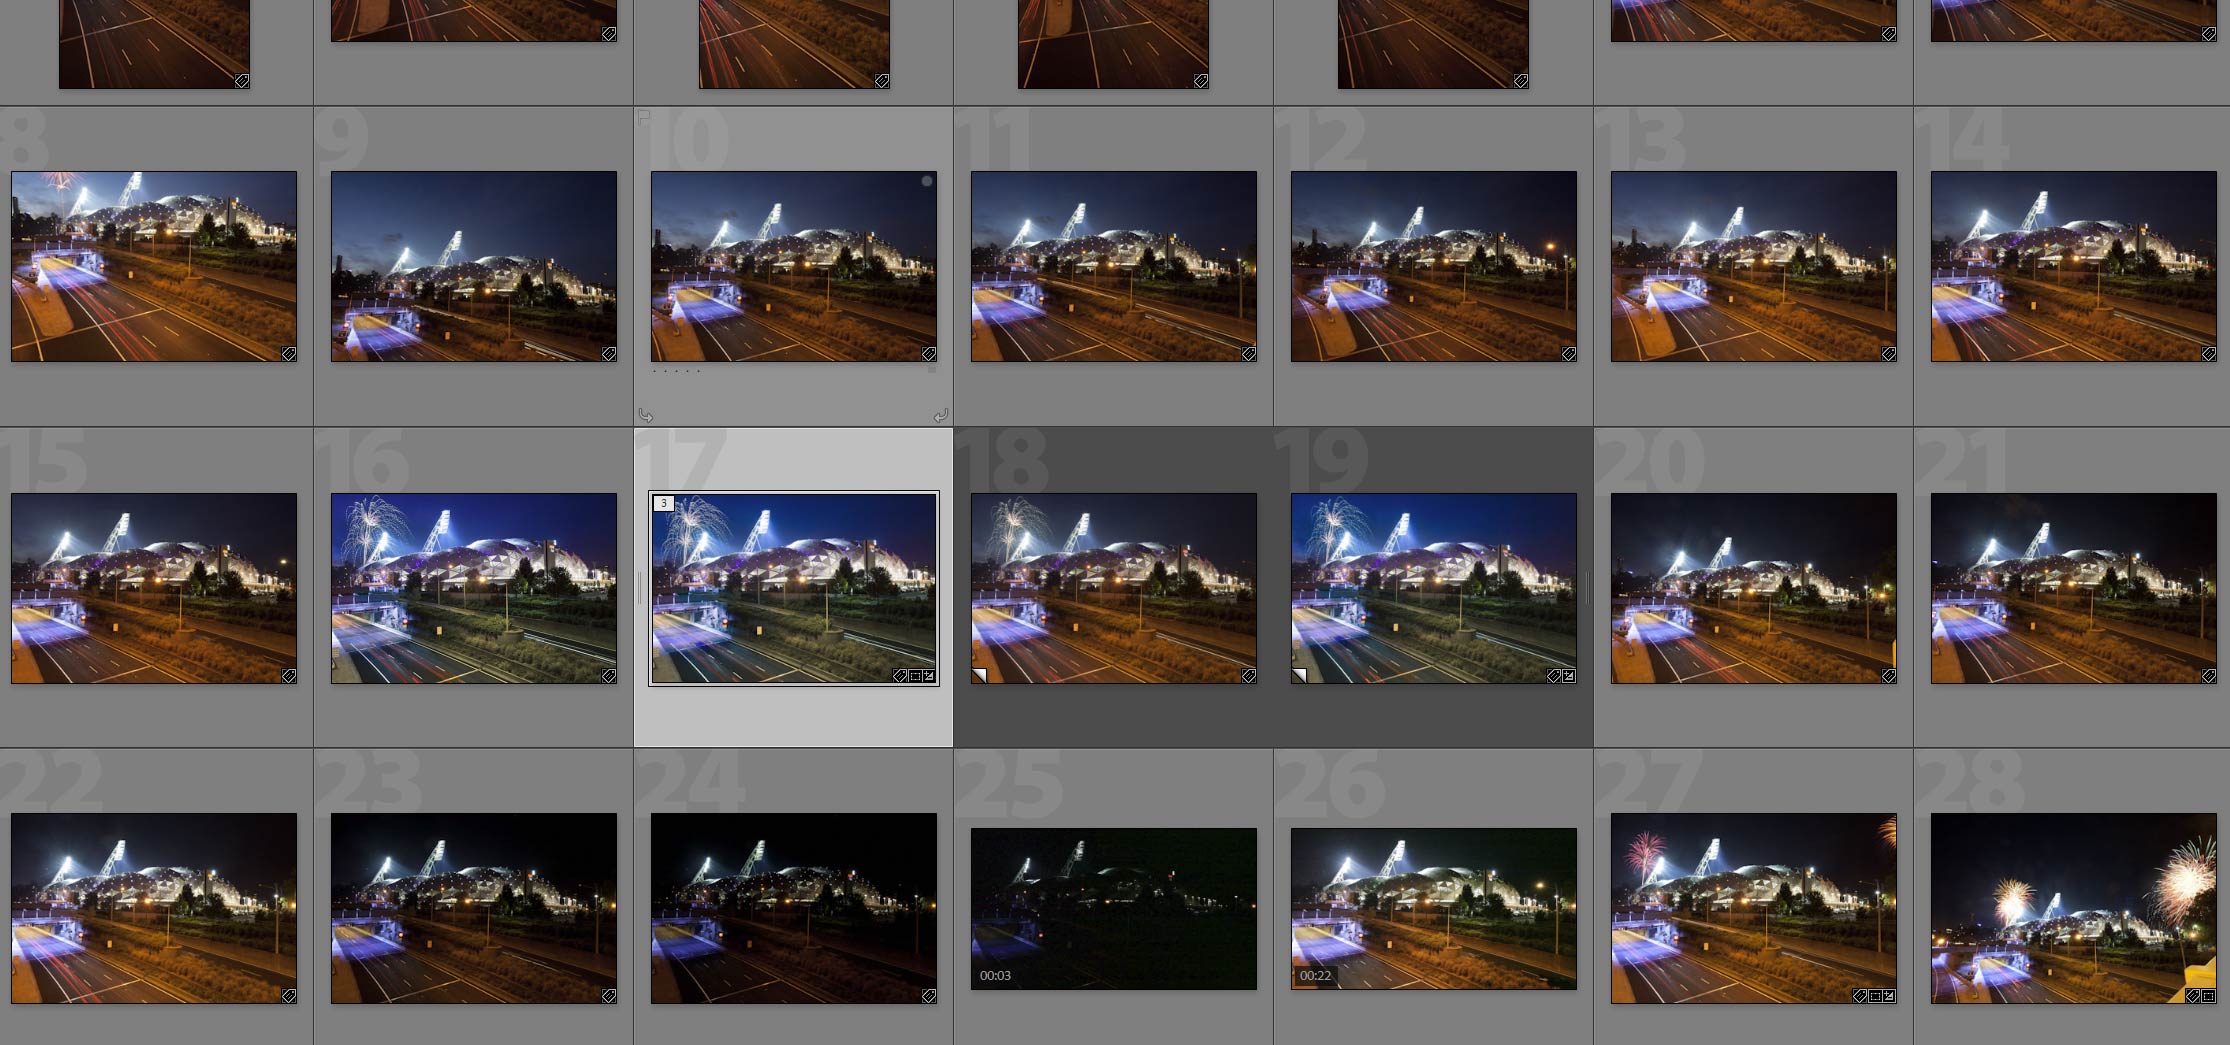
Various photos taken over the night.
It was by luck that AAMI Park uses fireworks for when a team scores a goal. Even more lucky was that many a goals were being scored. I have to be honest – photographing fireworks isn’t my strong point and I really wanted to capture it in one image rather than blending the fireworks into the shot. Thanks to the fireworks going off every 5-10 minutes it let me get the right photo eventually in a 20 second exposure at F/13. For this photo I used the Canon 5D Mark II, Canon 17-40 and a tripod.
Processing the Image
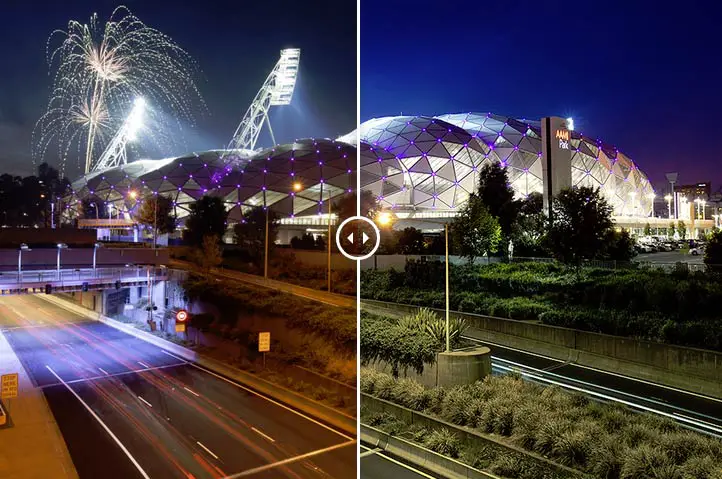
The challenge for this photo (and something I find a lot when shooting night time) is battling the warm temperatures of the street lights. For this image, I could of edited it entirely in Lightroom by using the adjustment brush and saturation but I wanted a greater level of control over the image where I could make small-scale changes to a small selection without affecting the overall image.This is where I encourage the use of layer masks in Photoshop due to their ability to allow you to make selective changes to an image. Want to increase the saturation of just the reds of the traffic flowing past without increasing the saturation to other reds in your image? Layer masks is your answer.
[box type=”info” style=”rounded”]More information about layer masks and blending can be found in an earlier post about layer masks on my blog[/box]
Using layer masks on the bottom half of the image, I used a mixture of selective saturation changes, curves channel changes (adjusting the Red channel shadows and mid tones to reduce the red) and introducing a cold photo filter . I’m probably not 100% with the bottom half of the image but much prefer it over the original image where the lights create a high temperature over the scene.
With the high temperature traffic lights cooled down I then went about editing the sky and stadium. The changes here were quite simple and included:
Saturation boost and brightening the sky – With the intention of capturing the image on blue hour I really wanted to bring out the sky to emphasize the blue hour feel. The sky in the raw was quite flat (notice how the light drops off near the stadium lights) so I used the dodge feature in Photoshop to brighten the sky and to also bring out the fireworks more. With this done I then set about boosting the blues of the sky with a saturation mask
Colour correcting and brightening the stadium – As I had the camera set to auto white balance, this left a warm and inconsistent colour temperature across the whole scene. To correct this, I set about creating a curves layer, opening the red channel and reducing the reds in the shadows and mid tones. The key here was to remove the reds from the stadium to make it appear its natural white colour. In addition to this, a saturation layer was created to lower the saturation of the stadium. Once again, a layer mask was used here for both layers to ensure the reduction to the red channel and saturation was only made to the stadium and not other parts to the scene. Once this was completed, I then went about dodging the stadium to brighten it
Straighten and perspective correction – I must admit, it’s rare that I’ll get my horizons 100% straight. Luckily it’s easy to quickly fix in Adobe Photoshop by selecting the ruler tool, running it along the horizon of the image and then selecting Image > Image Rotation > Arbitrary. With this complete I also used the lens correction tool in Photoshop which corrects distortion based on your lens profile. This can be found in Filter > Lens Correction
And that’s it really. For this image the most important thing was getting as much correct in camera as possible. Sure the colour balance could have been set to manual to avoid having to re-correct in post but through getting the fireworks and everything in one shot made post processing a lot easier.
Hope this post was useful for you and as usual if you have any questions or feedback I’d always love to hear from you.
