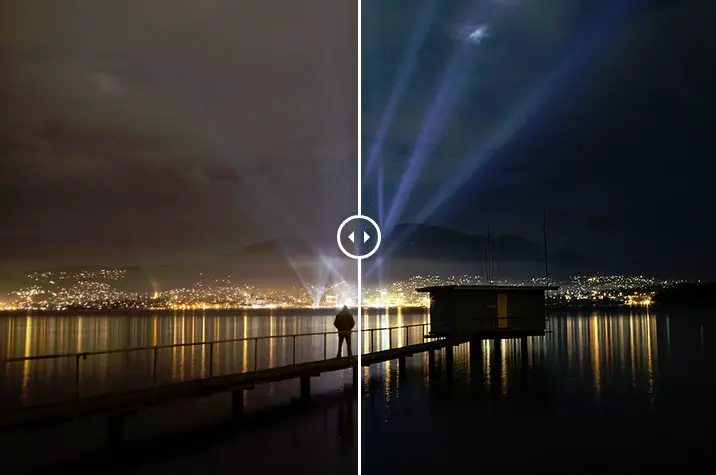
Following up from my recent post sharing photos of [ilink url=”https://www.alexwisephotography.net/blog/2014/08/22/a-quick-weekend-in-tasmania/”]a quick weekend photographing parts of Tasmania,[/ilink] I shared a photo from Dark Mofo 2014 and thought it was good timing to share a before and after of how the image came together.
[twentytwenty][/twentytwenty]
Capturing and Processing Dark Mofo 2014
This forms part of a [ilink url=”https://www.alexwisephotography.net/blog/category/technique/before-and-after-technique/”]Before and After Series[/ilink] where I share both the before and after images and do my best to provide an explanation of how the images were captured and processed. I’m not one to heavily process my images but when I can’t capture what I see, I will resort to using Photoshop and multiple layers to achieve what I visualised before even pressing the shutter. Perhaps some may feel that this is cheating and I appreciate that this level of post processing isn’t to everyone’s tastes but I would argue that post processing like this remains within an acceptable level of photography post processing and does not cross over to photo manipulation. The later involves adding skies, moons or sunbursts from other shoots where the lines of an acceptable level of Photoshop starts to be questioned. But let’s move on to how this particular image was captured and post processed.
Capturing the Images
Some background about this years Dark Mofo
This year Dark Mofo had an installation of multiple lights scattered around the city of Hobart where the general public could go and control them for a few minutes. Last year the organisers of Dark Mofo had a one light installation which was centered in the city of Hobart – making things a bit more easier for photographers. This great image of Dark Mofo 2012 by Ben Short captures it in all its glory.
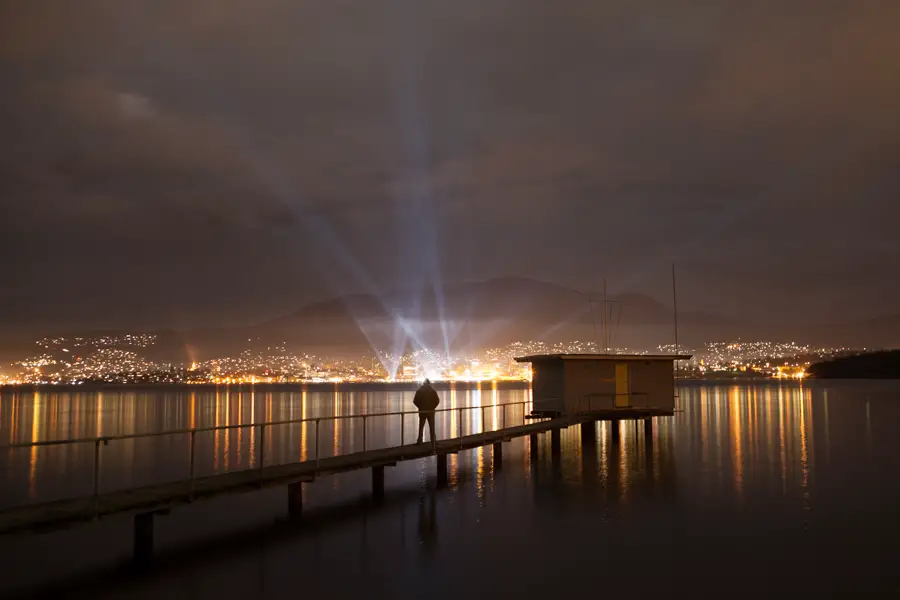
With the lights being controlled manually, imagine a kid dialed up on red cordial controlling the lights and them quickly moving around the sky (in case you’re curious I recorded this admittedly terrible video of two of the installations doing their thing). Rather than take a photo close up of the installation I looked for somewhere out of the city which would provide me with a viewpoint that captured all of the lights located around Hobart. For this reason I chose Bellerive which provided a direct view from across the river looking towards the city and the Dark Mofo light installations. After standing and watching the lights flicker around the sky I knew straight away that I would need to capture multiple exposures of the lights and combine them in Photoshop if I was to get the result I was after.
Capturing the light installation
Setting up for the image I decided to use my [ilink url=”http://www.adorama.com/ICA5DM2.html?KBID=65353″ style=”note”]Canon 5D Mark II[/ilink] , [ilink url=”http://www.adorama.com/CA2470.html?KBID=65353″ style=”note”]Canon 24-70 2.8 L[/ilink] , tripod and interval remote for the photo. Composing the image I used the jetty with me standing on it in the foreground and the Dark Mofo lights in the background. This would require multiple images to be captured of the light installations (to capture them at the different points in the sky) and then another shot of me standing on the jetty.
Capturing the light bursts I wanted to capture shorter exposure times so ramped up my ISO to 2000 and set my camera to aperture priority mode and shot at F/2.8 which resulted in an exposure time of around 0.5″ of a second. I set the camera to burst mode and fired around 15 shots of the lights. These would later be selectively combined to form the top part of the image
Capturing the image of me standing on the jetty
For the image of me standing on the jetty, I changed my camera settings to manual and set the ISO to 200, aperture to F/4 and an exposure time of 15 seconds. Using the interval remote, I was able to set the count down timer to be one minute, giving me plenty of time to get down to the jetty and stand ready for the photo to capture. The reason I used a longer exposure (15 seconds) was to smooth the water of the bottom part of the image. I found the shorter (0.5 second) exposures were leaving the water a little choppy from the outgoing tides and by capturing a longer exposure time this would also capture more reflection of the light installation.
Post Processing the Images
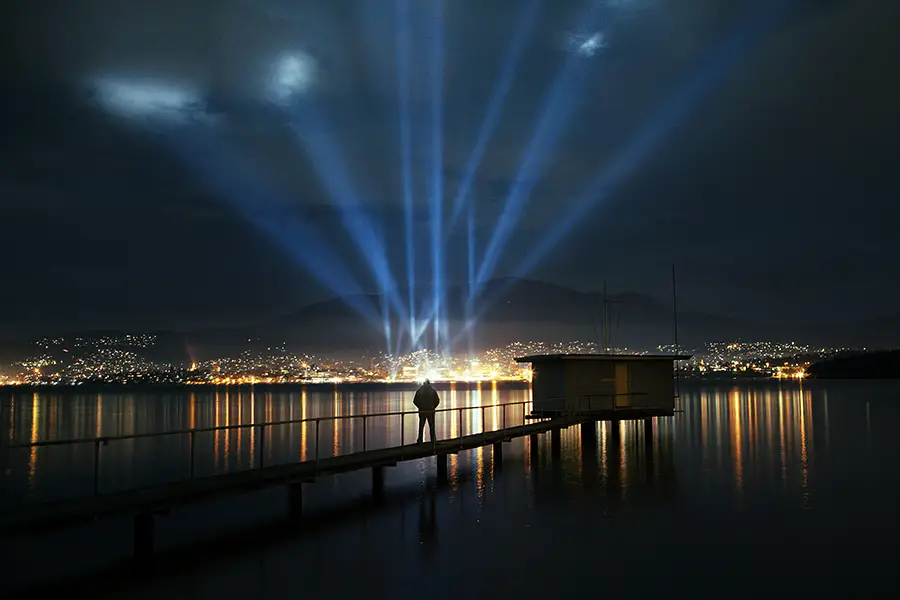
The final image was composed of 8 images and various saturation, curves and contrast adjustments (using Niksoft ProContrast and Viveza for the later). The image below gives you a sense of how rapidly the lights were moving based on the exposures that were captured. Note the exposure time was 0.5″ of a second so the 10 blue temperature photos you see were taken over the space of around 40 seconds. Quite a lot of movement!
Some of the 15 images that were bracketed to capture the quick moving lights
Once I’d loaded the images up into Lightroom I exported them as full JPG and loaded them into Photoshop. Here I used one of 0.5″ second exposure images as the base image and then added the other images (including the one of me standing on the jetty) as layers. The idea here was to selectively mask myself and different parts of the light installation into the base image by using layer masks.
[box]Haven’t used Photoshop Layer Masks before? Check out this tutorial on using Layer Masks that should bring you up to speed.[/box]
Using layer masks on each light layer, I selectively introduced parts of the light into the base image and also masked myself standing on the jetty into the shot. Once this was done, I set about using some curves masks to play with the red, green and blue colour channels to make some subtle changes to the colour of the image. Lately I’ve become quite the fan of the Pro Contrast Tool and Viveza that forms part of the [ilink url=”https://www.google.com/nikcollection/”]Nik Collection[/ilink]. I’ll generally use one of each and then play with the opacity of the layer. For this specific image though, I used a Pro Contrast layer just on the light beams of the shot to give them a bit more punch.
The above is a little confusing so to help explain things a little better I’ve put together a small clip that starts at the base image and enables each individual layer showing the progression and processing of the images.
Hopefully the clip provided some clarification regarding how the different layers were used and the subtle changes which using curves and ProContrast had on the image. If you have any questions about the process or the image itself be sure to leave a comment or drop an email and I’d be happy to help.
Over the coming months I’d like to share with you some before and after images of shots I’ve taken over the years. I’m a firm believer that there needs to be transparency in photography and the days of photographers hiding away secrets is done. Sorry to the old guard and old rules (oh yeah I just quoted Jay-Z in a post). Sure, there’s some aspects of photography that can’t be taught but I for one enjoy a behind the scenes look of how other photographers work. It’s both beneficial to people starting out and people who have been shooting for sometime. I shoot quite a bit with various people and find even though we’re shooting the same thing and processing quite similarly, there’s always subtle differences and it’s that what I hope to capture in my posts.
Through these before and after images, you will sometimes find that there is a dramatic change between the straight out of camera image and the final image you see on my website. While in others there may be minimal difference. For me, this is highlighting that we aren’t always fortunate to get great light while in other cases we are fortunate for the get great light and walk away with great photos in camera.
I’d like to use this as an opportunity to demonstrate how the image looked prior to my processing and briefly explain the processing techniques I used to achieve the final image. In some cases, the final image won’t be to everyone’s tastes and I fully accept and welcome that so feel free to chime in if you have any criticism of how you may have gone about things differently.
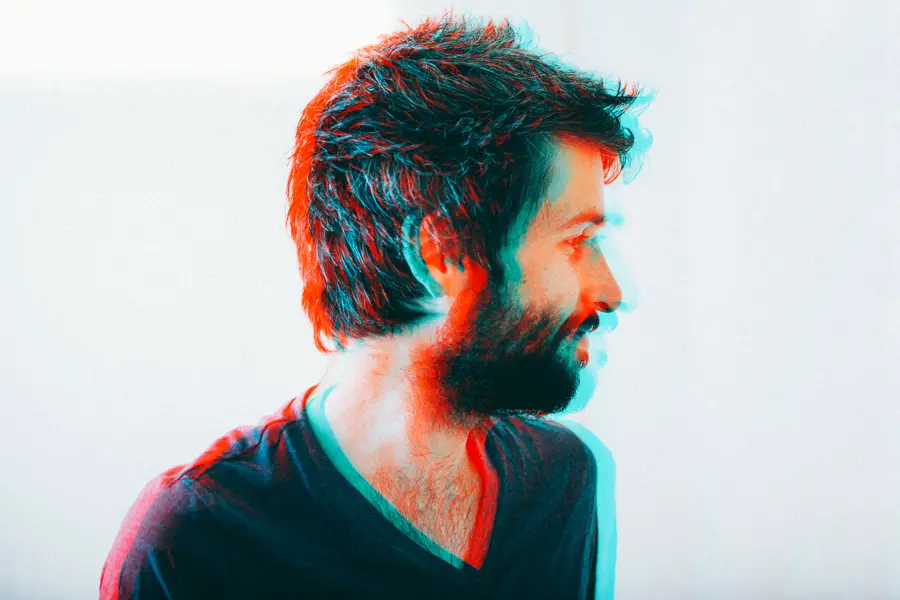
Recently I was stuck on hold with a major airline here in Australia and remember seeing a cool 3D inspired portrait that was used for a commercial advertising campaign in Melbourne. It got me tempted to have a go at trying to deconstruct the concept and put something together myself to kill the time. I must profess that I’m actually quite ordinary in Photoshop but it turns out it was a lot easier than I thought and I’d love to share how it was done even if the final image is a little gimmicky.
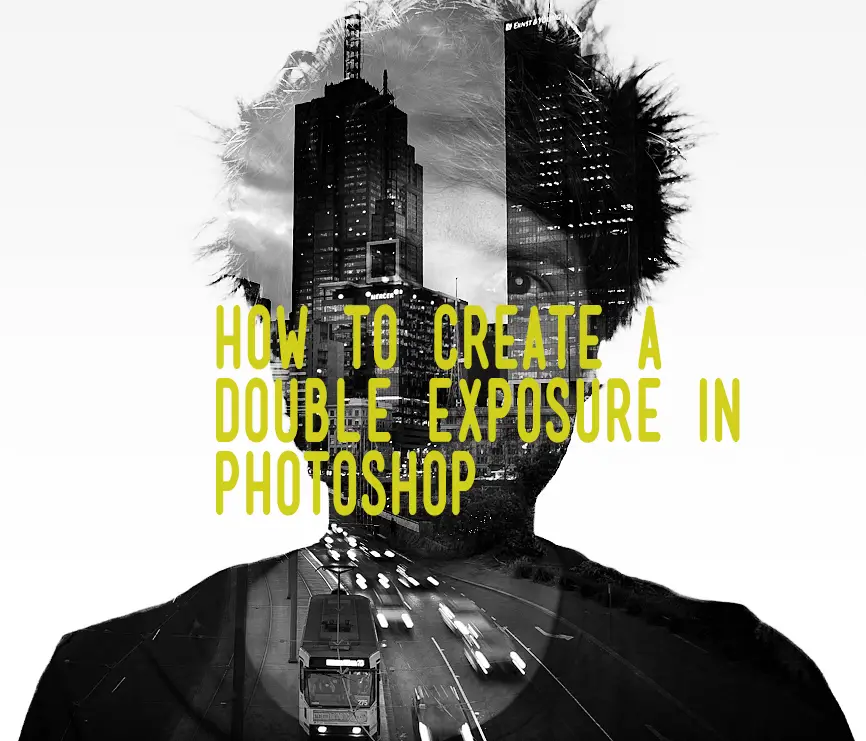
A few years ago now I put together a video tutorial on YouTube on how to create a double exposure in Photoshop. At the time a few photographers were taking beautiful double exposures, achieving a similar effect to that seen in film and were doing it in camera on digital bodies. Most of these people were using the Canon 5D Mark III or other bodies which come with the ability to create double exposures in camera.
Blending these two images to create a double exposure effect in Photoshop
As I own the Canon 5D Mark II and the multiple exposure feature isn’t included, I was slightly disappointed and wanted to try achieve a similar effect in Photoshop. In the end I came up with a method of achieving the result. I must admit, it is messy and probably not the best way to achieve the end result. As some comments in the video indicate, there are better ways of doing it oh and apparently Phlearn is 10x better for tutorials. Harsh but true. Aaron Nace is amazing and I do recommend you look up his Photoshop and photography tutorials. They’re mind blowing and he’s really leading the field when it comes to tutorials in this area. YouTube comments are pretty amusing for the most part though. It really brings the best and worst out in people.
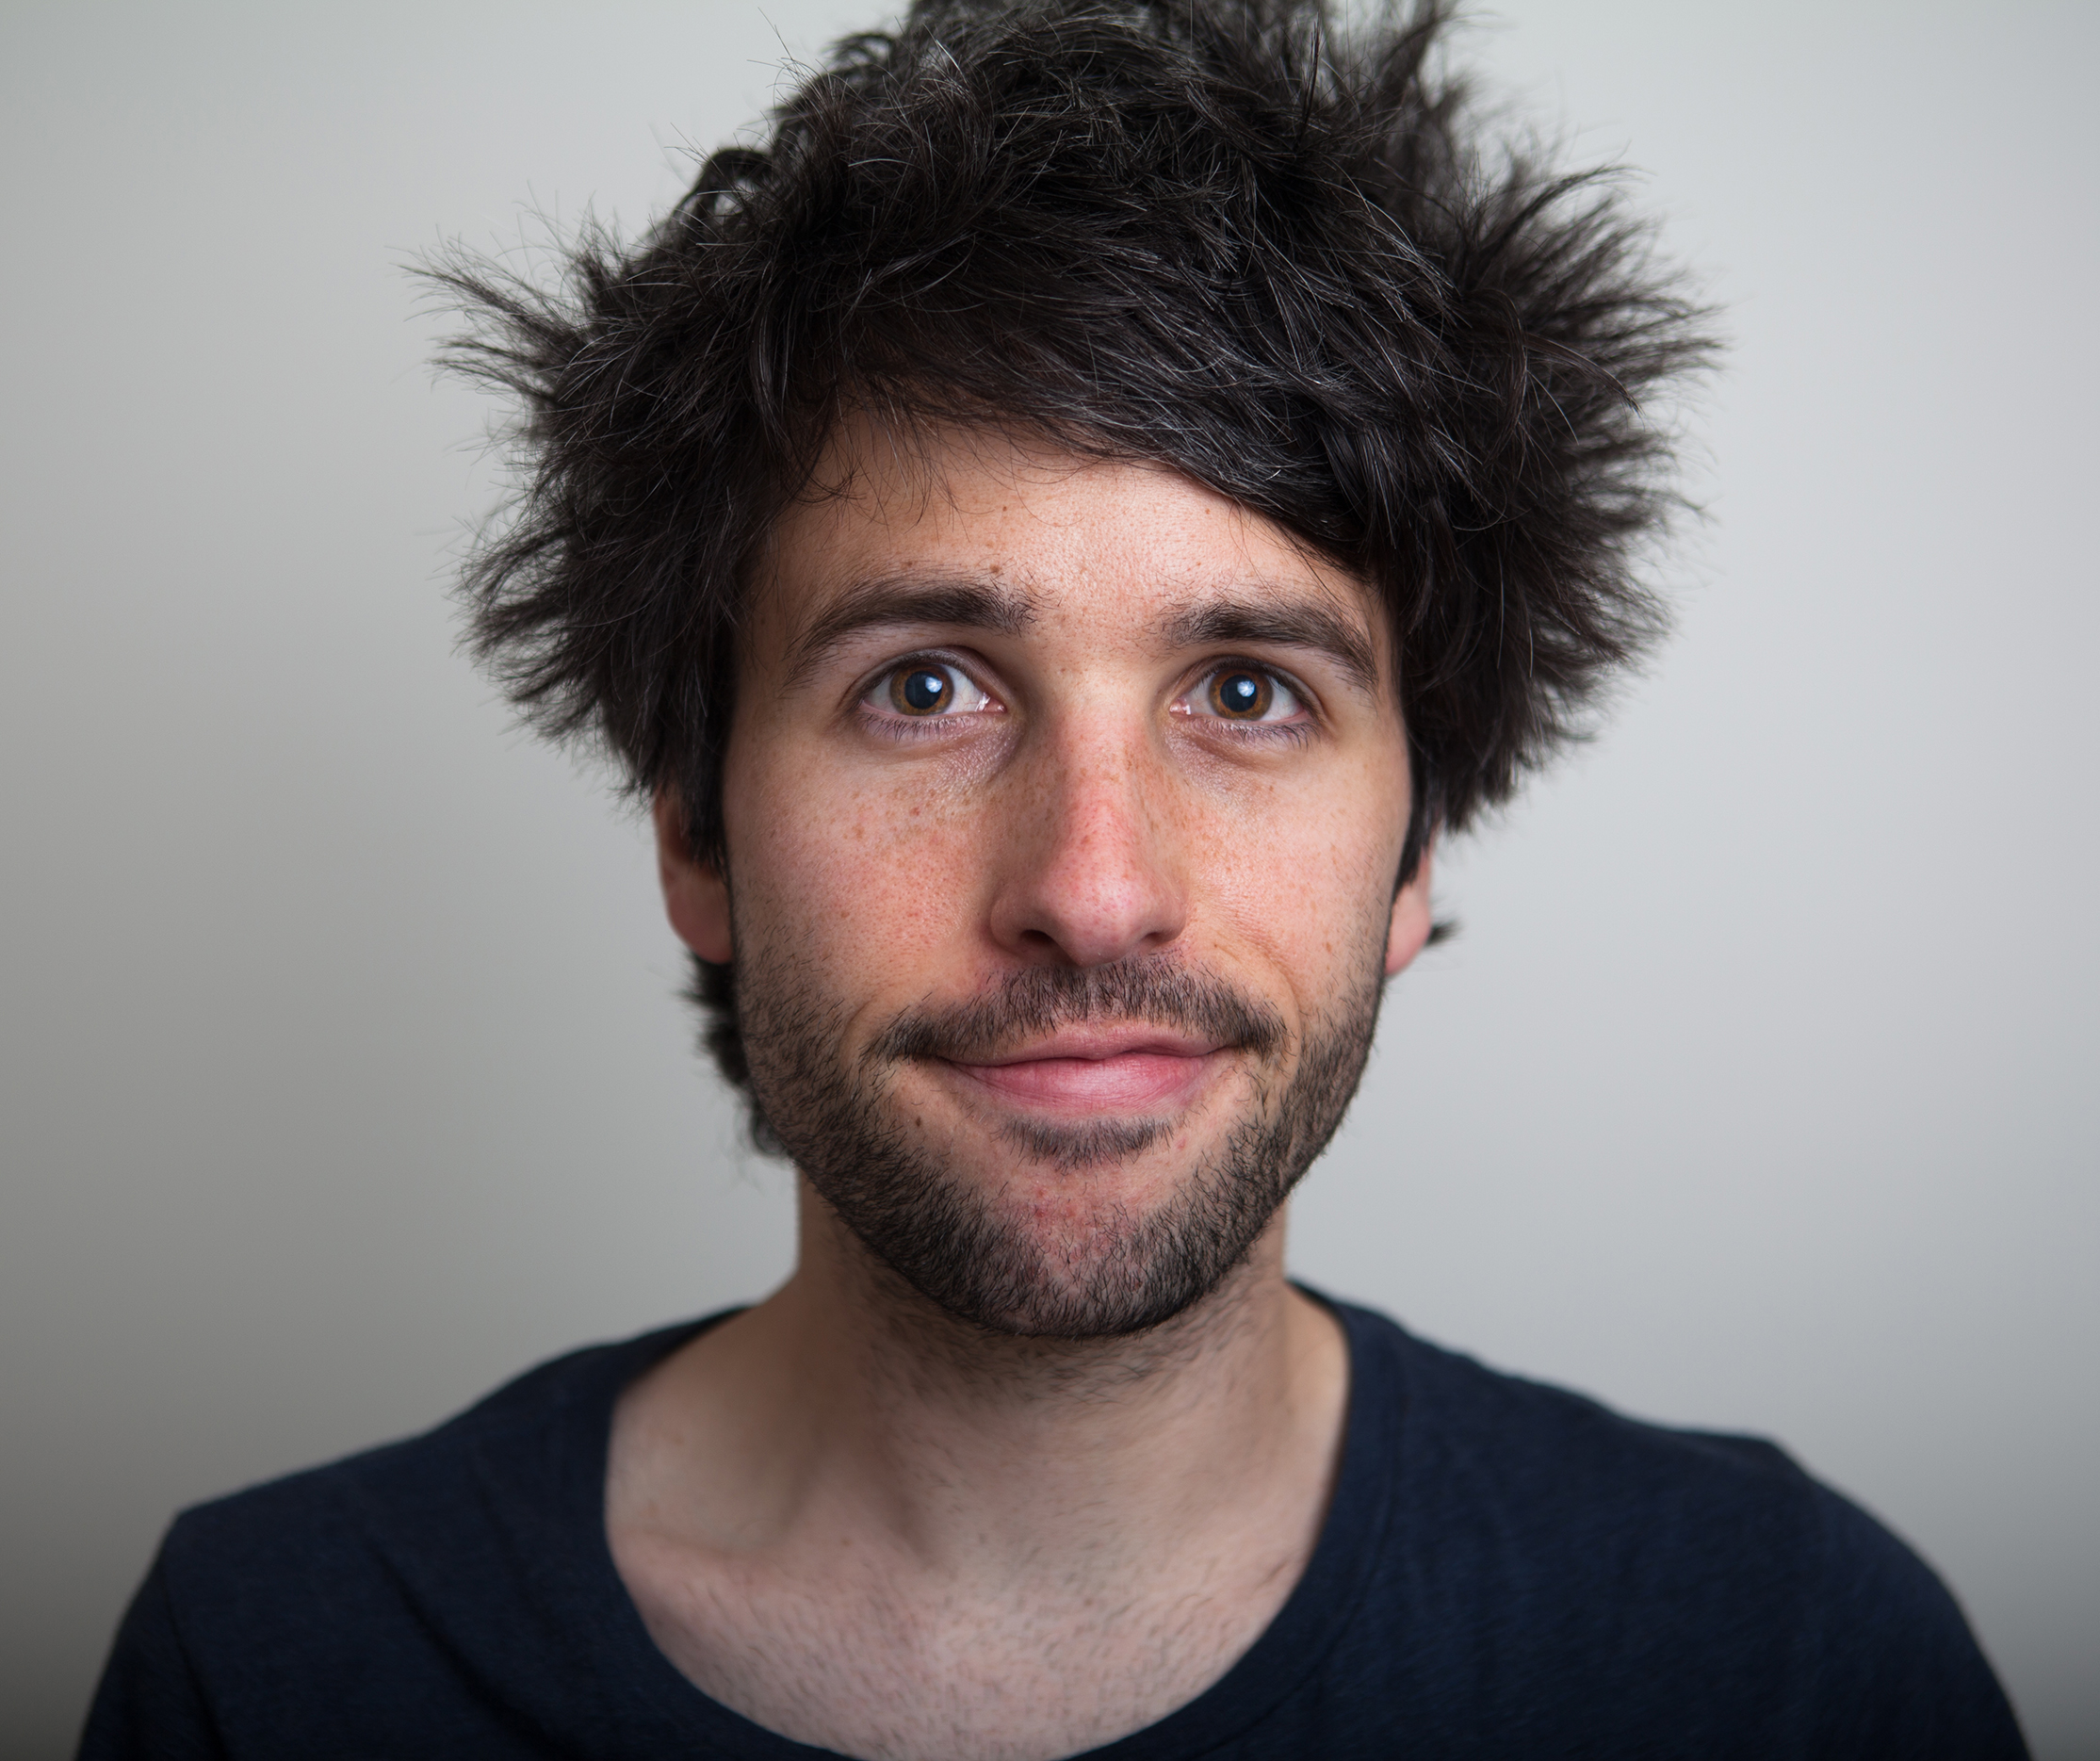
I’ve been meaning to put up a post on my blog about the tutorial and also link to the content I used for the tutorial in case anyone wants to have a play themselves with my ugly mug and a picture of Melbourne, Australia. It only took me 2 years… Sorry! Never too late right?
Resources for the Tutorial
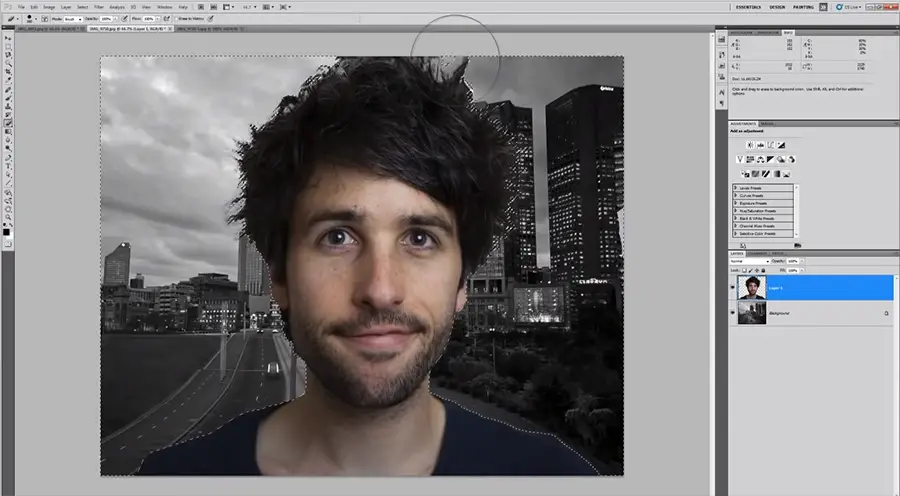
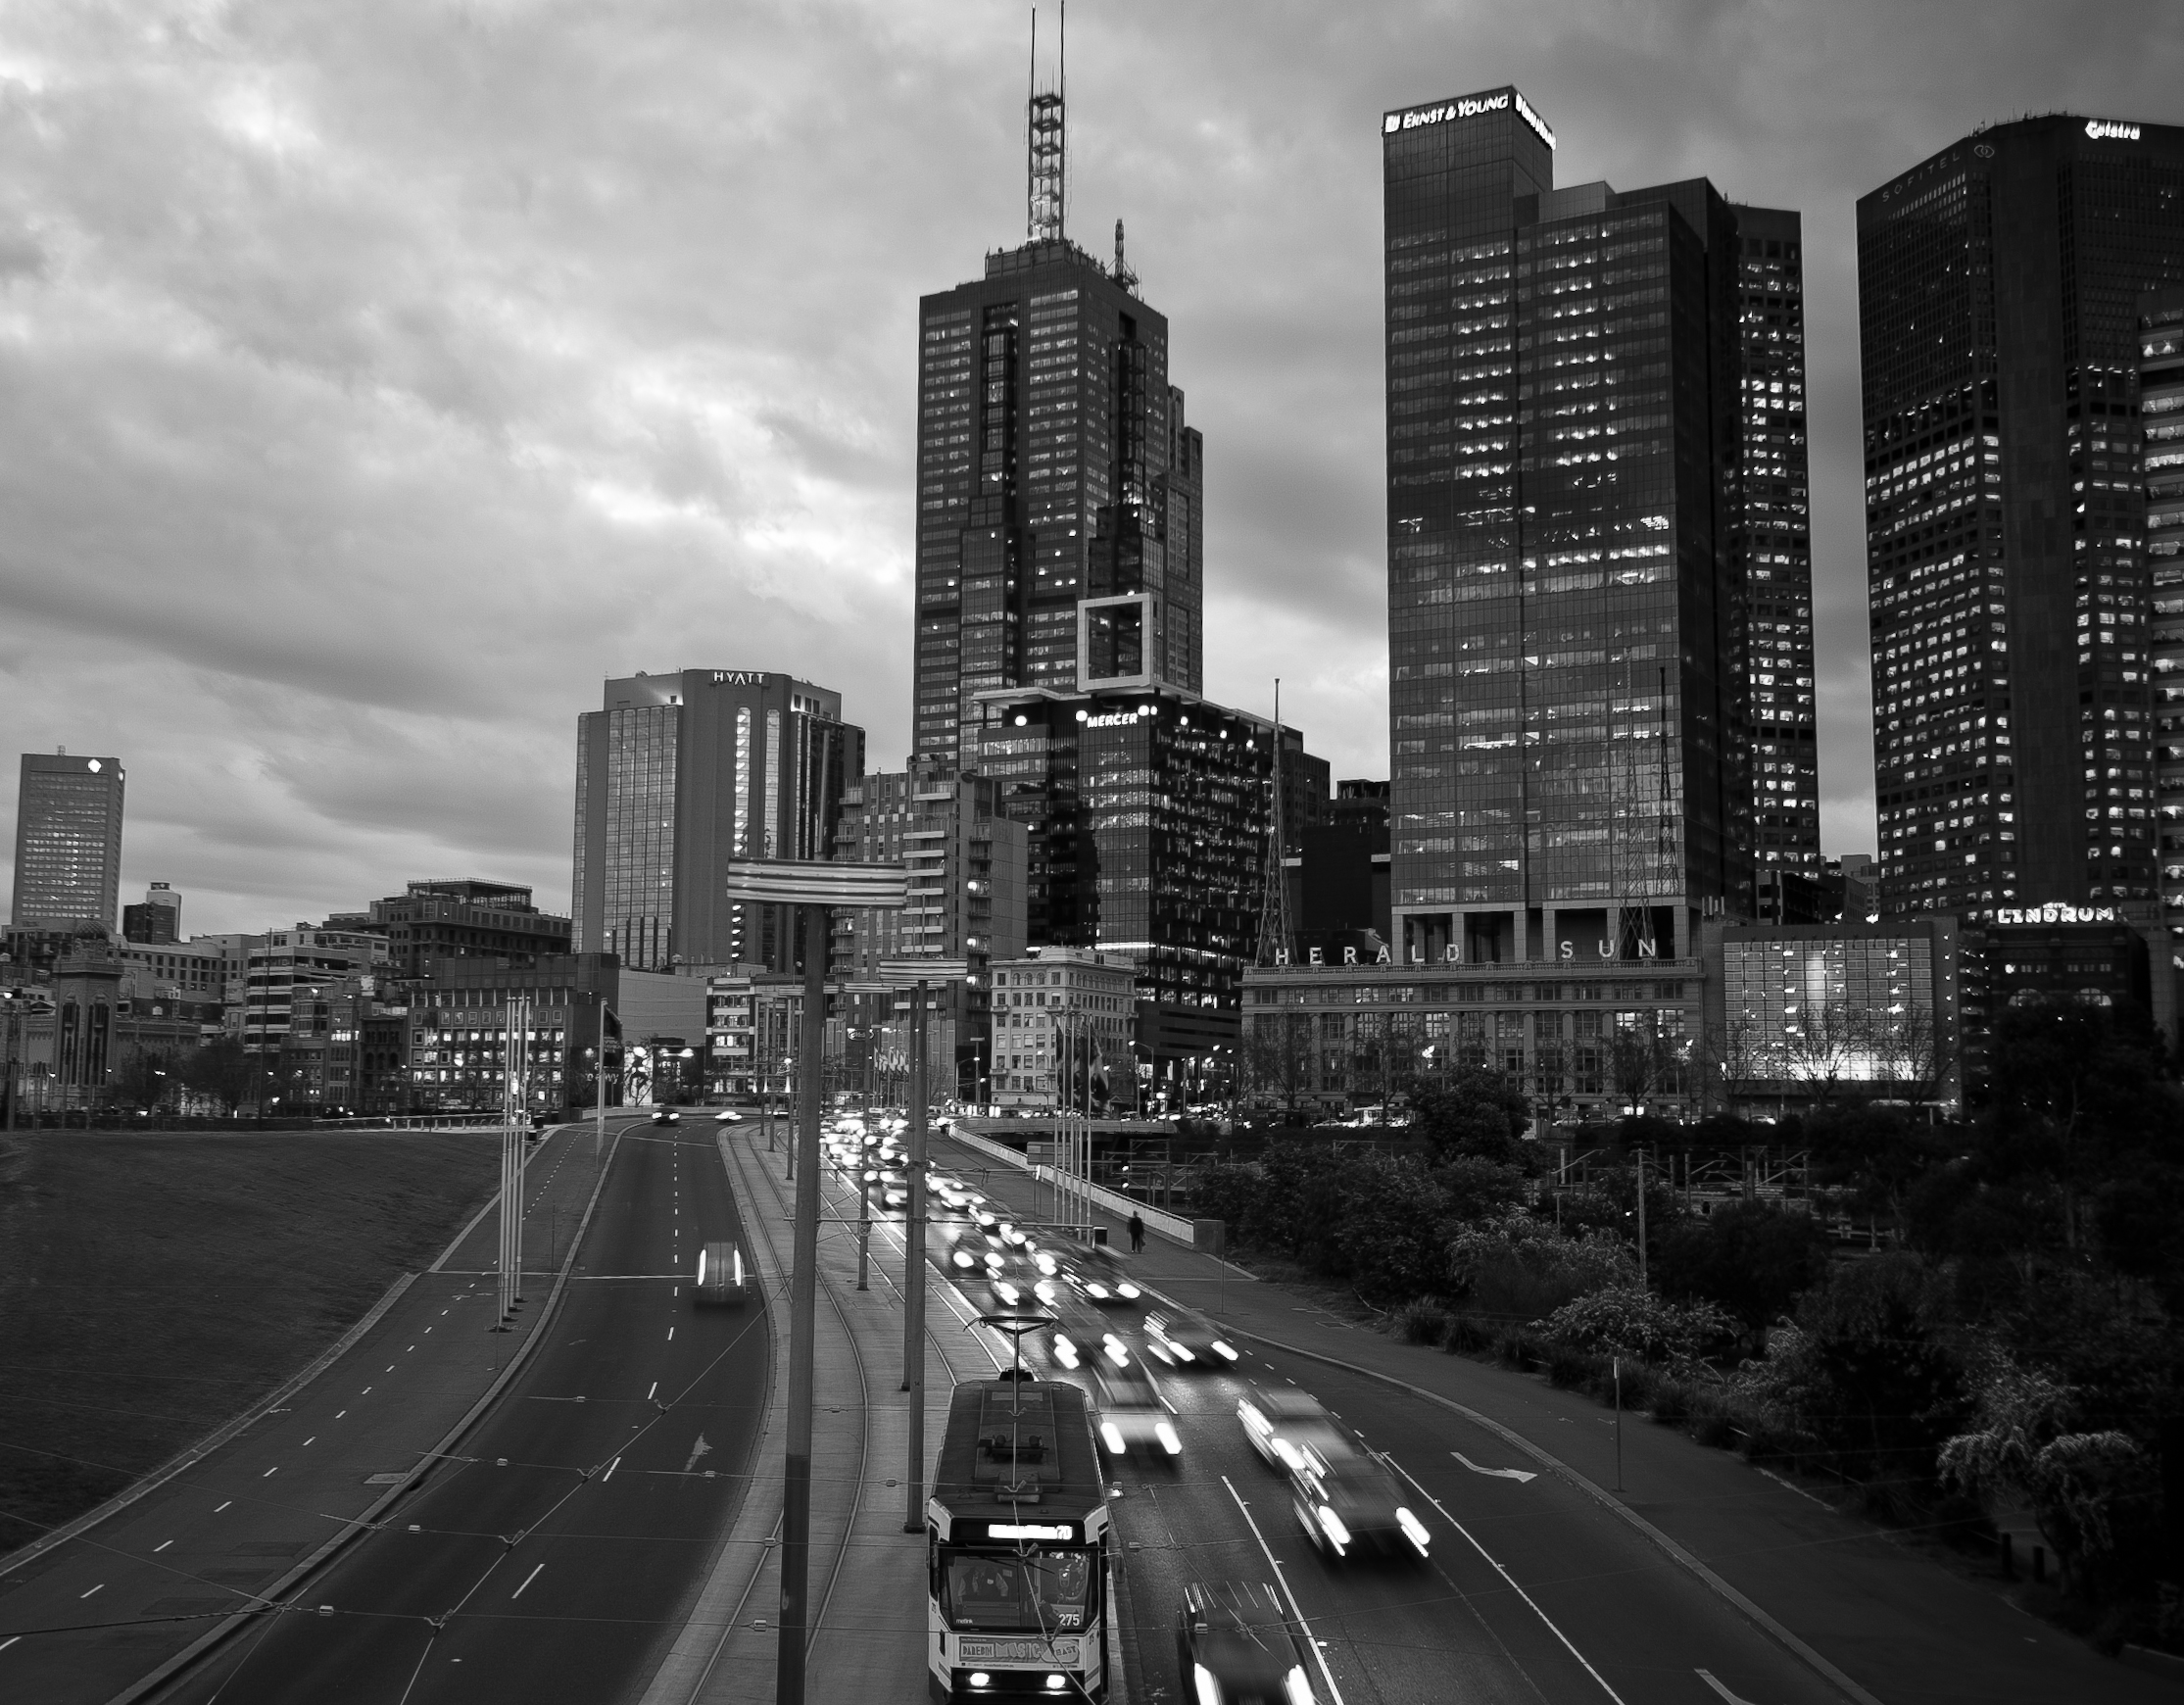
For this tutorial I will be using two images which I’ve uploaded for you so you can follow the tutorial video with the exact images. Download the city backdrop image used for the background (1.99 MB) Download the self portrait image used for the foreground image (1.91 MB)
I’m going to let the video (and my poor audio) do the talking for a moment as I demonstrate how I blend the two images together. I’d suggest watching the tutorial first then attempt it yourself. For this tutorial, I was using Photoshop CS5 however you should have no issues doing it in previous or current versions.
As you can see in the video it’s actually really easy hey? The only frustrating part I find is feathering around the image to remove the background. As a commenter on the video said, it really is like playing minesweeper and can be a game of luck but you can make life easier for yourself by decreasing the tolerance and checking the contiguous box as others later mentioned. I do have some good news though, it is a frustrating tool the first time you play with it and does become more natural and easier to use over time.
Hope this tutorial was of use and if you have any questions be sure to get in touch as I’m always happy to help 🙂
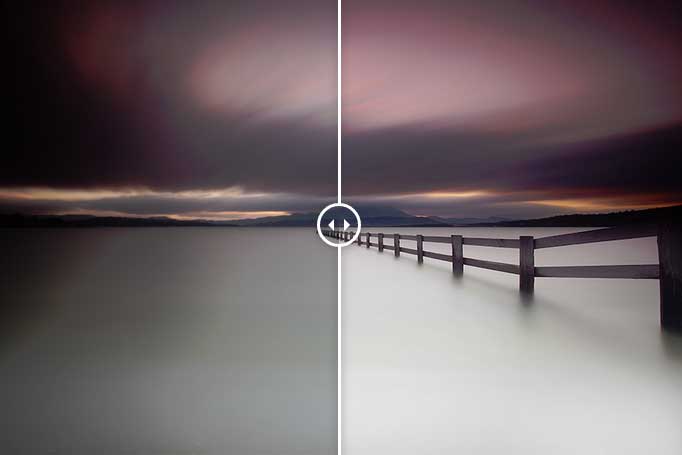
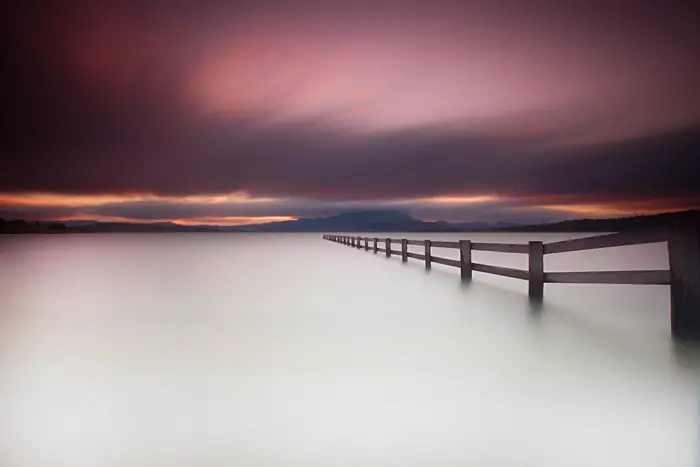
One of my favourite photos made by possible by using various neutral density filters
Neutral density filters are a favourite tool of my photography tool set and admittedly most of my shots have been taken using at least one. I must be honest, neutral density filters were the turning point for my photography. I actually found it quite frustrating as I wasn’t getting the images how I wanted them in camera until I started playing around with graduated neutral density filters. Once I got hooked on these I started taking other aspects of my photography more seriously, learning about composition and how exposure affects your image. This lead me on a path of exploring the use of neutral density filters from graduated types, strong neutral density filters and even playing around with welding glass.
For this reason I wanted to put together a simple guide on how to use ND filters, explaining the different types out there and why they are a great to have in your camera bag while also looking at when they are needed/are good and how they are generally used by photographers. But neutral density filters do have their shortcomings which I’ll also explore in this article. You never know perhaps you might get hooked on them too? 😉
What are Neutral Density Filters
Before we get started though let’s look at what a neutral density filter is and what purpose it actually serves. A neutral density filter reduces the amount of light coming in to your camera. This is great for photographers who want a longer exposure time or a larger aperture which may not be possible due to lighting conditions at the scene. The light entering the camera is reduced by the darkness of the filter used. When we look at different neutral density filters we look at how many stops of light they block out. By this it means how many f-stops the filter blocks. In English the higher amount of F-stops the neutral density filter blocks out, the darker the filter will be and the longer the exposure time required to get the correct exposure time. Simple enough right?
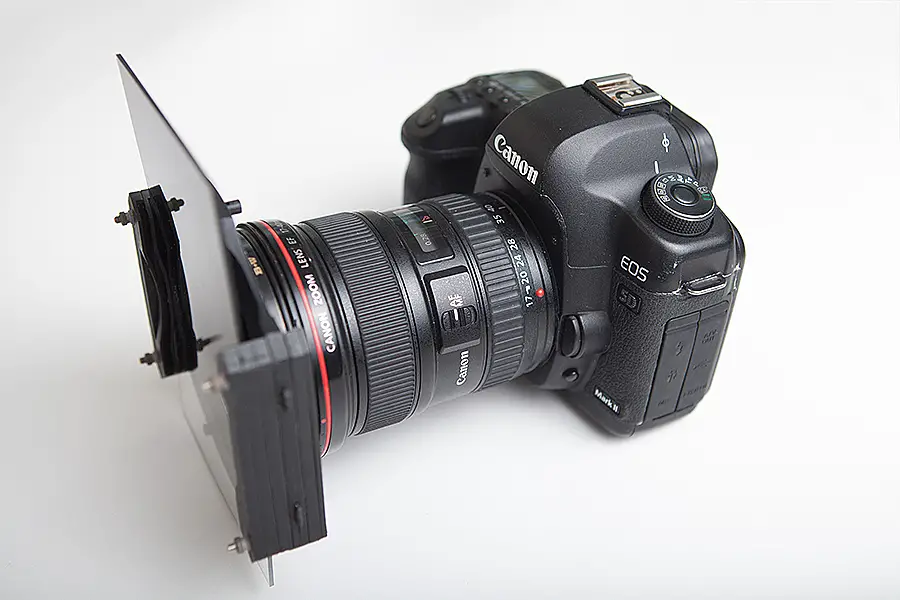
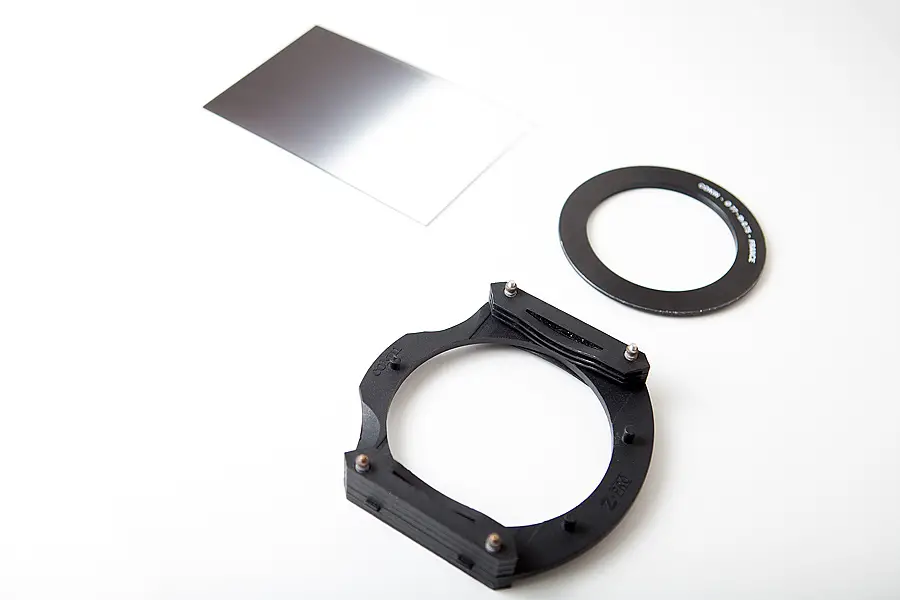
Neutral density filters come in all shapes and sizes from screw on types (more common) to rectangle glass which is mounted to the camera lens through an adapter. Below shows my setup which I normally shoot with which consists of a .9 Cokin Z-Pro graduated neutral density filter, filter holder, lens adapter to fold the filter holder and a B+W 110 10 stop neutral density filter. Good fun screwing it all on when shooting in freezing conditions 😉
An example of a solid neutral density filter (Filter in picture – B+W 110 ND)
Sold neutral density filters are your more common neutral density filter on the market. These come in various strength levels ranging from blocking out 2 stops of light up incrementally up to filters that block 10 stops of light. The 2 stop filter is quite useful for shooting waterfalls when you’re not quite getting the exposure time you need or when shooting portraits in harsh sunlight and you wish to capture at a higher aperture which may not be possible due to the harsh light. While the 10 stop neutral density filter is a lot more specialised and will allow you to capture exposure times beyond a minute which can drastically transform a scene. If this is something that interests you, give my article about capturing daytime long exposures a read which goes into more detail about the use of strong neutral density filters.
If you’re looking to get started with a solid neutral density filter I would personally recommend a 4 stop neutral density filter like this Hoya filter as this is a good middle ground without being too weak or too strong.
One word of advice though, avoid screw on graduated neutral density filters and screw on filters that allow you to change the strength of the neutral density filter. A few friends have purchased these and have had awful results from them and said how inconsistent they are. Perhaps others have had good experiences with them but from most people I’ve spoken to, they regret the purchase and ended up purchasing either a proper solid neutral density filter or a graduated neutral density filter kit.
Graduated Neutral Density Filters
Graduated neutral density filters are where it all started for me when I started experimenting with ND filters. The purpose of a graduated neutral density filter is to gradually darken part of the image depending on the position of the filter. This results in a gradual shift in darkness from solid to clear and allows you to position the filter based on where you want the graduation to occur. A common use for the filter is when capturing landscape photography where shooting a scene that is not evenly lit as the sky will be bright from the sunrise/sunset and the land quite dark. By using the graduated neutral density filter this will allow you to under expose the sky (avoiding highlights and slightly darkening the sky to create some mood) which results in a more even exposure.
Graduated neutral filters come in various graduations or step types. The type I refer to in this article are your typical soft edge graduated neutral density filter where the top half of the filter is a solid dark and gradually loses its darkness to become clear. The setup I use is the Cokin Z-Pro kit which is ok however has issues of a purple colour cast when multiple filters are stacked. For this reason I prefer to recommend the Lee setup which doesn’t have the same colour cast issues which the Cokin setup can be prone to (however easily corrected in post processing). Another style is a hard edge neutral density filter where half the filter is solidly dark and the rest is clear. Another but less popular style is the reverse graduated neutral density filter. This is popular for sunset photographs where the sun is sitting around the horizon. I’ve not used these personally as they’re quite expensive and feel their usage is limited and doesn’t justify the cost (see this Hitech reverse graduated neutral density filter which doesn’t come cheap) but I’m sure are no doubt handy to have in the kit if you can afford one.
An example of graduated neutral density filters (Filters in photo – Cokin Z-Pro graduated neutral density filter, lens adapter and filter holder)
While not limited to various types of graduation, these filters also come in various colours which allow the photographer to add colour to their scene. Generally grey (neutral) filters are what photographers use but others have been known to experiment with the blue, yellow and sepia colour filters. These work just like the normal graduated filters do with the colour being strong at the top and gradually becoming clear at the bottom. I’d recommend against these as they do not provide an accurate colour representation of the screen and if you really must the effect is quite easily achieved in Lightroom using the graduated filter as part of that.
How to use graduated neutral density filters
As technology advances and processing techniques become more defined, some would argue that a graduated neutral density filter isn’t as required as much as it once was and actually create more issues than their worth by degrading image quality and unwanted darkening parts of your scene. I’d argue they still very much have their place in your photography kit but admit they aren’t suitable for every shooting situation.
Generally I will use a graduated neutral density filter to partially darken part of the sky but it can be quite difficult when an object is in part of the sky (i.e. a cliff face that takes part of the sky). For these situations I won’t use my neutral density filter as it will result in the cliff face gradually darkened which looks unnatural and degrades the quality of your final image. Lightroom and other photography editing applications now allow you to overlay a graduated neutral density filter within software and is a great way to experiment with graduated neutral density filters without making the costly outlay of purchasing some.
However I still think that physical graduated neutral density filters do have a place in the photographers kit even with the rise of software programs like Lightroom becoming increasingly capable. This is due to the physical filter darkening the brighter regions of the sky in camera which will result in a longer exposure time. However if you attempt to do the same with a digital graduation filter in post processing this can create noise around the area. One could get around this issue by taking multiple exposures and using layer blending in Photoshop to selectively blend them in. I’ve written about this in a previous blog post which provides more information about layer masking areas from multiple exposures. One might argue that this is the way heading forward for landscape photography as it allows greater control over the final image and avoids any image degradation that may occur from placing a filter in front of the lens. But for the moment I’m happy using my graduated neutral density filters as they work for me.
If you do decide to purchase graduated neutral density filters, I’d strongly recommend the Lee filter setup. I personally shoot with the Cokin Z-Pro graduated neutral density filter kit however they have a slight colour purple colour cast which can result in a hint of purple being added to your image when you use more than one Cokin filter. The Lee filters don’t have this issue and provide a true graduated neutral density filter without any colour cast issues.
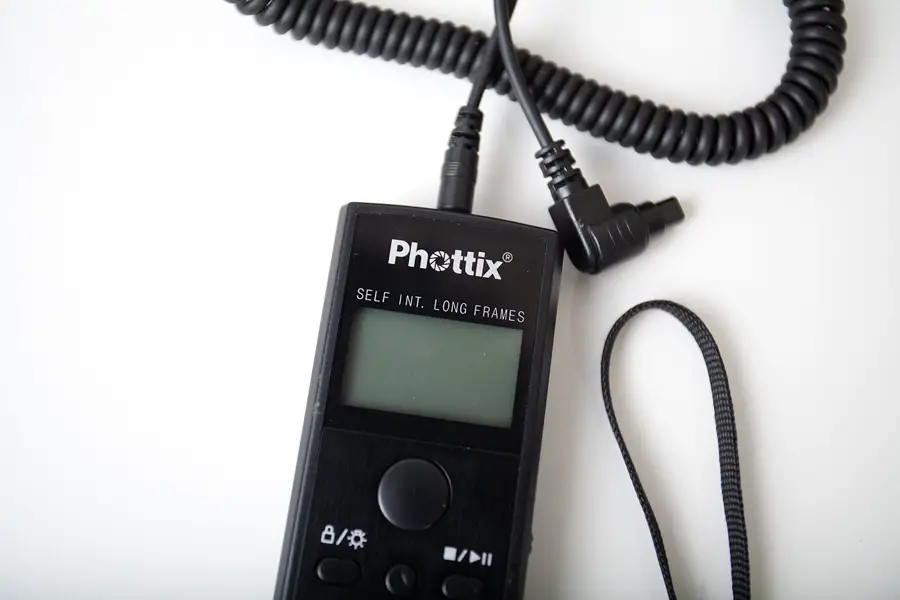
For most shots I will use a intervalometer to manually set the exposure time which is especially useful for shooting long exposures beyond 30 seconds.
When (and when not) to use neutral density filters
Neutral density filters can be used for many different circumstances which can include:
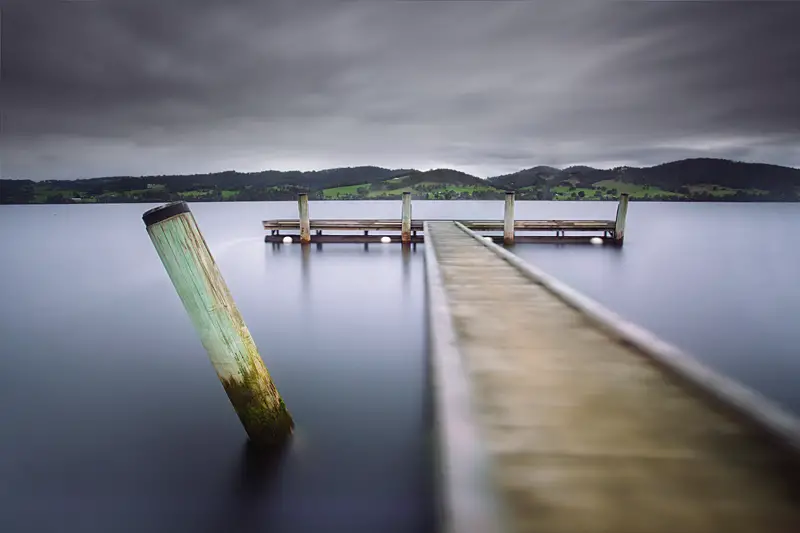
Blurring objects of a scene. Some popular things photographers like to blur include capturing the movement of clouds or the smoothing of water. But don’t limit yourself to this. I like to watch a scene and watch for gradual movement that occurs over the space of a few seconds and ponder how it may appear in a long exposure. An example of this is a shot I took at the Huon Valley, Tasmania of a moving jetty to create an interesting effect
Balancing a bright sky against a dark land/foreground. By using a graduated neutral density filter on the sky, this will allow you to darken the sky to balance it against the dark land
Adding some mood to the sky can instantly lift your photo in camera without the need for any burning in Photoshop when you return home
Allowing you to use an aperture that may not be possible due to bright lighting conditions therefore allowing you to capture a shallower depth of field
Blurring of people in a busy scene like this brilliant photo captured by Tom Carter in Tokyo of a busy intersection
The list is endless and neutral density filters allow for a lot of creative expression. I’ve compiled a list of long exposure photography ideas in an earlier post which might give you some ideas how you can use ND filters around your area
When to not use neutral density filters
Avoid using neutral density filters when:
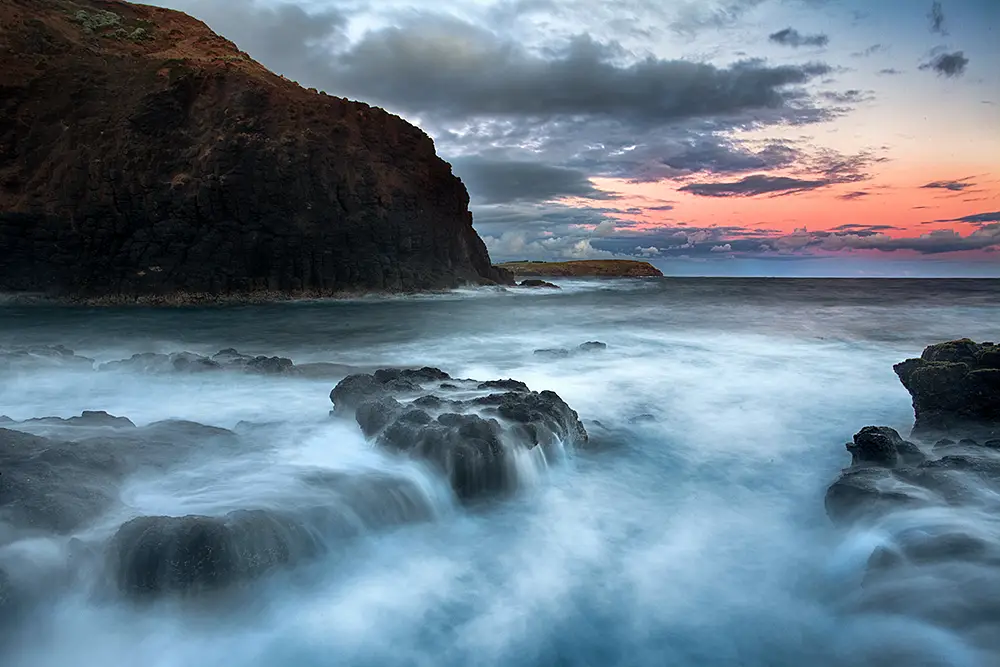
Mountain tops or other objects overlap part of the sky. For this photo taken at Cape Schanck I did not use a graduated neutral density filter as the cliff face took such a major part of the sky. If I was to of used a graduated neutral density filter on the shot I would of lost considerable dynamic range on the cliff and also the shot would of appeared unnatural
Shooting waterfalls where you can get a long enough exposure without the use of filters. Obtaining the smooth water effect when shooting waterfalls only requires a 2-3 second exposure which is quite easily achievable if shooting in overcast conditions. If you introduce a neutral density filter this will drastically increase your exposure time, getting your silky smooth water effect however will blur the surrounding foliage of the waterfall
Looking at how filters can affect your photo
My Canon 5D Mark II with a graduated neutral density filter and B+W 110 solid neutral density filter attached
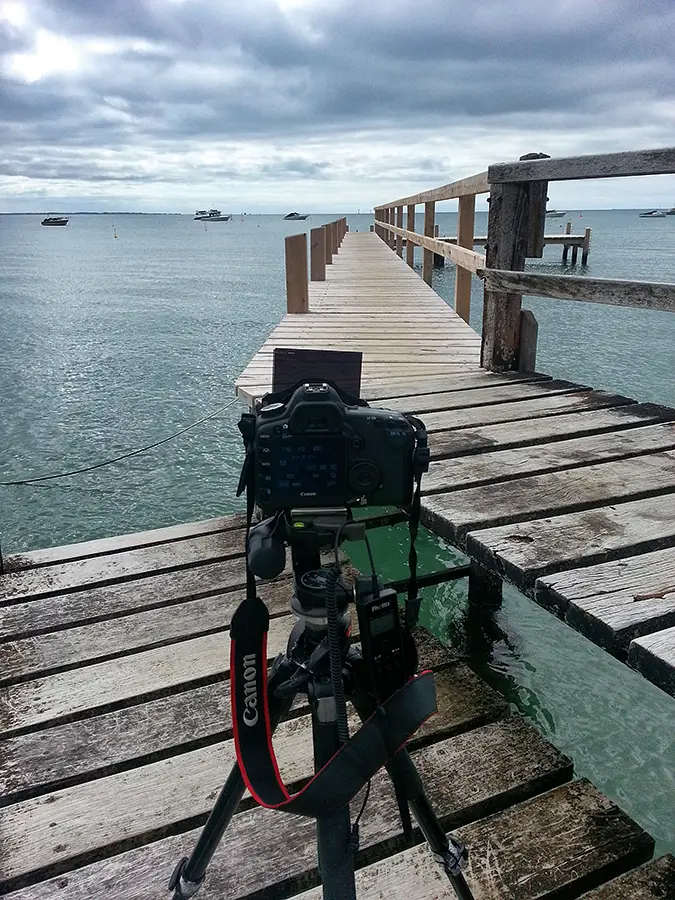
All this talk about solid and graduated neutral density filters is best explained by using some sample photos I took especially for this post to demonstrate how filters come into play. The setup consisted of a Canon 5D Mark II, Canon 17-40, intervalometer, Cokin Z-Pro graduated neutral density filters, 10 stop B+W 110 filter and a tripod (setup shot in case you’re curious).
I’ve not processed the images and for the first 3 images, the exposure time is the same and it is only when the strong 10 stop B+W solid neutral density filter is used that the exposure time changes. This is due to the B+W 10 stop filter being so dark that shooting at the same exposure time as the first 3 images would result in a black image. Instead the camera sensor needs more light to get a proper exposure which is why I had to lengthen how long the shutter remained open (in this case 1 minute).
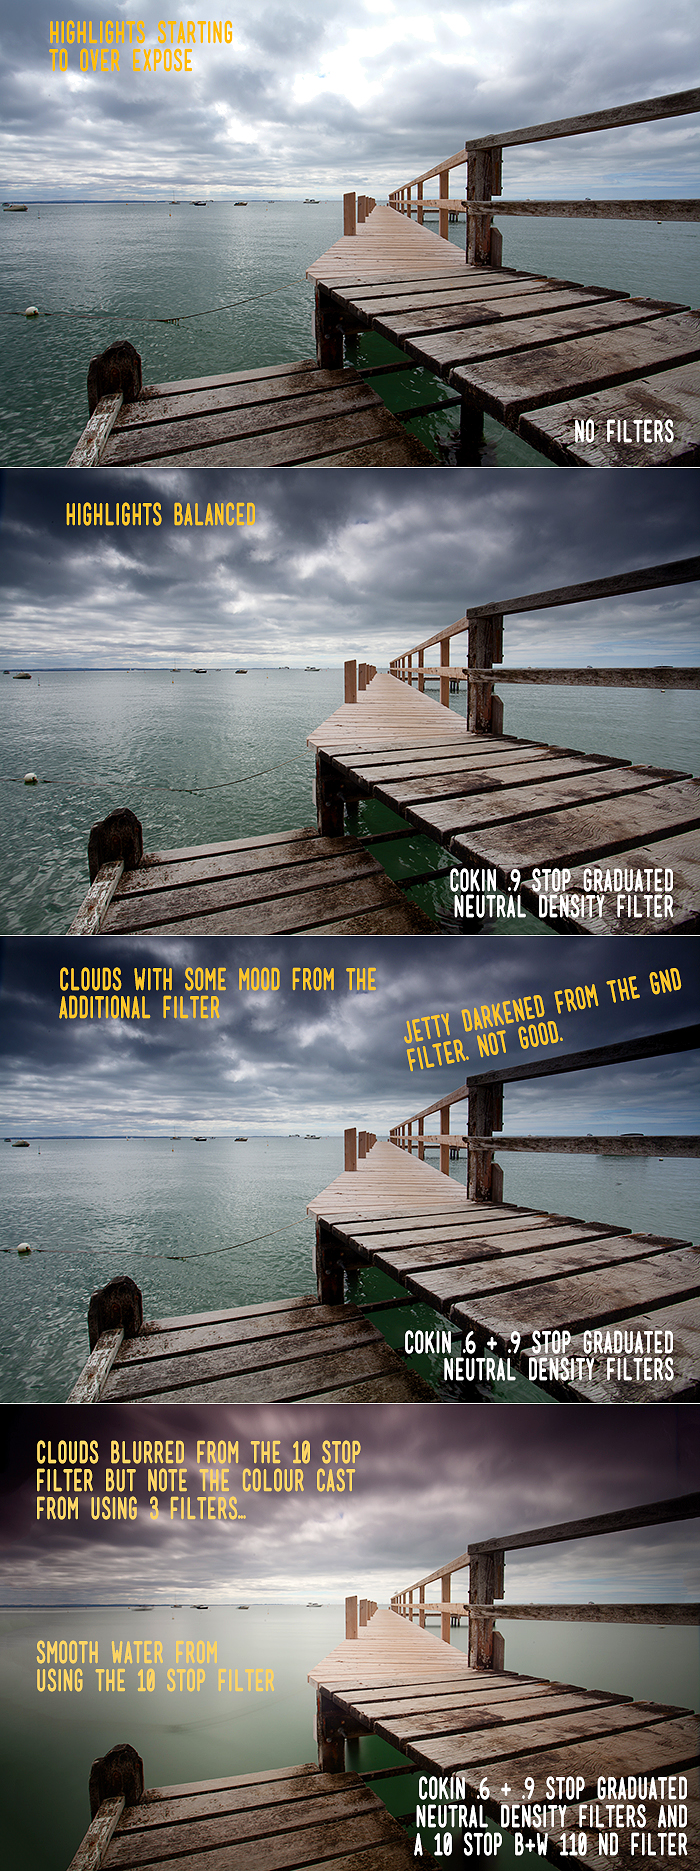
Image 1 – Base image where no neutral density filters have been used. As you can see the exposure is quite even however the highlights (white parts of the sky) are starting to blow out (Exposure – 1/4 sec at F18)
Image 2 – One Cokin Z-Pro .9 graduated neutral density filter has been added. You can notice that it has balanced the exposure of the sky and added some very slight mood to the sky (Exposure – 1/4 sec at F18)
Image 3 – Two Cokin Z-Pro graduated neutral density filters are used (.6 and .9) which adds a lot more mood to the sky however has introduced darkness over the jetty. This is one downside to using graduated neutral density filters where there is an object overlapping part of the sky (in this case the railings for the jetty) (Exposure – 1/4 sec at F18)
Image 4 – Going nuts and using the same Cokin setup (one .6 and .9 graduated neutral density filter) and also the solid B+W 110 10 stop neutral density filter. As the 10 stop neutral density filter is being used, this darkens what the camera can see considerably (imagine looking through welding glass) which as a result requires the camera to use a long exposure to capture a correct exposure. I love using the B+W 10 stop filter as it allows you to capture long exposures during the day which blurs the clouds and water however one down side of using so many filters is the colour cast that is introduced. This is mostly from using the Cokin Z-Pro filters which have a purple colour cast to them which you can see in the sky. For this reason I’d strongly recommend the Lee filter kit which doesn’t suffer from the same colour cast issues (Exposure – 1 minute at F18)
Comparing how neutral density filters can come into play
Example photos from using neutral density filters
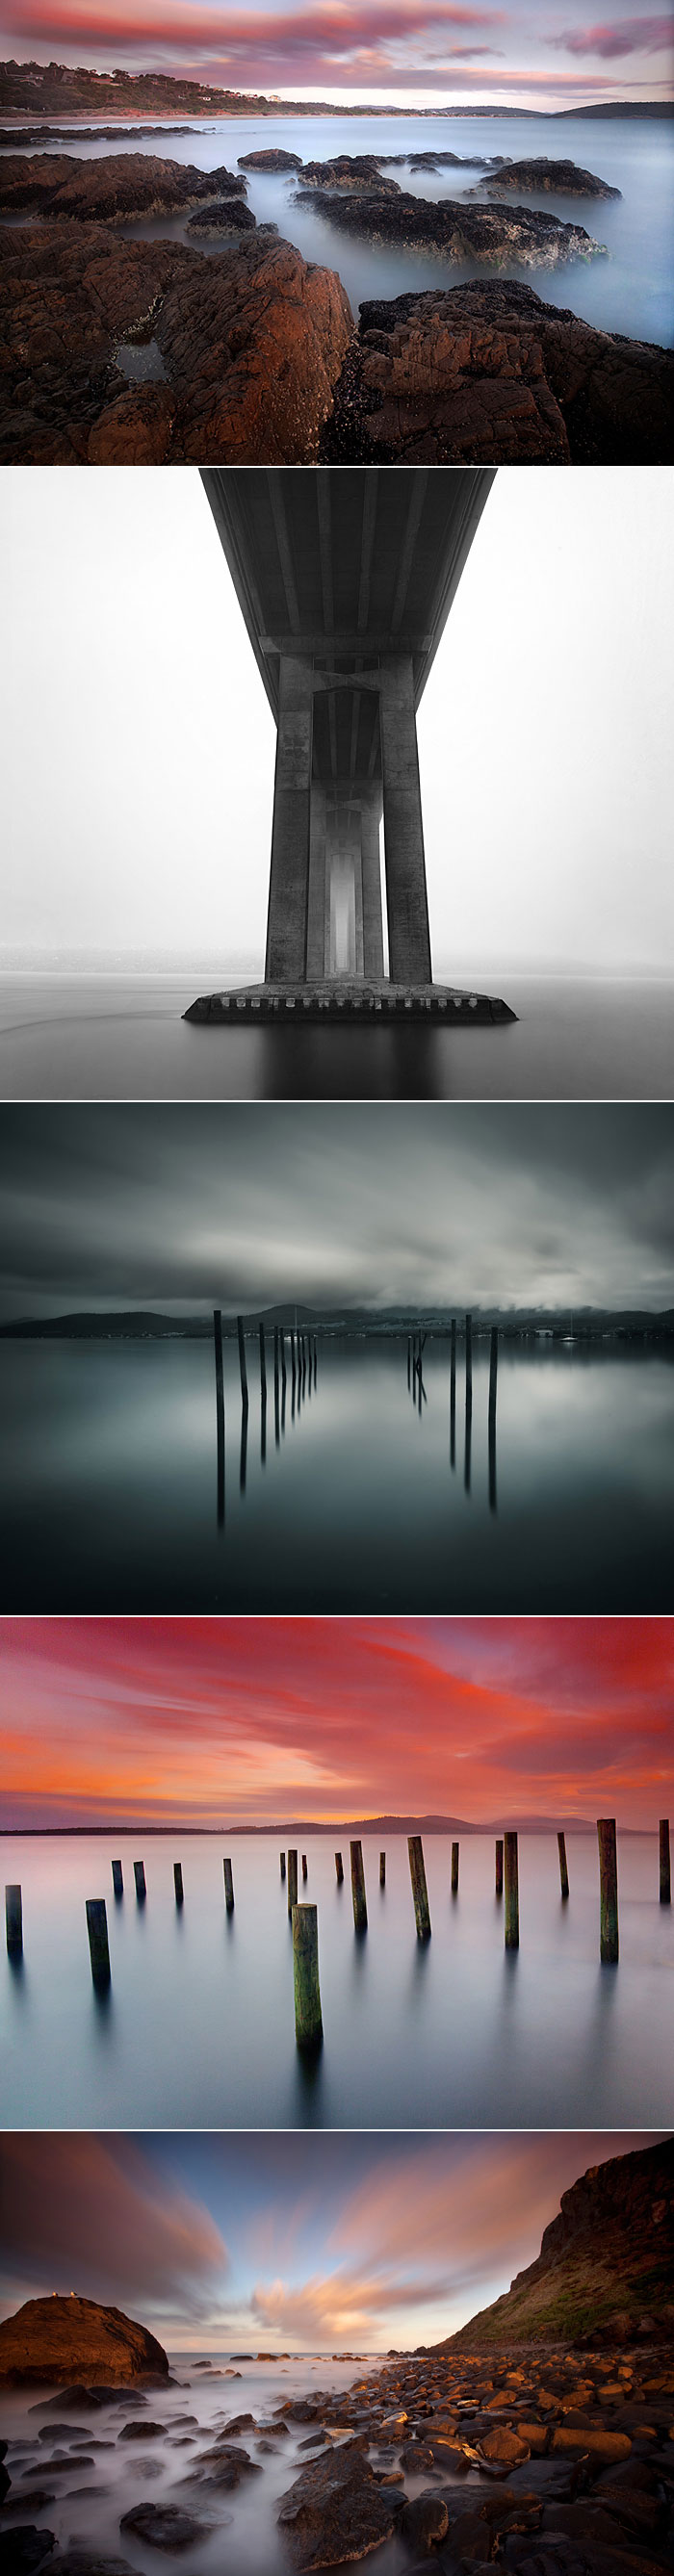
As mentioned at the start of this post, I won’t deny that I’m a sucker for neutral density filters and use them for a lot of my images. They’re a great tool to have in any landscape photographers tool set and well worth the investment. Below are some images that I’ve taken using a mixture of the Cokin Z-Pro graduated neutral density filters and the B+W 110 10 stop neutral density filter. Now that you’ve read about neutral density filters you should be able to identify where they have been used. In most of the shots a graduated neutral density filter has been used to darken the sky which has brightened the foreground and a stronger solid neutral density filter has been used to blur the movement of the clouds and water.
I hope this guide has been of use to you and has answered any questions you may have had about using neutral density filters. Please feel free to send me an email if you have any further questions as I’m always happy to help or alternatively if you have any feedback on what you would like to read about in future articles I’d also love to hear.
Thanks for reading,
– Alex
Photographs taken with neutral density filters referred to in this article
Related Reading
How to photograph waterfalls – This article looks at the basics of waterfall photography by discussing what conditions work best for waterfall photography, how exposure time can affect your photo, what equipment you will need for waterfall photography and more.
Neutral density reference chart – Stuck on what exposure time to use when using neutral density filters? This printable chart tells you what exposure time you will need based on the filter you are using
How to capture daytime long exposures – During the day it’s difficult for your camera to take long exposures without the need for filters or very low light conditions. This article explores what equipment you need to get started for shooting long exposures from 30 seconds to 5 minutes during the day.
Long exposure photography ideas – Stuck on ideas on how to use your ND filters? This article looks at the many uses for ND filters with some long exposure photography ideas to get you started.
Create your own 10 stop ND filter – A fun little weekend project which shows you how to create your own 10 stop neutral density filter for under $10.
The magic cloth technique – Use a cloth to create your own graduated neutral density filter during a long exposure.
 [/twentytwenty]
