Posted on 7 Comments

Long Exposure Filters Buying Guide

Neutral density filters are a great way to get creative and explore long exposure photography. With most manipulation to a photograph happening during post processing, it’s a refreshing change being able to get creative in camera with the various effects of long exposure photography.  The purpose of this article is to give you an overview of long exposure filters, how they work and what’s best based on your budget. 

Personally I recommend the NiSi long exposure kit paired with the NiSi’s circular polariser for anyone looking for the perfect long exposure filter kit. Whilst a bit on the pricey side, you are getting high quality filters that won’t affect your image quality which can be an issue with colour cast issues which comes with other brands like Cokin or Hitech. 

What is Long Exposure Photography?

An example of where a neutral density filter was used to slow down a moving object while keeping surrounding objects sharp

Before we start talking about the pros and cons of different neutral density filters, let’s get back to the basics for a moment. Long exposure photography or slow shutter photography, is where your camera uses a slower shutter speed to blur moving objects in your shot while keeping other parts of your image sharp and in focus.

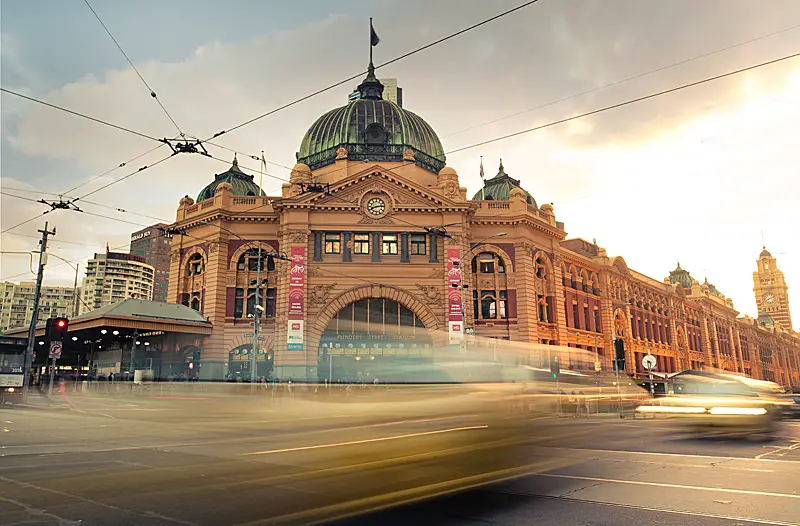
Let’s look at this with a real world example of a long exposure image from Flinders Street Station. By using a slower shutter speed, I’ve been able to blur the passing traffic while the rest of the frame is sharp and in focus. This is just one of  the various styles of long exposures you can capture. My long exposure photography ideas has many more styles for you to explore from waterfalls to dark starry night skies, long exposures can be used at any time during the day with or without filters. 

What is a Neutral Density Filter?

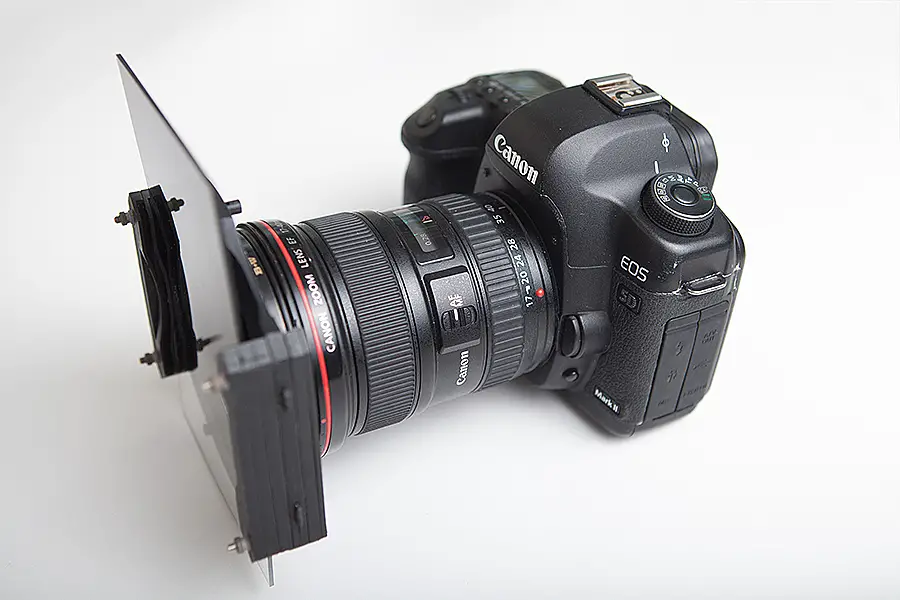
Circular or Rectangle? 

Example of a rectangle neutral density filter setup

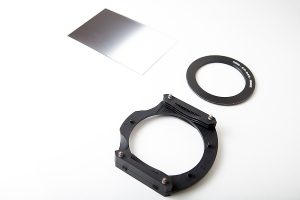
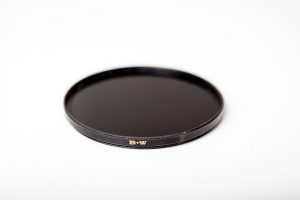
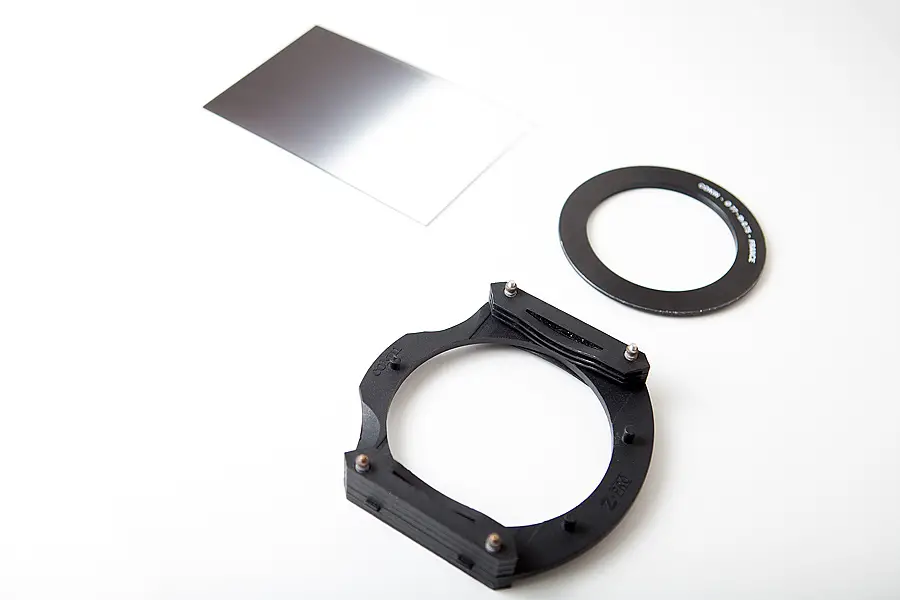
If you asked me this question 2-3 years ago when the Lee Big Stopper and NiSi rectangular circular polariser didn’t exist, I would have suggested stacking a mix of both circular 10 stop neutral density filter like the B+W 110 10 stopper and a rectangle graduated neutral density filter like the Cokin Z-Pro .9 filter on top of one another.

It was a painful process where you would screw your strong B+W 10 stop filter on first, then screw the filter holder adapter, mount the filter holder on top of this and then finally, slide your graduated filter through the filter holder. Fortunately things have come a long way with neutral density filters and circular polariser filters coming in rectangle form which leads to left stuffing around.

The reason I personally prefer going rectangle is that it makes changing filters a breeze and your process isn’t slowed having to screw/unscrew filters to setup for a shot (not so much when your fingers are frozen!). Instead you’re able to just slide your filters in or out of the filter holder and you’re away (literally a 2-3 second job). Much better. But the old way still works with that said 🙂

Example of a circular neutral density filter

Quick and Easy to Change

But this isn’t just about me being a princess and feeling the cold, having the ability to quickly change and remove filters is great when shooting with the more stronger neutral density filters (like the 15 stop Lee Big Stopper). 

Due to the filter being so dark, you’re unable to look through the viewfinder and compose your image when the filter is attached. This leads you having to take off the filter to compose and focus your photo and then re-attach. There’s been many times when I’ve accidentally left the autofocus on after screwing my B+W 10 stop and Cokin graduated neutral density filters on and then lost my focus as the camera can’t find a focus point (due to the strength of the filter). This can be especially frustrating when using a rectangle graduated neutral density filter on top of a circular screw filter as you not only have to remove the circular screw filter but also the lens screw adapter and rectangle filter holder. Instead if you were using just a rectangular system, there’s no unscrewing to recompose your image but just sliding your filters in or out. Much more convenient if you ask me! 

Greater Control

Another issue with circular screw on filters is controlling the location of the GND transition. As the transition isn’t as pronounced it can sometimes be difficult to get the GND exactly how you want it especially in low light conditions like sunrise or sunset. For this reason, I much prefer using rectangle filters where the graduation is more pronounced and can be easier to slot into place regardless of light conditions.

What Strength Level?

For this image I used a graduated neutral density filter to darken the sky

Neutral density filters come in all levels of strengths from blocking out 1 stop of light all the way up to blocking out 15 stops with the Lee Big Stopper. Deciding on what strength neutral density filter to use depends on your scene in terms of light conditions and what you are trying to achieve. 

If you are simply looking to balance the sunset sky against the land then the strength of your neutral density filter will depend on the light conditions at the time. If you’re shooting at the start of the sunset when there is still strong light, this is when you would look to apply a stronger strength neutral density filter. Towards the end of the sunset is when you would look to pull out a weaker strength neutral density filter as the light starts to fade. 

From personal experience – I’ll generally use my 10 stop filter for the first 15-30 minutes of the sunset but will put it away as the light starts to fade. I find as the light rapidly fades the filter really struggles to capture enough light and you’re left having to increase your ISO to accomodate the low light conditions which introduces unwanted noise. At this point I’ll either use a 6 stop neutral density filter or just shoot wide (F22~) at the lowest ISO possible (ISO 50) to get the slow long exposure times I’m after.

Using a 10 stop neutral density filter allowed me to capture this 5 minute exposure during the day

If you are looking to get creative with your photography and capture long exposures during the day (we’re talking exposure times of a few minutes) then this is when you will pull out the stronger 10+ stop neutral density filters like the Lee Big Stopper or NiSi 10 stopper.

By using these filters which block out a significant amount of light, you won’t be able to see through the viewfinder when the filter is applied due to the strength of the filter which can make composing a bit tricky. 

What is a Graduated Neutral Density Filter?

How soft, hard and reverse graduated neutral density filters are best applied.

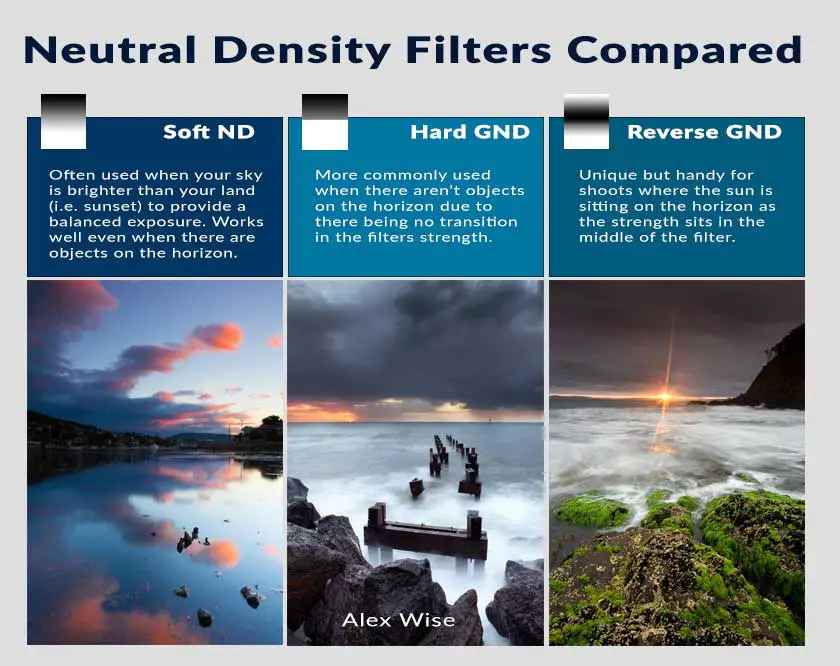
The difference between a graduated neutral density filter and a solid neutral density filter is that part of the filter will be neutral density (dark) and then transition into transparent (clear). The transition from dark to clear comes in different variations including soft edge, hard edge and reverse graduated neutral density filters which I briefly describe below:

Soft Edge GND

NiSi Soft Edge Graduated Neutral Density Filter

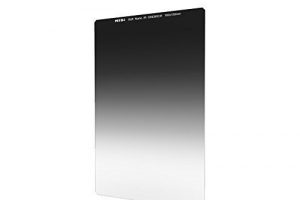
The top part of the filter is 100% neutral density and gradually lowers in strength to 0%.

This is my preferred type of filter and is best applied where your horizon level is uneven and you may have objects appearing above the horizon level. Generally if there are objects above the horizon which become darkened by the soft GND, you can generally dodge (brighten) this back in Lightroom/Photoshop to bring back the detail.

Pros: Great for scenes where you have objects sitting above the horizon as you can position the filter at 90° to avoid the object on the horizon
Cons: The gradual transition can be soft so occasionally you will need to stack multiple soft edge filters to get your desired effect

Hard Edge GND

NiSi Hard Edge Neutral Density Filter

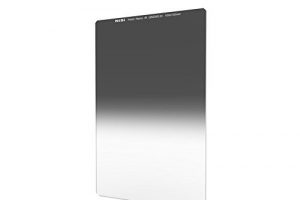
The top half of the filter is neutral density and does not gradually transition to clear like the soft edge graduated neutral density filter. Hard edge graduated neutral density filters are best used in seascape photography when balancing the exposure from the sky to the land.

An example of how not to use GND filters. Notice how the filter has darkened the cliff? A big no no!

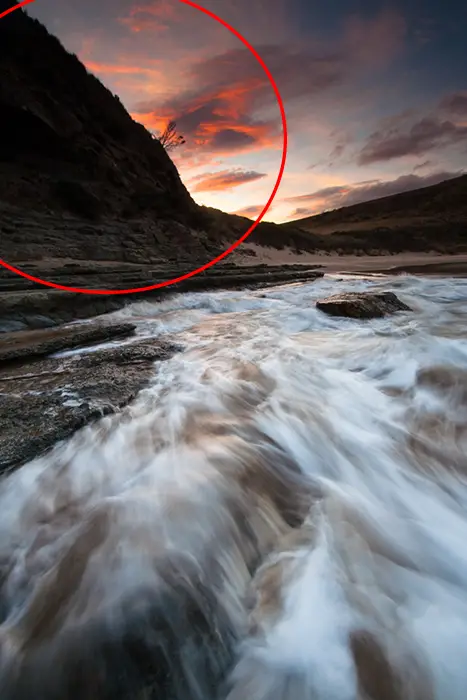
For best results, I only use hard edge graduated neutral density filters when there isn’t any objects on the horizon (i.e. surrounding cliffs). The reason being is that any objects on or above the horizon will darken which will lead to a loss in dynamic range to your final shot which can be difficult to recover in Lightroom/Photoshop.

Pros: Works great when there are only clouds above the horizon to darken the clouds nicely
Cons: The sharp transition from dark to clear makes these limited to scenes where there are no objects (i.e. cliffs) above your horizon

Reverse Level GND 

NiSi Reverse Graduated Neutral Density Filter

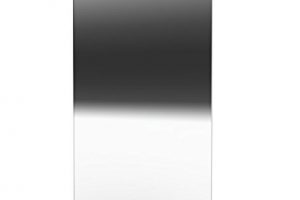
The reverse level graduated neutral density filter goes from clear at the top, to dark in the middle and then to clear again.

Think of a reverse level graduated neutral density filter as the ideal filter for when the sun is just about to pop on the horizon.  These aren’t as common as other graduated neutral density filters but can be handy when trying to capture the sunburst effect as the sun dips below the horizon.

Pros: Best used for sunset or sunrise photography when the sun is sitting on the horizon
Cons: Only effective when there is a sun bursting on the horizon so they become quite a specialised filter for the price

Are Neutral Density Filters Still Relevant as Technology Advances?

Most definitely!

There are some effects like day time long exposures or shooting directly into the sun on sunset which is only made possible by using neutral density filters like the Lee Big Stopper or NiSi graduated neutral density filter kit. Sure, you can imitate some of these effects in Photoshop with lots of image stacking but it’s not quite the same as capturing the image in camera. 

As technology has advanced I must admit that I’ve found myself using my graduated neutral density filters less as camera sensors have become more forgiving and post processing techniques have evolved with exposure stacking. Not only are sensors coming with higher megapixels but also with greater highlight and shadow recovery which means that you can sometimes get by without needing to use graduated neutral density filters.

A before and after with the easy to use Graduated Filter in Lightroom

Quite often I’ll apply the same effect in post using Lightroom’s graduated neutral density filter. Sure, this won’t work for every situation (i.e. when you’re shooting directly into harsh sunlight) however for other situations where you’re simply looking to emphasize the colour of a sunset sky, Lightroom’s graduated neutral density tool works great allowing you to decrease the brightness of the sky as you would with a normal graduated neutral density filter. 

Can the a digital workflow fully replace physical neutral density filters? I’ll leave that to another post but in my opinion, no, not at the moment anyway. 

Choosing Neutral Density Filters

Which Filter is Best for You?

Using a graduated neutral density filter allowed me to properly capture the light bursting on the horizon

Anyone who is serious about landscape photography needs a graduated neutral density filter and at least one strong neutral density filter in their bag. There’s a couple of reasons to why I recommend this:

  1. Flexibility in quickly changing light conditions – Having a strong neutral density filter in your kit allows you to continue taking long exposures in the later stage of a sunrise or early stage of a sunset. I’m not sure about you but there’s been many a times when I’ve photographed a sunrise and stuffed around in the dark for too long and only found a good spot to photograph as the light started to become stronger. At this point of the sunrise, it becomes harder to take a long exposure due to the amount of light hitting your camera meter. By having a strong neutral density filter available, I’m able to put this on my camera and still obtain the effect I’m after like the nice blurry movement of waves crashing against a rock
  2. Balancing harsh light in a scene – We’ve all been there, the sun is beginning to set and you want to capture an image just before the sun dips below the horizon to capture that burst of the suns last light. Unfortunately your camera has other ideas and will struggle to expose the image. This is where a graduated neutral density filter comes in handy and helps you balance the exposure of the harsh sunlight against the land
  3. Creativity – We can’t all be blessed with great light against jaw dropping locations so sometimes it takes a bit more to get that shot. In these situations sometimes I’ll experiment with a strong neutral density filter to capture a long exposure to add a bit extra to the image, whether that be the blur of passing clouds or the movement of the water. 

Neutral Density Filter Buying Guide

Showing the difference a strong neutral density filter like the Lee Big Stopper can do to your scene with this long exposure image

So taking these reasons to why I love neutral density filters, here are some of my favourite neutral density filters available at the time of writing. Unfortunately neutral density filters don’t come cheap but I’ve tried to make all attempts to include a range in different price brackets.

Like most things in life, it pays to spend and get the best you can afford as this will ensure superior image quality.With the midrange and budget price brackets, the filters aren’t perfect and can introduce colour cast to your image (a purple tinge) when using multiple filters at a time. Part of the reason the high end filters are more expensive is that because they don’t have any colour cast issues like the cheaper filters. 

My recommendation for people looking at the different price brackets and unsure – If you’ve used neutral density filters before and know they will form an essential part of your kit, just buy properly the first time. If you’re sitting on the fence and haven’t used them before, start off with the more affordable range first to see if you get a taste for them before splashing the cash. 

High End

NiSi and Lee are the producers of the best filters in the high end market. For many years, Lee had a firm grip on the market but in recent years, NiSi have started to make a presence with their filters which are slightly more affordable than the Lee range and offer just as good, if not better, quality than the Lee filters. Plus I’m a sucker for Australian based products.

If you want a great set up, I would strongly recommend the NiSi long exposure kit with comes with the required adaptor, a 6 stop and 10 stop neutral density filter. Add a circular polariser and graduated neutral density filter and you will have yourself a very nice kit. 

Yes I agree it is a lot of money to spend on filters but with this setup you will be fully equipped to photograph long exposures during the day, waterfall photography and for sunrise or sunset photography. The perfect kit for a landscape photographer. 

[amazon_link asins=’B01EZ5VCXE,B00MNSS130,B00M24Y6MU,B00KL5PHAC,B00XCHFJMW’ template=’ProductCarousel’ store=’alexwisephot-20′ marketplace=’US’ link_id=’ f80d1787-f75f-11e6-84e7-75c10fbbc909′]

Budget

For those that don’t want to break the bank on the premium end of the market or aren’t sure whether neutral density filters are for them, I’d recommend a mix of filters from a strong long exposure like the B+W 110 10 stop neutral density filter (great for capturing daytime long exposures), a Hoya circular polariser for assisting with reducing the glare and getting a longer exposure time for photographing waterfalls and lastly, a set of Cokin Z-Pro graduated neutral density filters

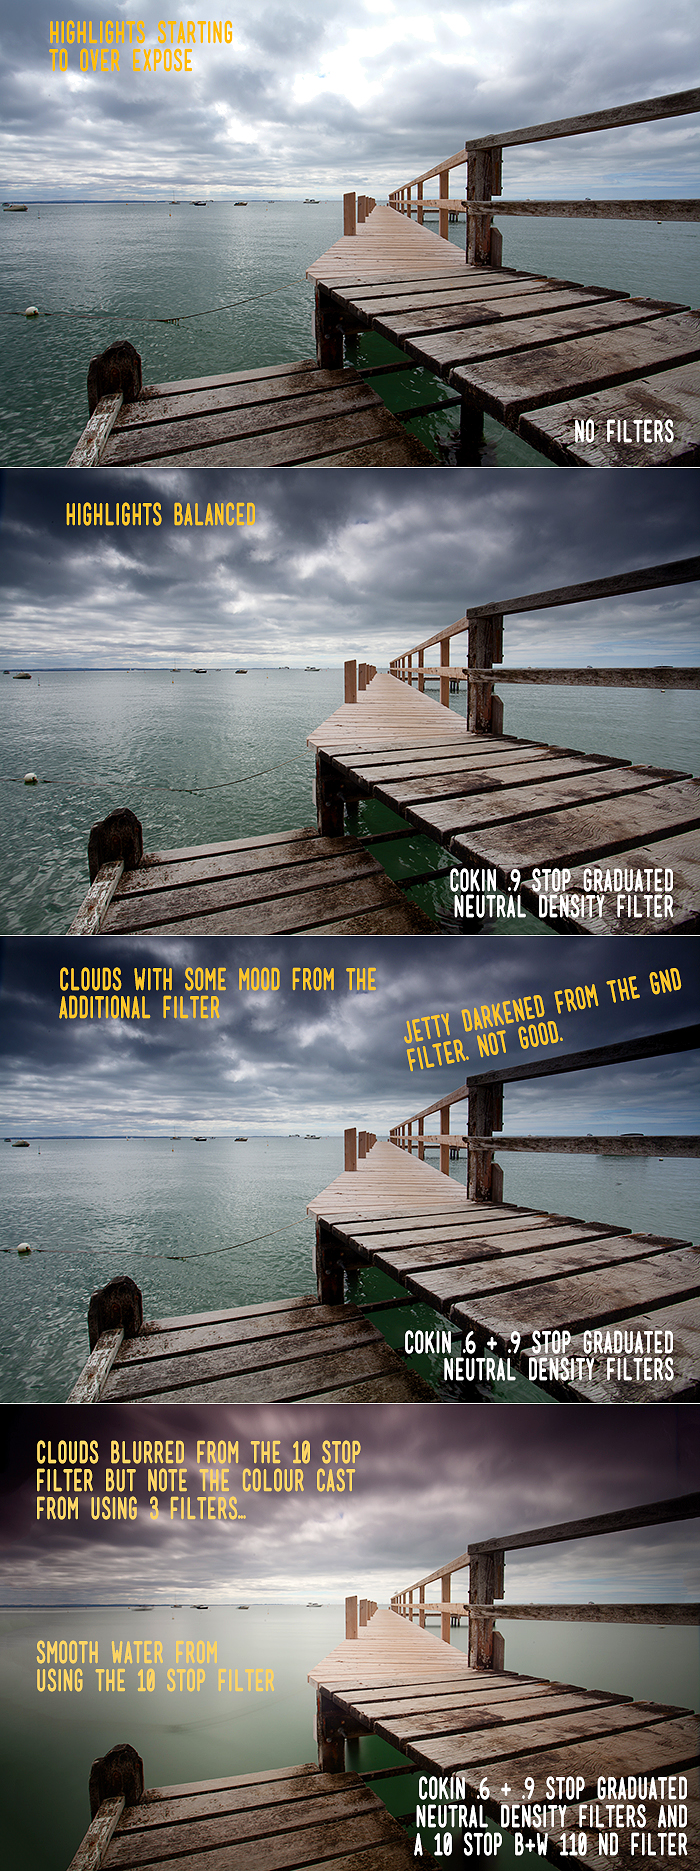
Contrary to what others say, the Cokin Z-Pro filters are actually good bang for buck provided you know the constraints of the filters. As an example, if you stack all three graduated filters at once, you will get some harsh purple colour cast coming through the filters meaning an unwanted purple colour at the top half of the frame which you may or may not want. I’m assuming you may not want… Although I may have cheated a few times and used the colour cast to my advantage for dull sunsets… 

[box type=”info” style=”rounded”]If you really want to experiment with long exposure photography on the cheap why not DIY a neutral density filter with welding glass?[/box]

[amazon_link asins=’B000T95Q8I,B00485ZJB8′ template=’ProductGrid’ store=’alexwisephot-20′ marketplace=’US’ link_id=’ f8a4868c-fae7-11e6-80b2-f907ad690a64′]

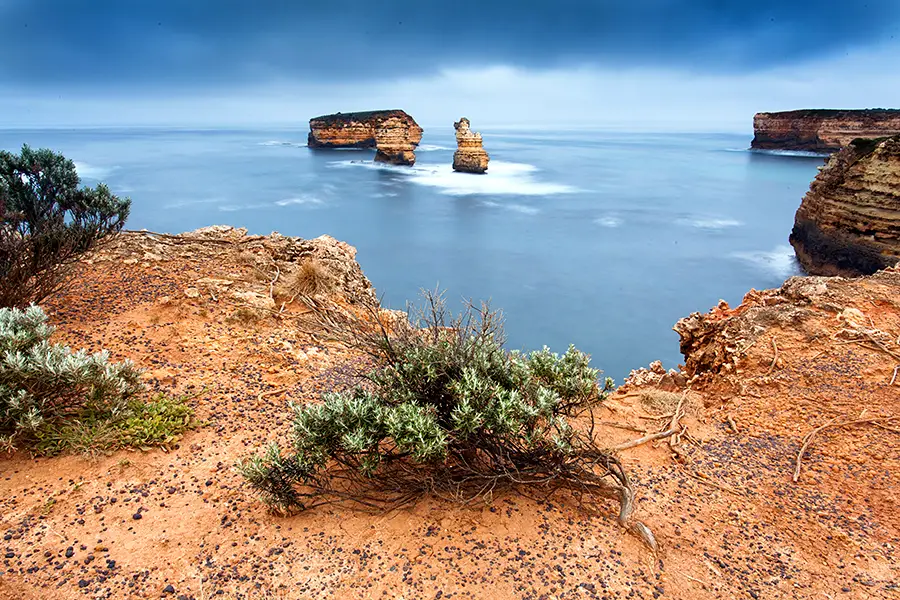
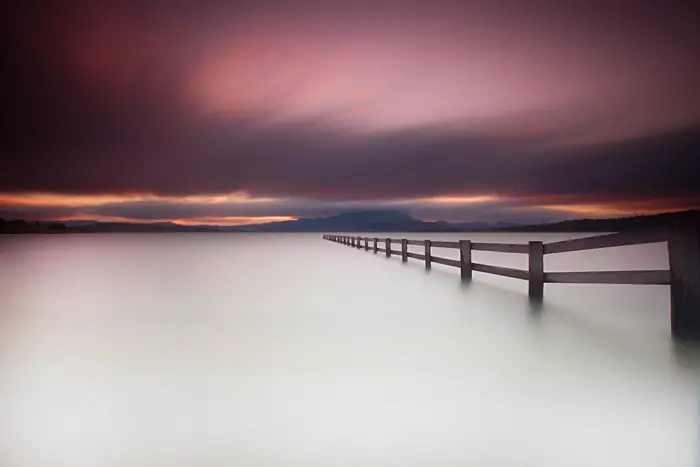
Examples of Long Exposure Photography

Examples of different long exposure photographs

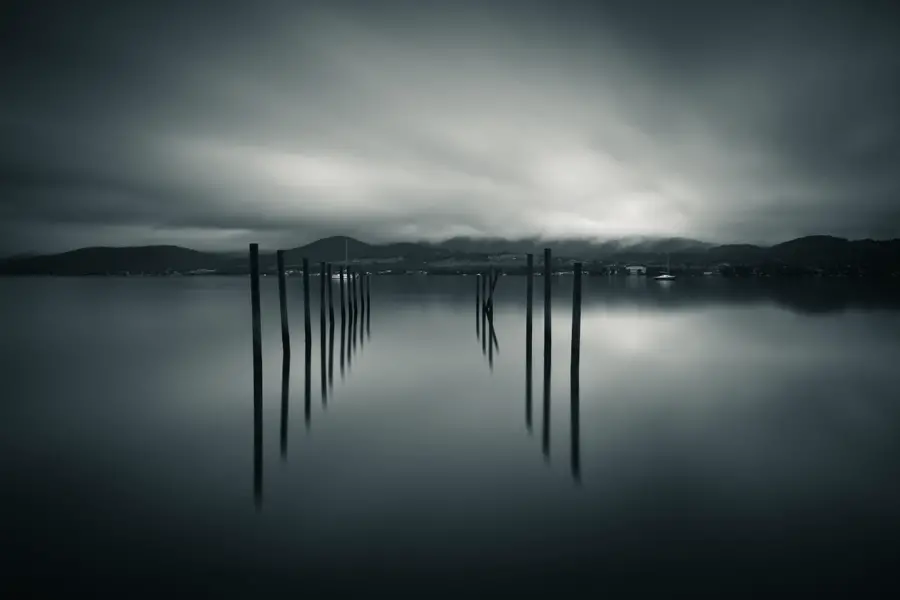
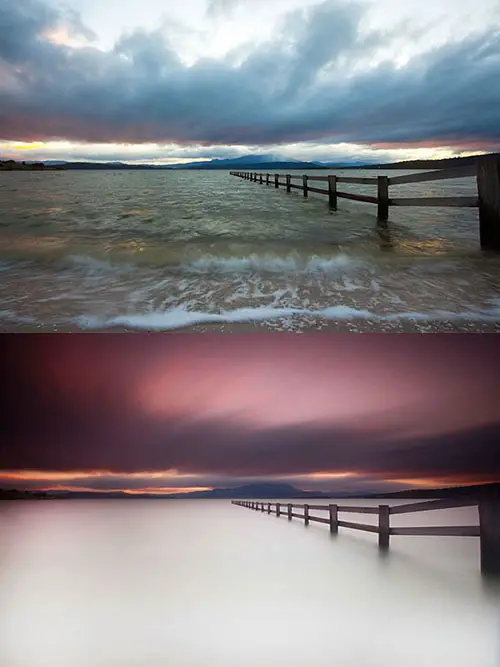
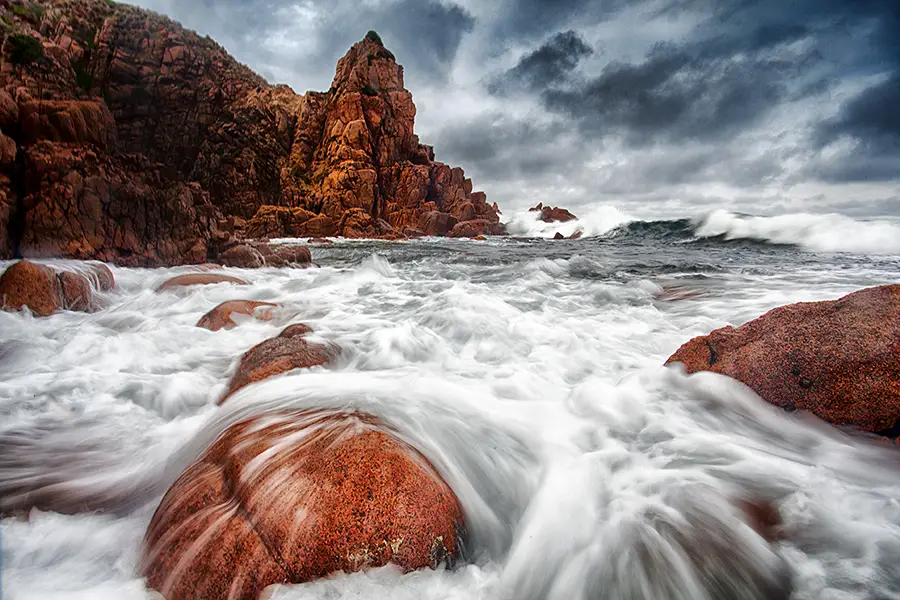
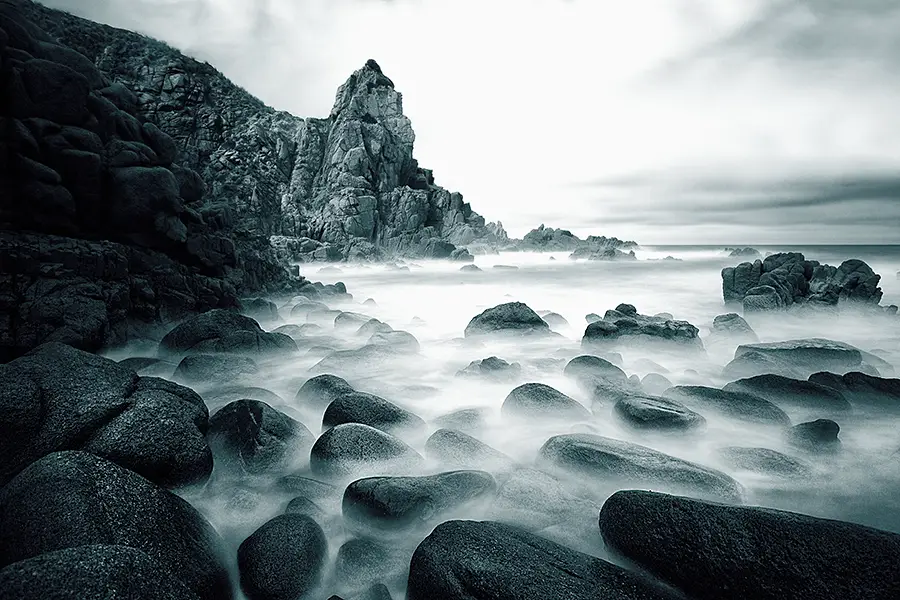
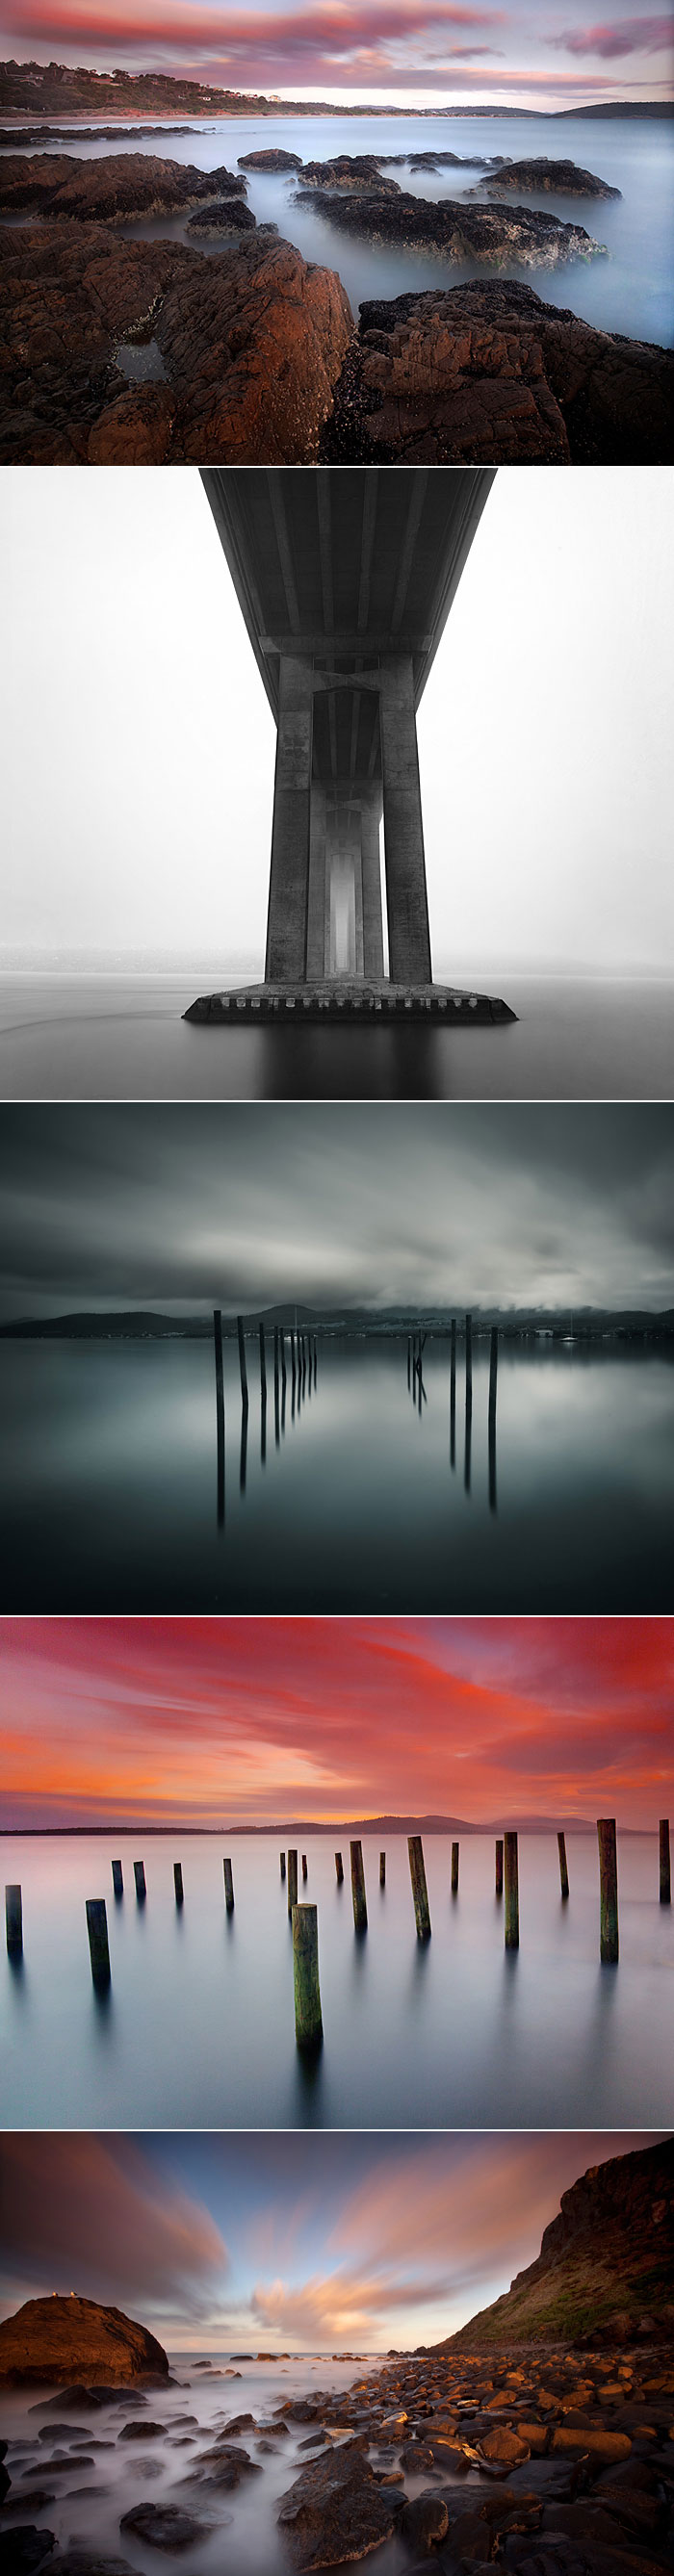
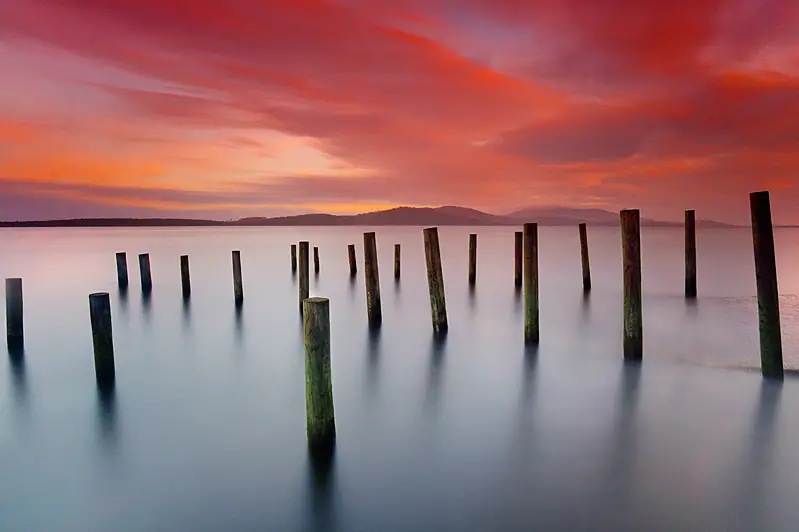
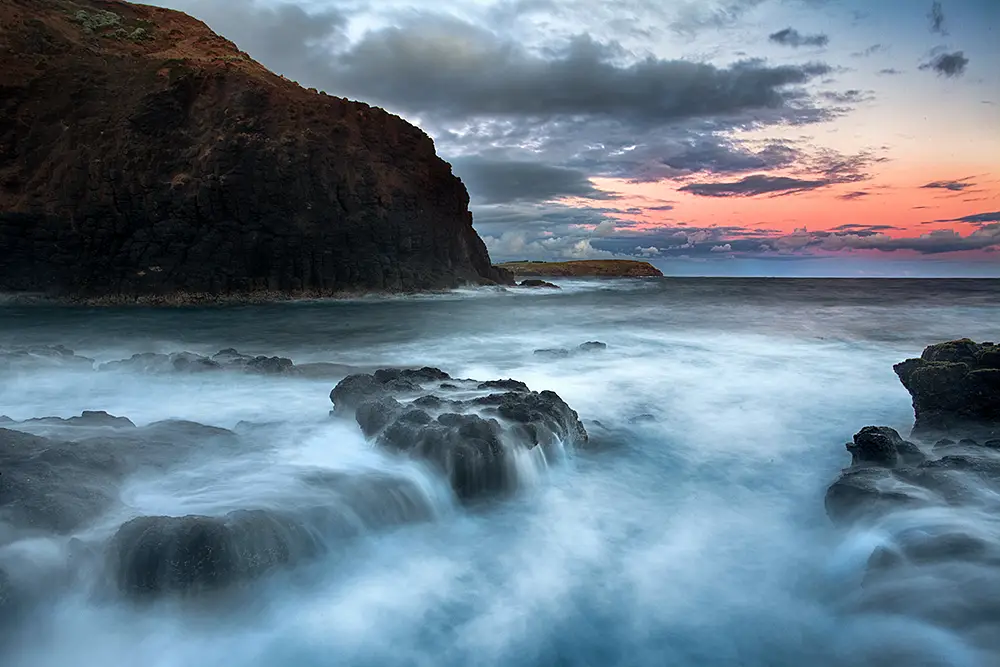
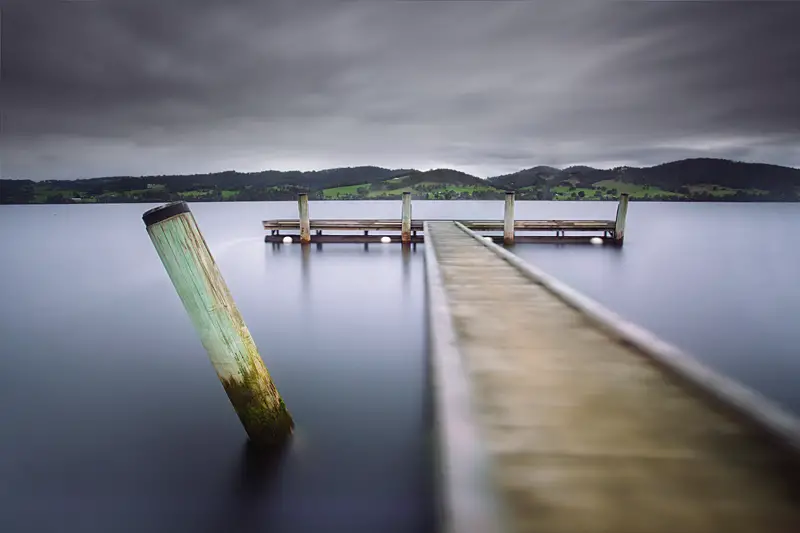
Some of my favourite long exposure photographs are of water (I love the sea if you can’t already tell by expanding the image to the right) but there are plenty more options whether it be long exposures of traffic at night or capturing the movement of clouds at a location over the period of 5-10 minutes (creates a cool effect!).

[box style=”rounded”]Looking for ideas to plan your next shoot? Give my long exposure photography ideas post a read for some ideas and inspiration[/box]

Most of the images in the right image were made possible by having neutral density filters which allowed me to take 5~ minute long exposures during the day. They allowed me to turn an otherwise dull scene into something different and unique from the effect of a long exposure (like the pylons beneath the jetty).

End

I hope this buying guide for long exposure filters has been useful and answered some questions. Please don’t hesitate to reach out via my contact form if you have any questions as I’d be more than happy to help where I can.

Thanks for reading,

Alex


Posted on 2 Comments

Morning trip to Cape Woolamai, Phillip Island

Cape Woolamai
Using welding glass to create a daytime long exposure at Cape Woolamai

Look I won’t lie, I’m a light snob and when Ricardo Da Cunha told me at 7am that we weren’t heading down to the Yarra Valley to capture some nice fog lit forrests but instead down to Phillip Island I did raise my eye brows slightly. One of the things I’ve learnt over time is that for certain scenes, there’s not much point pulling your camera out unless it’s at certain times of the day. For waterfalls I generally find they’re best when the weather is overcast and miserable while for seascapes I prefer to shoot around sunset/sunrise to capture the golden hour light and colours that unfold. So with this in mind I smiled and thought I could at least resurrect the situation with some day time long exposure shots but that didn’t quite turn out to be. More on that later.

On our way down the idea was to catch up with Andrew Sharpe who has only just recently purchased a Phase One setup. I’d not seen one in the flesh and while not tempted myself, it’s a beautiful camera and I’m envious. Personally speaking, I’m a too rough with my camera’s and also like to get a little too close to the action like the time I lost my camera to a waterfall… So the idea of walking around with a camera worth upwards of $20,000+ alone would scare me. Hell, sitting on the train with a bag of camera gear can be nerve wracking enough. But either way, it was a beautiful camera and the results it puts out are stunning.

The walk into the Pinnacles is stunning and a must visit if you're ever down Phillip Island way
The walk into the Pinnacles is stunning and a must visit if you’re ever down Phillip Island way
Ah... The lovely muddy descent down to the Pinnacles. Always a pleasure.
Ah… The lovely muddy descent down to the Pinnacles. Always a pleasure.

I’ve been down to the Pinnacles at Cape Woolamai only the once and it’s one of my favourite places for seascape photography in the state. There’s something about walking down the beach for a km or two and finally making your way to a set of stairs then walking further before you begin to descend down into the Pinnacles. A private little bay where the waves are endless and wild. It’s one of those places that never disappoints and would be hard to take a bad photograph. A must visit for any travelling photographer who is interested in seascape photography.

We made our way down to Cape Woolamai and the sky was overcast with not much going on. I quickly learnt that I had left my B+W 110 10 stop filter at home. The filter that I thought would allow me to at least capture a couple of frames using day time long exposure effects and resurrect the trip.  Bit of a dampener but I quickly remembered that I had a Hoya R72 (infrared filter also great for long exposures) and some welding glass in my camera bag. I’ve blogged about using welding glass in the past with this post about using welding glass as a DIY neutral density filter which explains what welding glass to purchase and how to remove the colour cast from your shots.

With lighting conditions quite diffused from the overhead cloud this allowed me to capture the movement of water through some short long exposures using my Cokin Z-Pro filters like the shot below which involved the use of a .9 Cokin graduated neutral density filter. Some more information on the different types of filters out there and how to use them can be read on a recently posted blog post in case you are interested in further information.

Cape Woolamai
Cape Woolamai

We didn’t hang around too long and ended up making our way back to Melbourne by lunch time. Would I shoot seascapes again during the day? Probably not but it’s a good slap in the face for me to be less of a light snob and get out there in conditions that are less ideal and make the most of what you are given. As opposed to only shooting locations when the conditions align.

Although that being said I find this seems to be one of the biggest mistakes I see for beginner photographers – not shooting according to the conditions and expecting to go out in the middle of the day and walk out with nice photos. If you are starting out I’d recommend learning what conditions work best for certain conditions and shooting around this time. So if you’re keen on shooting a favourite beach, find out if it is sunset or sunrise facing and get down there at that time as opposed to the middle of the day where you will be battling strong light or dull skies. Just don’t become a light snob like me 😉

Thanks for reading,

– Alex

Posted on 11 Comments

What Are Neutral Density Filters and How to Use Them

Camera with graduated neutral density filters
One of my favourite photos made by possible by using various neutral density filters

Neutral density filters are a favourite tool of my photography tool set and admittedly most of my shots have been taken using at least one. I must be honest, neutral density filters were the turning point for my photography. I actually found it quite frustrating as I wasn’t getting the images how I wanted them in camera until I started playing around with graduated neutral density filters. Once I got hooked on these I started taking other aspects of my photography more seriously, learning about composition and how exposure affects your image. This lead me on a path of exploring the use of neutral density filters from graduated types, strong neutral density filters and even playing around with welding glass.

For this reason I wanted to put together a simple guide on how to use ND filters, explaining the different types out there and why they are a great to have in your camera bag while also looking at when they are needed/are good and how they are generally used by photographers. But neutral density filters do have their shortcomings which I’ll also explore in this article. You never know perhaps you might get hooked on them too? 😉

What are Neutral Density Filters

Before we get started though let’s look at what a neutral density filter is and what purpose it actually serves. A neutral density filter reduces the amount of light coming in to your camera. This is great for photographers who want a longer exposure time or a larger aperture which may not be possible due to lighting conditions at the scene. The light entering the camera is reduced by the darkness of the filter used. When we look at different neutral density filters we look at how many stops of light they block out. By this it means how many f-stops the filter blocks.  In English the higher amount of F-stops the neutral density filter blocks out, the darker the filter will be and the longer the exposure time required to get the correct exposure time. Simple enough right?

Neutral density filters come in all shapes and sizes from screw on types (more common) to rectangle glass which is mounted to the camera lens through an adapter. Below shows my setup which I normally shoot with which  consists of a .9 Cokin Z-Pro graduated neutral density filter, filter holder, lens adapter to fold the filter holder and a B+W 110 10 stop neutral density filter. Good fun screwing it all on when shooting in freezing conditions 😉

How to Use ND Filters
My typical neutral density filter setup Canon 5D Mark II, Canon 17-40, B+W 110 and Cokin Z-Pro .9 graduated ND filter with adapter and holder attached)

Solid Neutral Density Filters

B+W 110 neutral density filter
An example of a solid neutral density filter (Filter in picture – B+W 110 ND)

Sold neutral density filters are your more common neutral density filter on the market. These come in various strength levels ranging from blocking out 2 stops of light up incrementally up to filters that block 10 stops of light.  The 2 stop filter is quite useful for shooting waterfalls when you’re not quite getting the exposure time you need or when shooting portraits in harsh sunlight and you wish to capture at a higher aperture which may not be possible due to the harsh light. While the 10 stop neutral density filter is a lot more specialised and will allow you to capture exposure times beyond a minute which can drastically transform a scene.  If this is something that interests you, give my article about capturing daytime long exposures a read which goes into more detail about the use of strong neutral density filters.

If you’re looking to get started with a solid neutral density filter I would personally recommend a 4 stop neutral density filter like this Hoya filter as this is a good middle ground without being too weak or too strong.

One word of advice though, avoid screw on graduated neutral density filters and screw on filters that allow you to change the strength of the neutral density filter. A few friends have purchased these and have had awful results from them and said how inconsistent they are.  Perhaps others have had good experiences with them but from most people I’ve spoken to, they regret the purchase and ended up purchasing either a proper solid neutral density filter or a graduated neutral density filter kit.

Graduated Neutral Density Filters

Graduated neutral density filters are where it all started for me when I started experimenting with ND filters. The purpose of a graduated neutral density filter is to gradually darken part of the image depending on the position of the filter.  This results in a gradual shift in darkness from solid to clear and allows you to position the filter based on where you want the graduation to occur. A common use for the filter is when capturing landscape photography where shooting a scene that is not evenly lit as the sky will be bright from the sunrise/sunset and the land quite dark. By using the graduated neutral density filter this will allow you to under expose the sky (avoiding highlights and slightly darkening the sky to create some mood) which results in a more even exposure.

Graduated neutral filters come in various graduations or step types. The type I refer to in this article are your typical soft edge graduated neutral density filter where the top half of the filter is a solid dark and gradually loses its darkness to become clear. The setup I use is the Cokin Z-Pro kit which is ok however has issues of a purple colour cast when multiple filters are stacked. For this reason I prefer to recommend the Lee setup which doesn’t have the same colour cast issues which the Cokin setup can be prone to (however easily corrected in post processing). Another style is a hard edge neutral density filter where half the filter is solidly dark and the rest is clear. Another but less popular style is the reverse graduated neutral density filter. This is popular for sunset photographs where the sun is sitting around the horizon. I’ve not used these personally as they’re quite expensive and feel their usage is limited and doesn’t justify the cost (see this Hitech reverse graduated neutral density filter which doesn’t come cheap) but I’m sure are no doubt handy to have in the kit if you can afford one.

Graduated neutral density filters
An example of graduated neutral density filters (Filters in photo – Cokin Z-Pro graduated neutral density filter, lens adapter and filter holder)

While not limited to various types of graduation, these filters also come in various colours which allow the photographer to add colour to their scene. Generally grey (neutral) filters are what photographers use but others have been known to experiment with the blue, yellow and sepia colour filters. These work just like the normal graduated filters do with the colour being strong at the top and gradually becoming clear at the bottom. I’d recommend against these as they do not provide an accurate colour representation of the screen and if you really must the effect is quite easily achieved in Lightroom using the graduated filter as part of that.

How to use graduated neutral density filters

As technology advances and processing techniques become more defined, some would argue that a graduated neutral density filter isn’t as required as much as it once was and actually create more issues than their worth by degrading image quality and unwanted darkening parts of your scene. I’d argue they still very much have their place in your photography kit but admit they aren’t suitable for every shooting situation.

Generally I will use a graduated neutral density filter to partially darken part of the sky but it can be quite difficult when an object is in part of the sky (i.e. a cliff face that takes part of the sky). For these situations I won’t use my neutral density filter as it will result in the cliff face gradually darkened which looks unnatural and degrades the quality of your final image. Lightroom and other photography editing applications now allow you to overlay a graduated neutral density filter within software and is a great way to experiment with graduated neutral density filters without making the costly outlay of purchasing some.

However I still think that physical graduated neutral density filters do have a place in the photographers kit even with the rise of software programs like Lightroom becoming increasingly capable. This is due to the physical filter darkening the brighter regions of the sky in camera which will result in a longer exposure time. However if you attempt to do the same with a digital graduation filter in post processing this can create noise around the area. One could get around this issue by taking multiple exposures and using layer blending in Photoshop to selectively blend them in. I’ve written about this in a previous blog post which provides more information about layer masking areas from multiple exposures. One might argue that this is the way heading forward for landscape photography as it allows greater control over the final image and avoids any image degradation that may occur from placing a filter in front of the lens. But for the moment I’m happy using my graduated neutral density filters as they work for me.

If you do decide to purchase graduated neutral density filters, I’d strongly recommend the Lee filter setup. I personally shoot with the Cokin Z-Pro graduated neutral density filter kit however they have a slight colour purple colour cast which can result in a hint of purple being added to your image when you use more than one Cokin filter. The Lee filters don’t have this issue and provide a true graduated neutral density filter without any colour cast issues.

For most shots I will use a intervalometer to manually set the exposure time which is especially useful for shooting long exposures beyond 30 seconds.

When (and when not) to use neutral density filters

Neutral density filters can be used for many different circumstances which can include:

  • Blurring objects of a scene. Some popular things photographers like to blur include capturing the movement of clouds or the smoothing of water. But don’t limit yourself to this. I like to watch a scene and watch for gradual movement that occurs over the space of a few seconds and ponder how it may appear in a long exposure. An example of this is a shot I took at the Huon Valley, Tasmania of a moving jetty to create an interesting effect
  • Balancing a bright sky against a dark land/foreground. By using a graduated neutral density filter on the sky, this will allow you to darken the sky to balance it against the dark land
  • Adding some mood to the sky can instantly lift your photo in camera without the need for any burning in Photoshop when you return home
  • Allowing you to use an aperture that may not be possible due to bright lighting conditions therefore allowing you to capture a shallower depth of field
  • Blurring of people in a busy scene like this brilliant photo captured by Tom Carter in Tokyo of a busy intersection
  • The list is endless and neutral density filters allow for a lot of creative expression. I’ve compiled a list of long exposure photography ideas in an earlier post which might give you some ideas how you can use ND filters around your area

When to not use neutral density filters

Avoid using neutral density filters when:

  • Mountain tops or other objects overlap part of the sky. For this photo taken at Cape Schanck I did not use a graduated neutral density filter as the cliff face took such a major part of the sky. If I was to of used a graduated neutral density filter on the shot I would of lost considerable dynamic range on the cliff and also the shot would of appeared unnatural
  • Shooting waterfalls where you can get a long enough exposure without the use of filters. Obtaining the smooth water effect when shooting waterfalls only requires a 2-3 second exposure which is quite easily achievable if shooting in overcast conditions. If you introduce a neutral density filter this will drastically increase your exposure time, getting your silky smooth water effect however will blur the surrounding foliage of the waterfall

Looking at how filters can affect your photo

Camera with graduated neutral density filters
My Canon 5D Mark II with a graduated neutral density filter and B+W 110 solid neutral density filter attached

All this talk about solid and graduated neutral density filters is best explained by using some sample photos I took especially for this post to demonstrate how filters come into play. The setup consisted of a Canon 5D Mark II, Canon 17-40, intervalometer, Cokin Z-Pro graduated neutral density filters, 10 stop B+W 110 filter and a tripod (setup shot in case you’re curious).

I’ve not processed the images and for the first 3 images, the exposure time is the same and it is only when the strong 10 stop B+W solid neutral density filter is used that the exposure time changes. This is due to the B+W 10 stop filter being so dark that shooting at the same exposure time as the first 3 images would result in a black image. Instead the camera sensor needs more light to get a proper exposure which is why I had to lengthen how long the shutter remained open (in this case 1 minute).

  1. Image 1 – Base image where no neutral density filters have been used. As you can see the exposure is quite even however the highlights (white parts of the sky) are starting to blow out (Exposure – 1/4 sec at F18)
  2. Image 2 – One Cokin Z-Pro .9 graduated neutral density filter has been added. You can notice that it has balanced the exposure of the sky and added some very slight mood to the sky (Exposure – 1/4 sec at F18)
  3. Image 3 – Two Cokin Z-Pro graduated neutral density filters are used (.6 and .9) which adds a lot more mood to the sky however has introduced darkness over the jetty. This is one downside to using graduated neutral density filters where there is an object overlapping part of the sky (in this case the railings for the jetty) (Exposure – 1/4 sec at F18)
  4. Image 4 – Going nuts and using the same Cokin setup (one .6 and .9 graduated neutral density filter) and also the solid B+W 110 10 stop neutral density filter. As the 10 stop neutral density filter is being used, this darkens what the camera can see considerably (imagine looking through welding glass) which as a result requires the camera to use a long exposure to capture a correct exposure. I love using the B+W 10 stop filter as it allows you to capture long exposures during the day which blurs the clouds and water however one down side of using so many filters is the colour cast that is introduced.  This is mostly from using the Cokin Z-Pro filters which have a purple colour cast to them which you can see in the sky. For this reason I’d strongly recommend the Lee filter kit which doesn’t suffer from the same colour cast issues (Exposure – 1 minute at F18)
Comparing how neutral density filters can come into play

Example photos from using neutral density filters

As mentioned at the start of this post, I won’t deny that I’m a sucker for neutral density filters and use them for  a lot of my images. They’re a great tool to have in any landscape photographers tool set and well worth the investment. Below are some images that I’ve taken using a mixture of the Cokin Z-Pro graduated neutral density filters and the B+W 110 10 stop neutral density filter. Now that you’ve read about neutral density filters you should be able to identify where they have been used. In most of the shots a graduated neutral density filter has been used to darken the sky which has brightened the foreground and a stronger solid neutral density filter has been used to blur the movement of the clouds and water.

I hope this guide has been of use to you and has answered any questions you may have had about using neutral density filters. Please feel free to send me an email if you have any further questions as I’m always happy to help or alternatively if you have any feedback on what you would like to read about in future articles I’d also love to hear.

Thanks for reading,

– Alex

Photographs taken with neutral density filters referred to in this article

Related Reading

  • How to photograph waterfalls – This article looks at the basics of waterfall photography by discussing what conditions work best for waterfall photography, how exposure time can affect your photo, what equipment you will need for waterfall photography and more.
  • Neutral density reference chart – Stuck on what exposure time to use when using neutral density filters? This printable chart tells you what exposure time you will need based on the filter you are using
  • How to capture daytime long exposures –  During the day it’s difficult for your camera to take long exposures without the need for filters or very low light conditions. This article explores what equipment you need to get started for shooting long exposures from 30 seconds to 5 minutes during the day.
  • Long exposure photography ideas – Stuck on ideas on how to use your ND filters?  This article looks at the many uses for ND filters with some long exposure photography ideas to get you started.
  • Create your own 10 stop ND filter – A fun little weekend project which shows you how to create your own 10 stop neutral density filter for under $10.
  • The magic cloth technique Use a cloth to create your own graduated neutral density filter during a long exposure.
Posted on 10 Comments

2010 Retrospective

All year I’ve felt like I haven’t taken as many photographs as I’d like. Looking back now maybe it wasn’t as quiet as I first thought. Here are a selection of images from 2010.

The year started off with a trip up Mt. Wellington with Carl Ashley.

I planned to revisit an old jetty that I had shot in 2009 however it had unfortunately been pulled down.

Desperate for new seascape locations, I began exploring Kingston for photographs.

But it was soon back to my favourite location, Clifton Beach even if without my tripod.

Walking along Howrah Beach, I noticed the water coming off these rocks nicely and had to stop for a photo.

My obsession with long exposure photography grew during 2010. This is one from Tranmere, Tasmania

Busy with uni, my camera spent a lot of time in the cupboard over winter. On my way home from uni I noticed this scene so made a quick dash home to grab the camera.

With the deciduous beech coming into season mid year. I was keen to get up to the Tarn Shelf to take a photo of this beautiful scene. Constantly looking for new locations to take photos of, I tried Blackman’s Bay for a change.

With amazing clouds rolling in one afternoon, I made the decision to skip class in the hope of the clouds putting on a nice sunset. I was lucky even if I did get drenched.

Not long after, I made my way to Park Beach for sunset photos.

I love winter and its fog. This is captured underneath the Tasman Bridge on a chilly early morning.

Probably my favourite find and photo of the year. Constantly looking for new locations to take photos of, I made my way to O’Possum Bay but left a little disappointed.

Next on the list is a drive to Remarkable Caves which was amazing and wild.

With large swells in Hobart, this meant otherwise quiet locations had swell for a change.

My obsession with long exposures continued.

Always looking for new locations, I came across this lovely stream on a drive.

More playing around with long exposures. Even looking at this photo now I’m still unsure about it. The moving jetty creates an interesting effect but whether it works is another question.

With heavy rain forecasted, I made my way up to the North West Bay River for some shots.

It was then off to Melbourne for some jumping on beds, catching up with friends and eating tasty food.

But before I could go to Melbourne. I had to shave my exam growth. Personally, I think the half half look could have worked but my Mum disagreed.

Finally I got around to meeting up with Mitch Pearson-Goff and taking some photos with him. This was from a trip to Snug Falls.

Visiting my favourite part of Tasmania, The Gardens I was greeted with terrible weather. I still managed to get a couple of shots in.

Having bought some Alienbee lights, it was time to use them by dropping tea bags into my lovely bodum cup.

Still wanting to play with my new lights more, I decided to bake some muffins. They look vile but were tasty and didn’t last long.

My cat decided to look cute for Christmas day.

Last shot to finish up the year. A self portrait from South Arm, Tasmania.

Hope you all had a great 2010 and thanks for your continual support 🙂